
Bikerbrady
Registered user
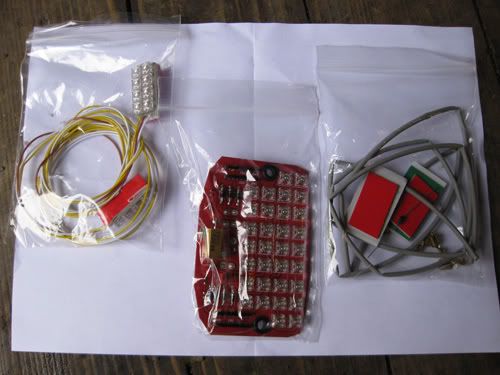
Fitting of Techno’s LED tail light panel and LED indicator panel
INSTALLATION WAS TO A R1150GSA 2004
Tools you will need
• Posidrive screwdriver
• Wire stripper/cutter
• Crimper (or long/short nose pliers)
• Heat gun, cable ties, heatshrink (optional)
Lets get going then
1. Ensure the ignition is off
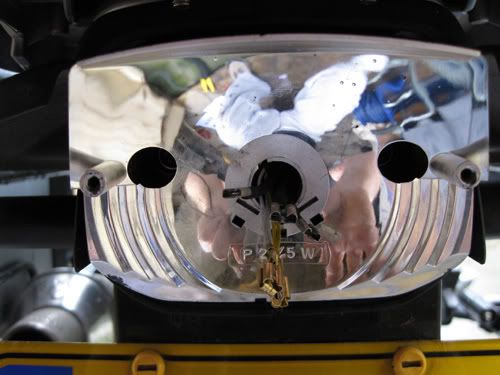
2. Remove the indicator lenses on both sides and remove the indicator bulbs
3. Remove the rear tail light lens and bulb
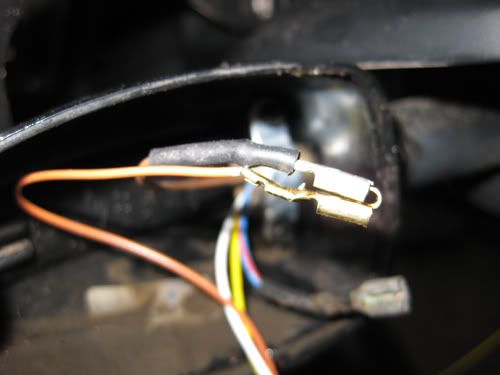
4. Remove the tail reflector and disconnect the three wires from behind noting their positions. (BROWN is EARTH, GREY/YELLOW is BRAKE and BLACK/GREY is TAIL)

5. Set all three lenses and bulbs and the rear reflector aside on a desk or bench so you won’t tread on them.
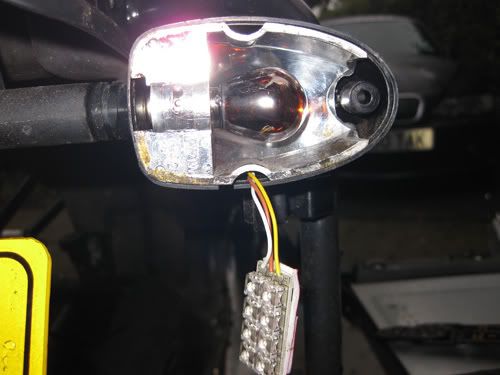
6. On the right hand indicator , gently pull the indicator lens assembly out of its housing.
7. Now feed the white and yellow wires on one of the LED modules through the indicator stem so it protrudes out behind the number plate
8. Repeat steps 6 and 7 for the left hand indicator.
9. You should now have 2 yellow and 2 white wires dangling out of the indicator stalks behind the number plate and a brown short wire in each of the indicator housings.
10. Fit one of the piggy back connectors to each of the brown wires and connect to the ground connector in the housing, connecting the existing indicator ground to the other tab.
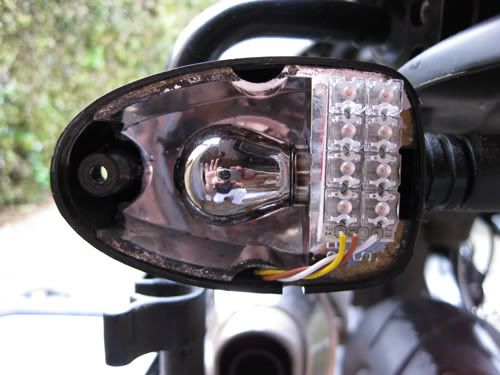
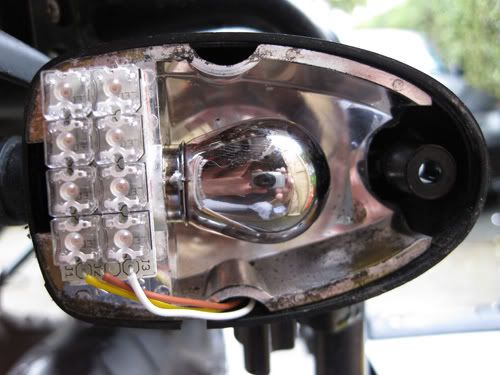
11. Gently fit the indicator reflectors back into the housing with the LED panel wires fitted through the gap.

12. Fit the LED panel to the lens housing by peeling off the adhesive backing. It is only necessary to hold it in place whilst you put the lens on. Spare/extra pads do come with the kit.
IMPORTANT – The indicator lens is grounded, DO NOT allow the circuit board pins to touch the reflector or the LED board will be damaged.
13. Next and this is optional fit a length of heat shrink over each set of white and yellow wires that are dangling behind the number plate and heat with a heat gun
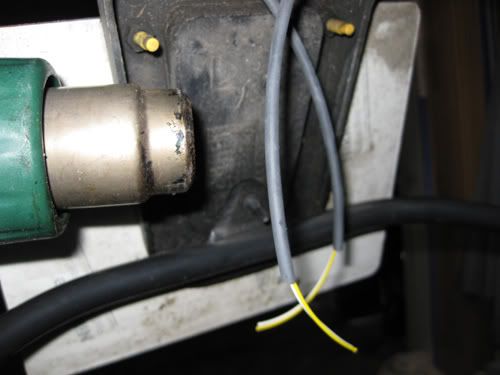
14. Now feed the white and yellow wires up through the tail light grommet. The best way is to prise the grommet out and then feed the wires through and then replace the grommet. Use some fairy or Vaseline if necessary.
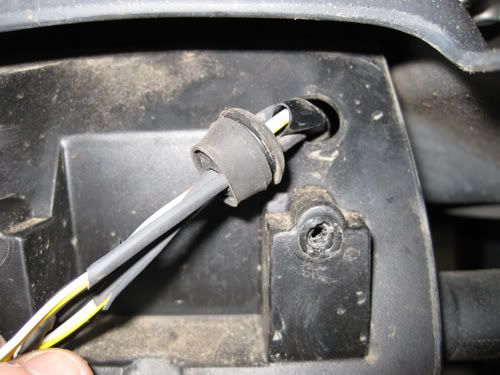
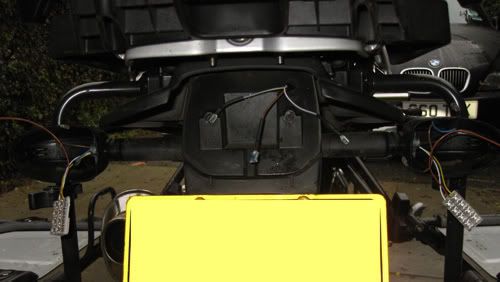
15. Loosely tie the cables to the number plate bracket as necessary.
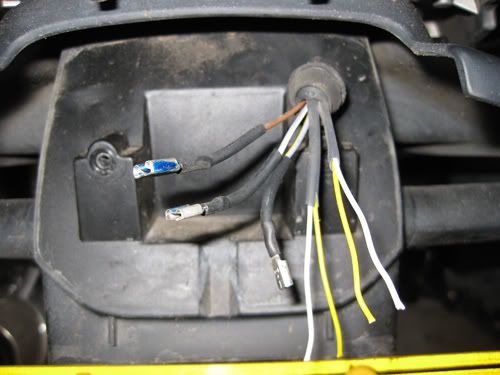
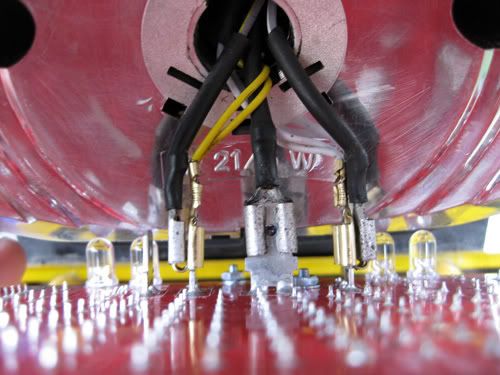
16. Inside the rear light fitting, gather the two white wires and crimp a piggy back connector to them. Connect the BLACK/GREY wire to the free terminal. Do the same with the YELLOW wires and then connect the GREY/YELLOW to the free terminal. Remember to leave enough slack (about 6-10cms is fine) before cutting.
17. Feed all the wires though the hole of the tail light rear reflector without pulling them too much.
18. Refit reflector. You don’t need the bulb anymore.
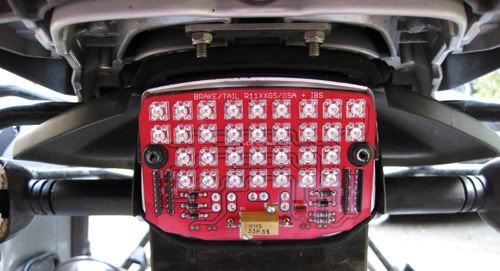
19. To fit the LED panel, you will need to lightly lubricate the screw posts to allow the grommets in the panel to slide on, Vaseline or fairy is good but not too much. Do this to both screw posts.
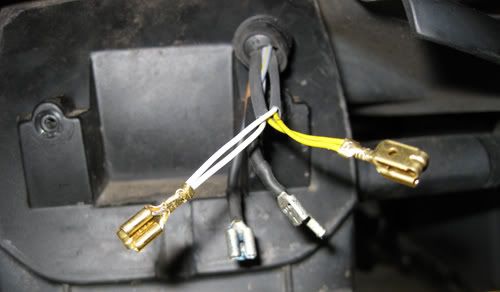
20. Now connect the wires to the corresponding terminals on the LED board (small fingers come in handy here). (BROWN is EARTH, GREY/YELLOW is BRAKE and BLACK/GREY is TAIL)
21. Fit the panel to the posts
22. Once the LED panel is fitted, test by turning on the ignition and switching on the lights and operating the brake.
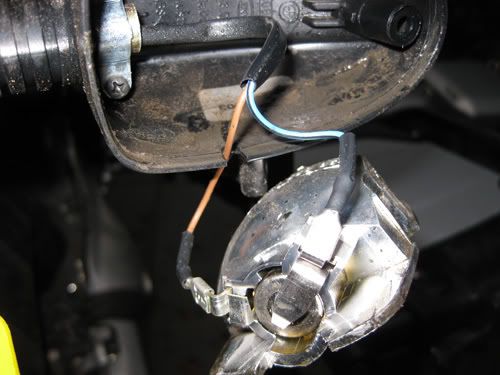
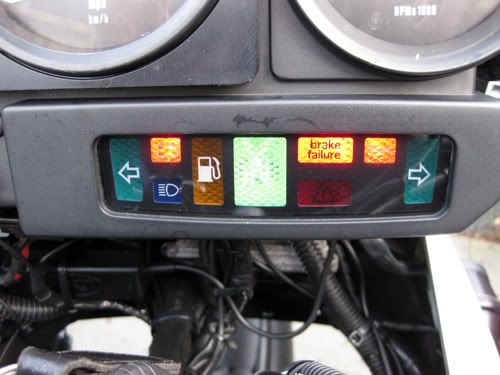
23. NOTE: If you have IBS you will need the jumper ON to “fool” the system into thinking there is a bulb filament. See the pic below for the location of the jumper.
24. This should be set before you turn on the ignition. If you don’t have IBS you can remove the jumper, and save 5 watts of power. If you are not sure you have IBS you can check following this procedure.
With the ignition on and no warning light (other than neutral/battery/oil/ABS(if fitted) remove the jumper. If the warning light illuminates you have IBS, in this case replace the jumper and turn the ignition OFF and then ON to reset. If it doesn’t you don’t have IBS and can leave the jumper off.
IBS Fault – Use the jumper
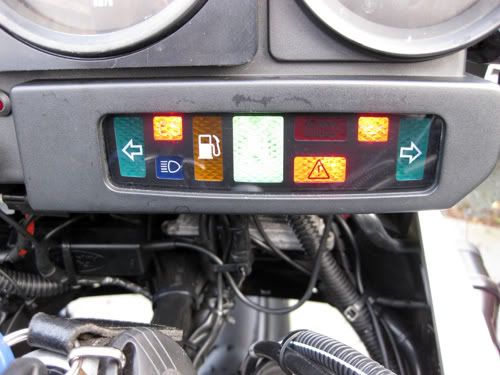
No IBS Fault. You do not need the jumper
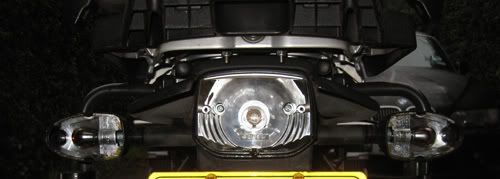
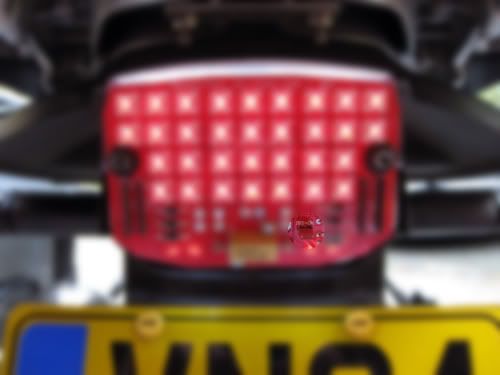
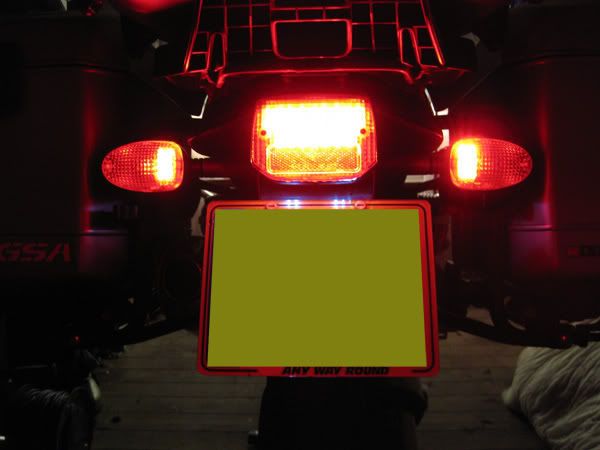
And after all your hard work you should have this

 (just tail lights)
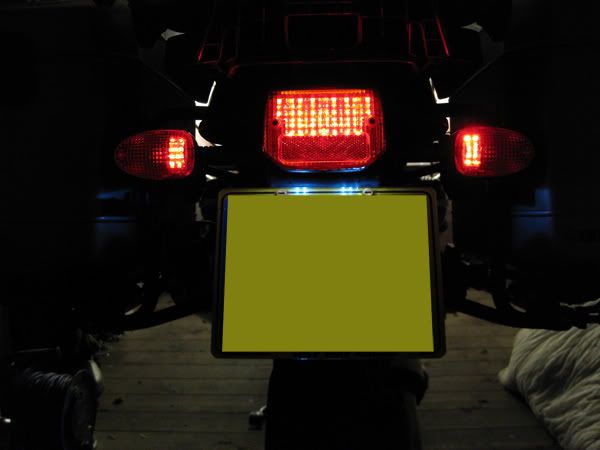
(tail and brake lights). They are actually brighter than what the pic shows as my HID front light is so bloody bright in the shed!
Thankyou to Techno for a quality product and very quick delivery, cant recommend these enough.
INSTALLATION WAS TO A R1150GSA 2004
Tools you will need
• Posidrive screwdriver
• Wire stripper/cutter
• Crimper (or long/short nose pliers)
• Heat gun, cable ties, heatshrink (optional)
Lets get going then
1. Ensure the ignition is off
2. Remove the indicator lenses on both sides and remove the indicator bulbs
3. Remove the rear tail light lens and bulb
4. Remove the tail reflector and disconnect the three wires from behind noting their positions. (BROWN is EARTH, GREY/YELLOW is BRAKE and BLACK/GREY is TAIL)
5. Set all three lenses and bulbs and the rear reflector aside on a desk or bench so you won’t tread on them.
6. On the right hand indicator , gently pull the indicator lens assembly out of its housing.
7. Now feed the white and yellow wires on one of the LED modules through the indicator stem so it protrudes out behind the number plate
8. Repeat steps 6 and 7 for the left hand indicator.
9. You should now have 2 yellow and 2 white wires dangling out of the indicator stalks behind the number plate and a brown short wire in each of the indicator housings.
10. Fit one of the piggy back connectors to each of the brown wires and connect to the ground connector in the housing, connecting the existing indicator ground to the other tab.
11. Gently fit the indicator reflectors back into the housing with the LED panel wires fitted through the gap.
12. Fit the LED panel to the lens housing by peeling off the adhesive backing. It is only necessary to hold it in place whilst you put the lens on. Spare/extra pads do come with the kit.
IMPORTANT – The indicator lens is grounded, DO NOT allow the circuit board pins to touch the reflector or the LED board will be damaged.
13. Next and this is optional fit a length of heat shrink over each set of white and yellow wires that are dangling behind the number plate and heat with a heat gun
14. Now feed the white and yellow wires up through the tail light grommet. The best way is to prise the grommet out and then feed the wires through and then replace the grommet. Use some fairy or Vaseline if necessary.
15. Loosely tie the cables to the number plate bracket as necessary.
16. Inside the rear light fitting, gather the two white wires and crimp a piggy back connector to them. Connect the BLACK/GREY wire to the free terminal. Do the same with the YELLOW wires and then connect the GREY/YELLOW to the free terminal. Remember to leave enough slack (about 6-10cms is fine) before cutting.
17. Feed all the wires though the hole of the tail light rear reflector without pulling them too much.
18. Refit reflector. You don’t need the bulb anymore.
19. To fit the LED panel, you will need to lightly lubricate the screw posts to allow the grommets in the panel to slide on, Vaseline or fairy is good but not too much. Do this to both screw posts.
20. Now connect the wires to the corresponding terminals on the LED board (small fingers come in handy here). (BROWN is EARTH, GREY/YELLOW is BRAKE and BLACK/GREY is TAIL)
21. Fit the panel to the posts
22. Once the LED panel is fitted, test by turning on the ignition and switching on the lights and operating the brake.
23. NOTE: If you have IBS you will need the jumper ON to “fool” the system into thinking there is a bulb filament. See the pic below for the location of the jumper.
24. This should be set before you turn on the ignition. If you don’t have IBS you can remove the jumper, and save 5 watts of power. If you are not sure you have IBS you can check following this procedure.
With the ignition on and no warning light (other than neutral/battery/oil/ABS(if fitted) remove the jumper. If the warning light illuminates you have IBS, in this case replace the jumper and turn the ignition OFF and then ON to reset. If it doesn’t you don’t have IBS and can leave the jumper off.
IBS Fault – Use the jumper
No IBS Fault. You do not need the jumper
And after all your hard work you should have this
(just tail lights)
(tail and brake lights). They are actually brighter than what the pic shows as my HID front light is so bloody bright in the shed!
Thankyou to Techno for a quality product and very quick delivery, cant recommend these enough.

 or
or 

