AirHead Drag Bike

In other news I have made lots of progress on the R100R which has filled in the time, wanted to do a build thread on this on here but early response was not positive when I posed some questions so although its going to happen / is happening - bike completly stripped and engine should be back from freshen up next week.....I didnt want to get lynched as its going in a completely new direction from the base bike :eek:

Its looking good - Love to hear as well as see it when its done, we like a video on here we do!

Re the R100 - please, please do post it, nothing better than a build thread (whether you agree with the asthetic or not), clearly you have shown yourself to be extremely capable and wont be delivering a poorly done lash up bastard of a thing (which is what most peeps concerns are really, given the amount of wrecked airheads in hipster land) and its all good grist to the mill

:beerjug:
 
Thanks Solid, well the R100r build has been started on here as " Project Stealth " lets hope its lives up to all expectations.

In other news the fairing and tank were picked up from CT Motorcycles and Chris has excelled himself...... we got back late so the fitting will take place on Sunday and if it goes to plan it could break cover on here first....
 
Sunny day so it looked like a good chance to fit up the fairing and tank. Great credit to James who came up with the design and Chris for turning that into a reality top job guys - let me know what you think.


Looks great!

reminds of this a bit

attachment.php
 
Just utterly wonderful! :thumb2

It's just such a totally different. and imaginative, way to use some familiar bits in an unfamiliar way.

Hopefully they still have straightline events up near here at Melbourne and I can got over to hear it roar and cheer you on.

Awesome! :bow
 
Paul has asked me to put up the paint process in keeping with the project nature of the build ...

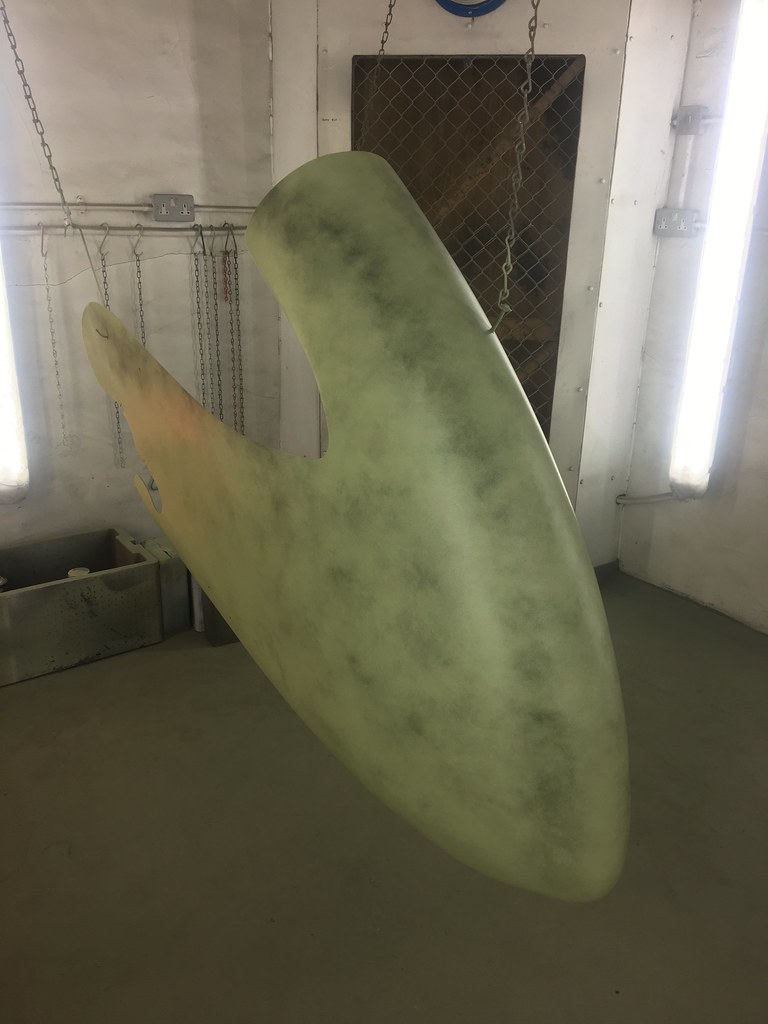
Brand new Fibreglass is a real pig to paint, the silicon release agents used to help the item out of it's mould impregnates itself into the gel coat and is notoriously difficult to paint over. However I have an epoxy product which is excellent as a first stage primer.

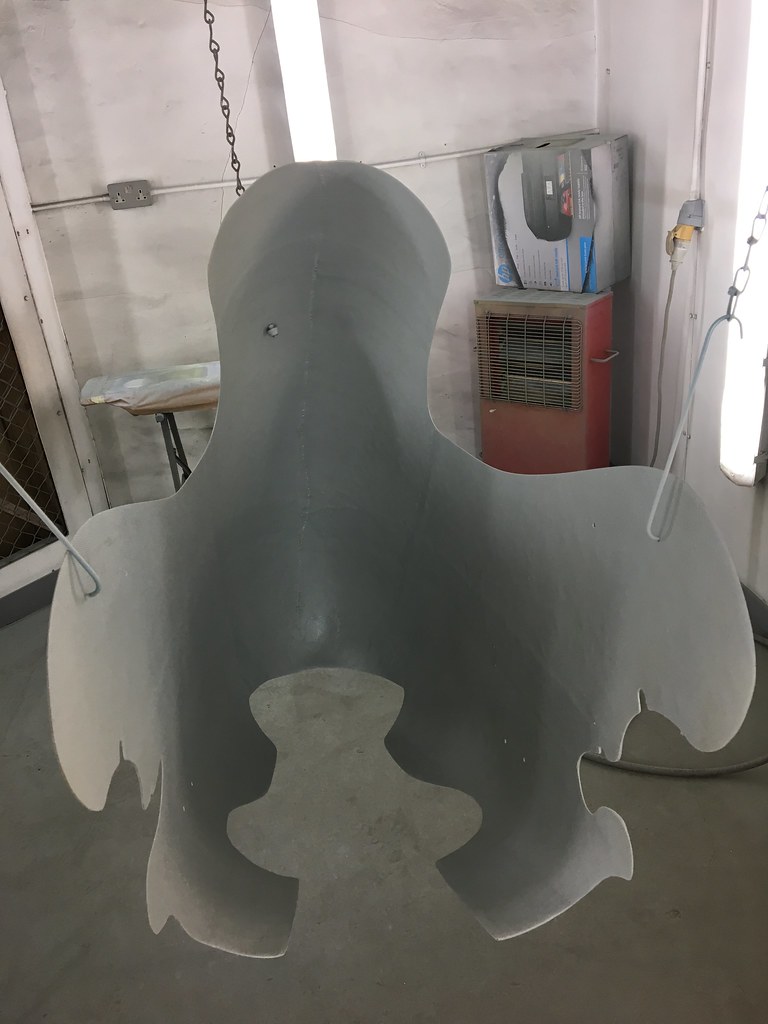
The fibreglass is very thin in places so manoeuvring it around was fun :D

Once hung up I could apply the first coats of epoxy ..

IMG_2933 by tunneruk, on Flickr

IMG_2934 by tunneruk, on Flickr

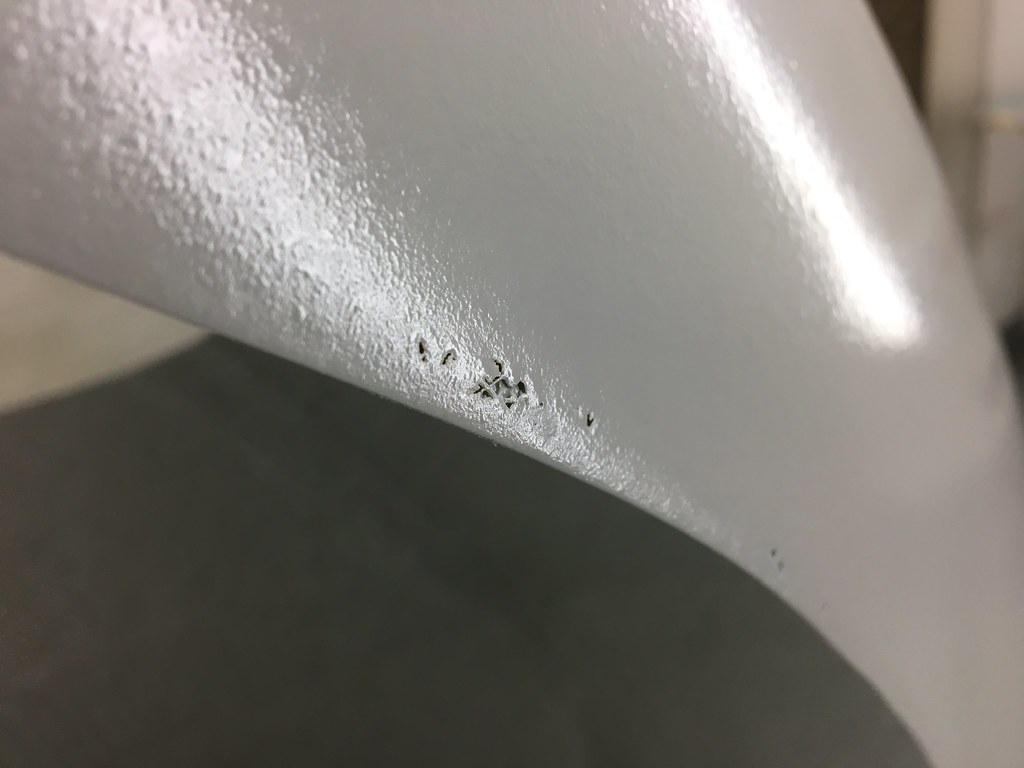
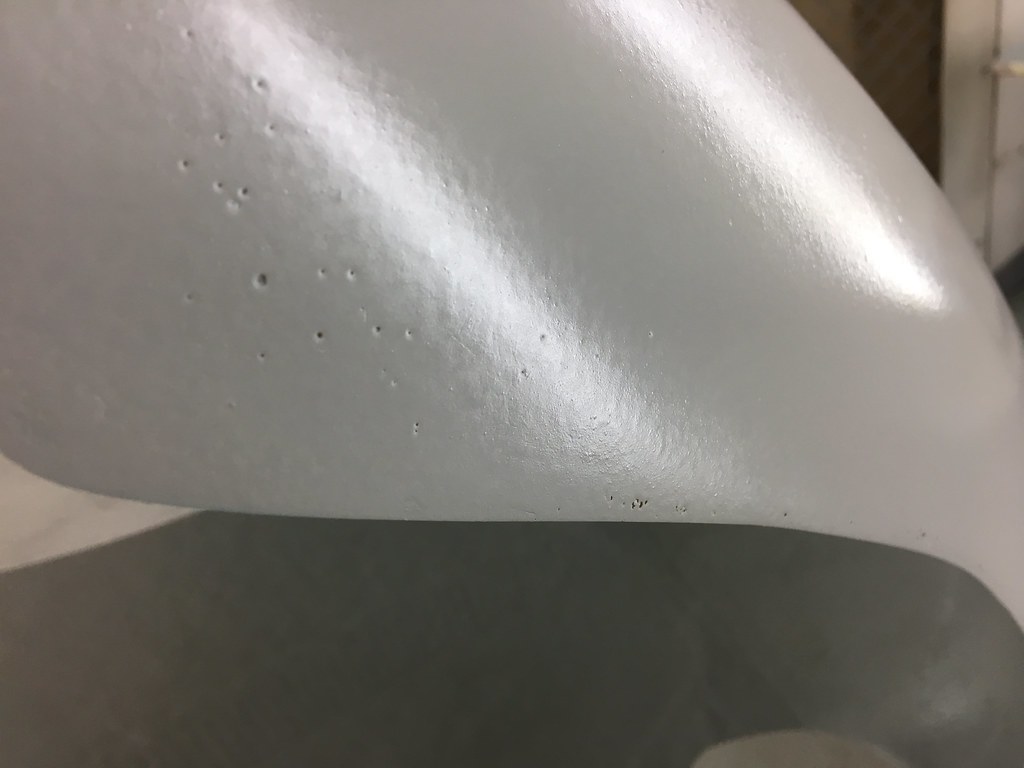
Now although the epoxy is good, it sometimes gets defeated by really stubborn silicones.

IMG_2938 by tunneruk, on Flickr

IMG_2939 by tunneruk, on Flickr

After 24 hours another coat was applied which eventually sealed the nastiness ....

I decided that hanging the panel up was great when painting but a nightmare when trying to work on it elsewhere so I asked for service above and beyond of my trusty work stool
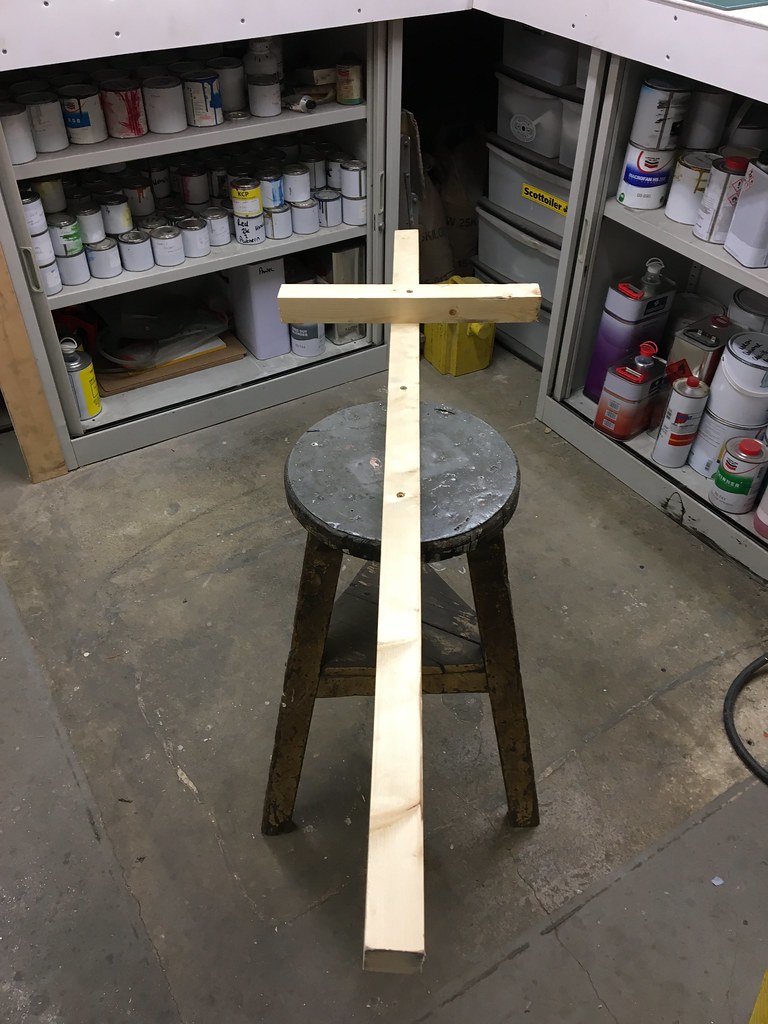
IMG_2940 by tunneruk, on Flickr

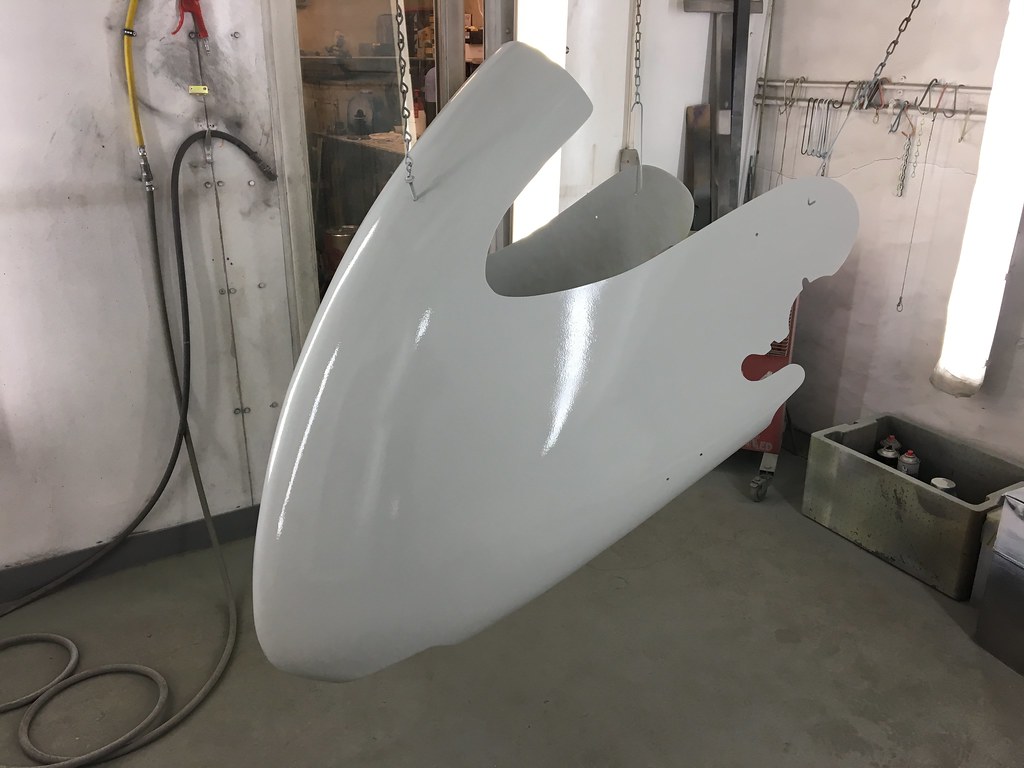
Time for high build primer ..

IMG_2943 by tunneruk, on Flickr

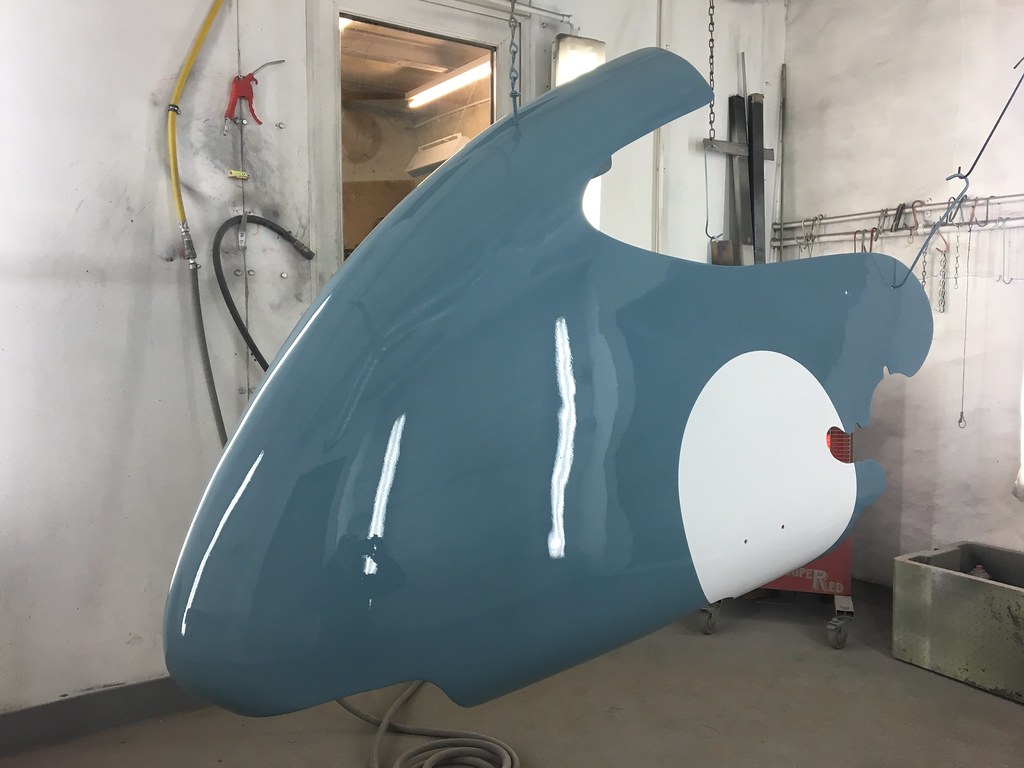
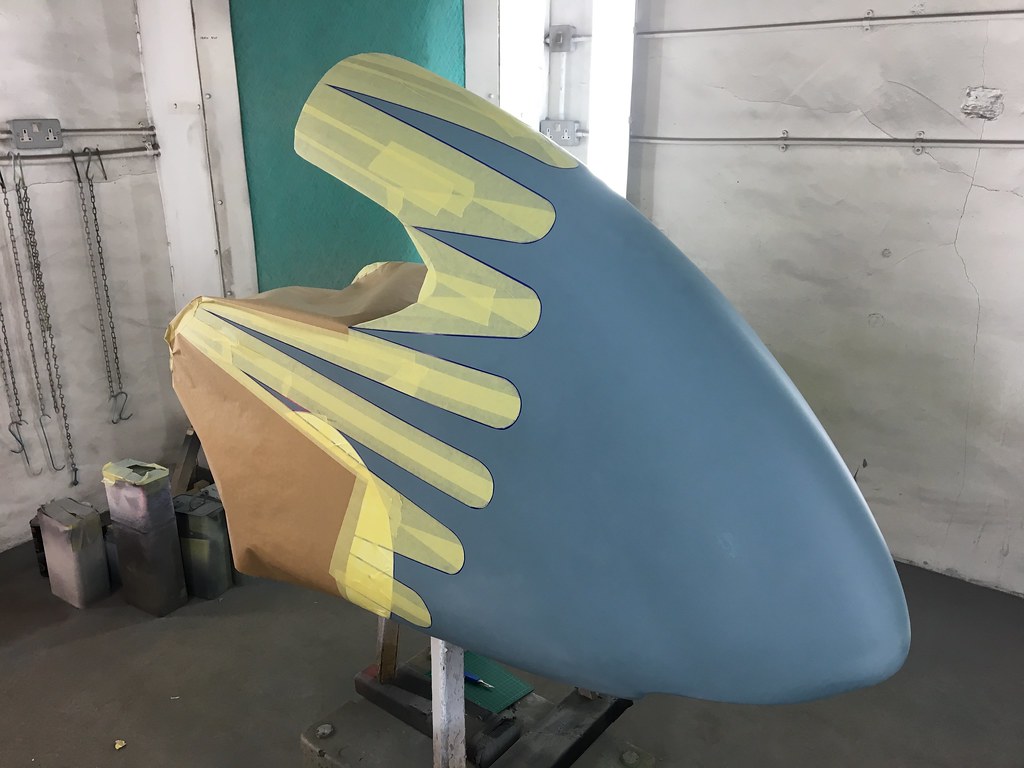
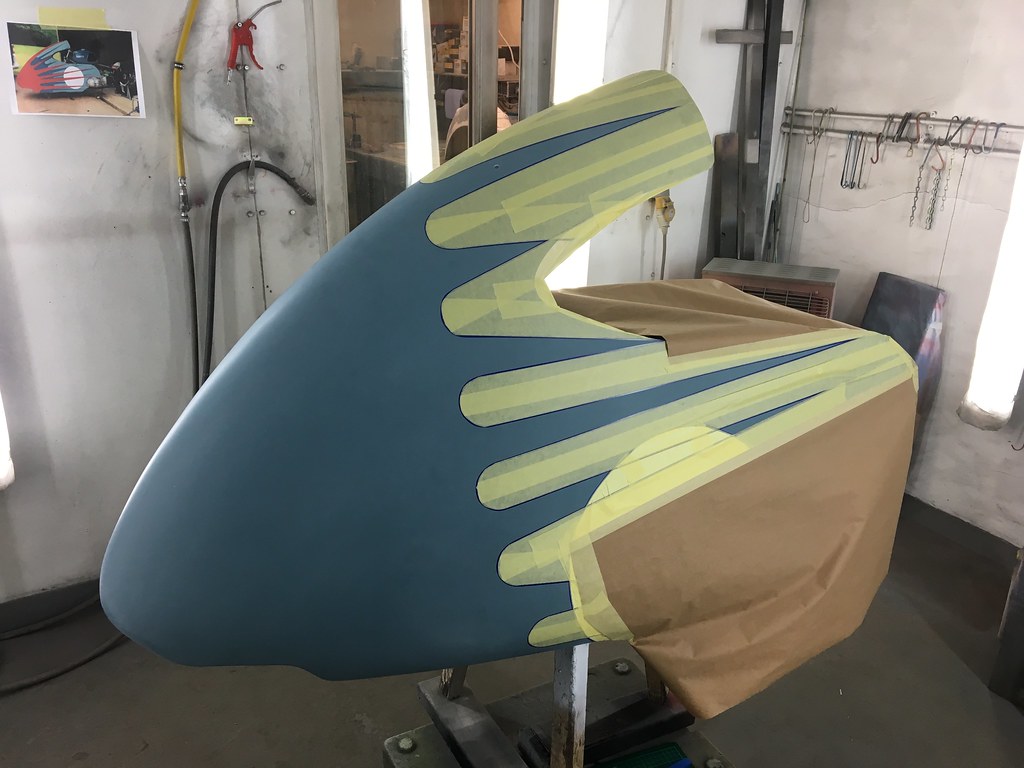
After about 750 hours of blocking and sanding it was time to get the first colours on. Painted white first, with the number boards back masked the main blue was applied followed by two coats of lacquer to seal it all in.

IMG_3060 by tunneruk, on Flickr

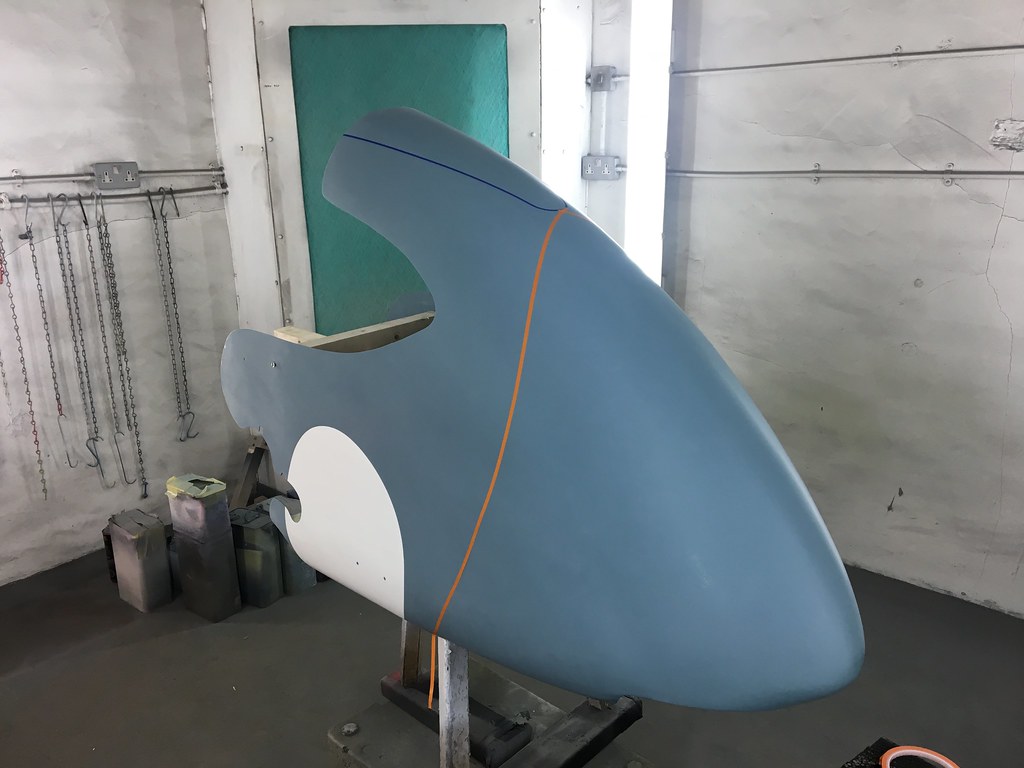
After 24 hours this then came out for another 750 hours of wet sanding to enable me to base coat the rest of the scheme

IMG_3089 by tunneruk, on Flickr

IMG_3091 by tunneruk, on Flickr

IMG_3092 by tunneruk, on Flickr

IMG_3093 by tunneruk, on Flickr

IMG_3094 by tunneruk, on Flickr

IMG_3095 by tunneruk, on Flickr

IMG_3096 by tunneruk, on Flickr

IMG_3098 by tunneruk, on Flickr

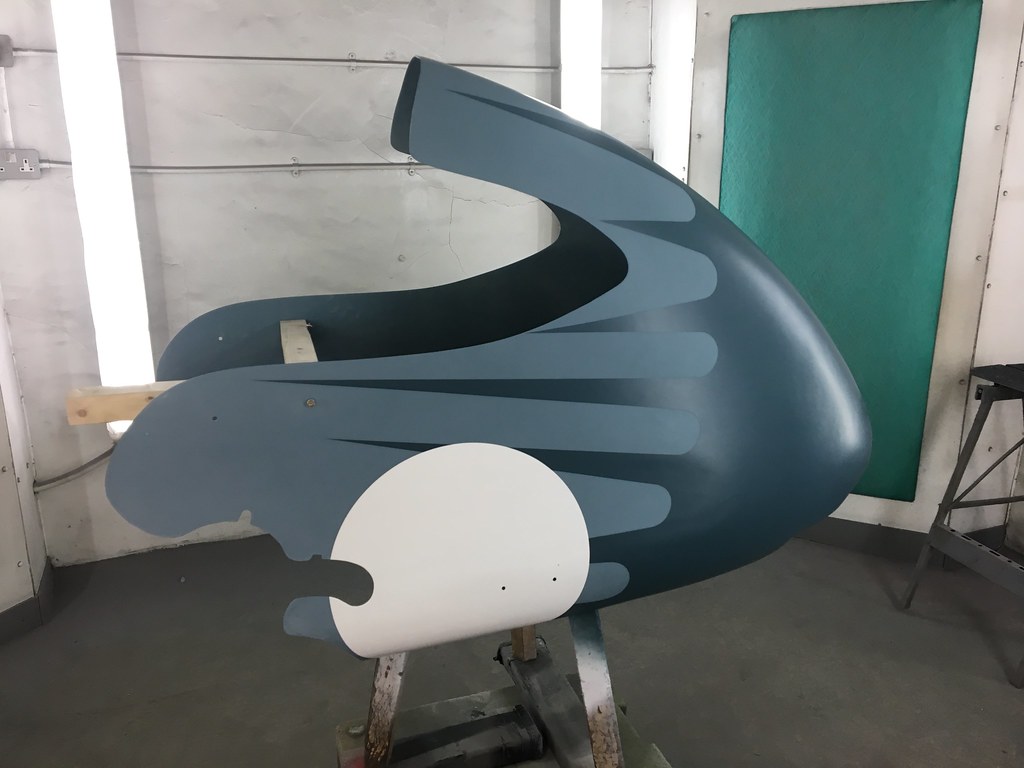
Ordinarily this darker coat is dry enough to clear coat over within about 20 minutes but because I was going to mask over it for the next cover I left it in the residual heat of the booth to harden up for 24 hours.

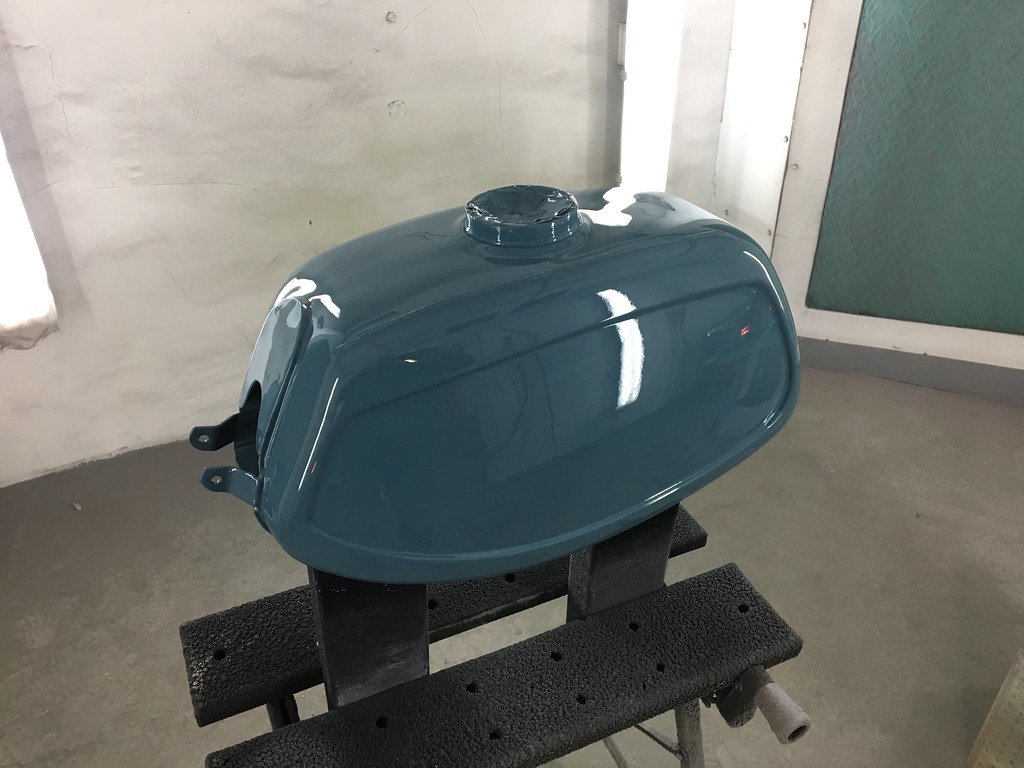
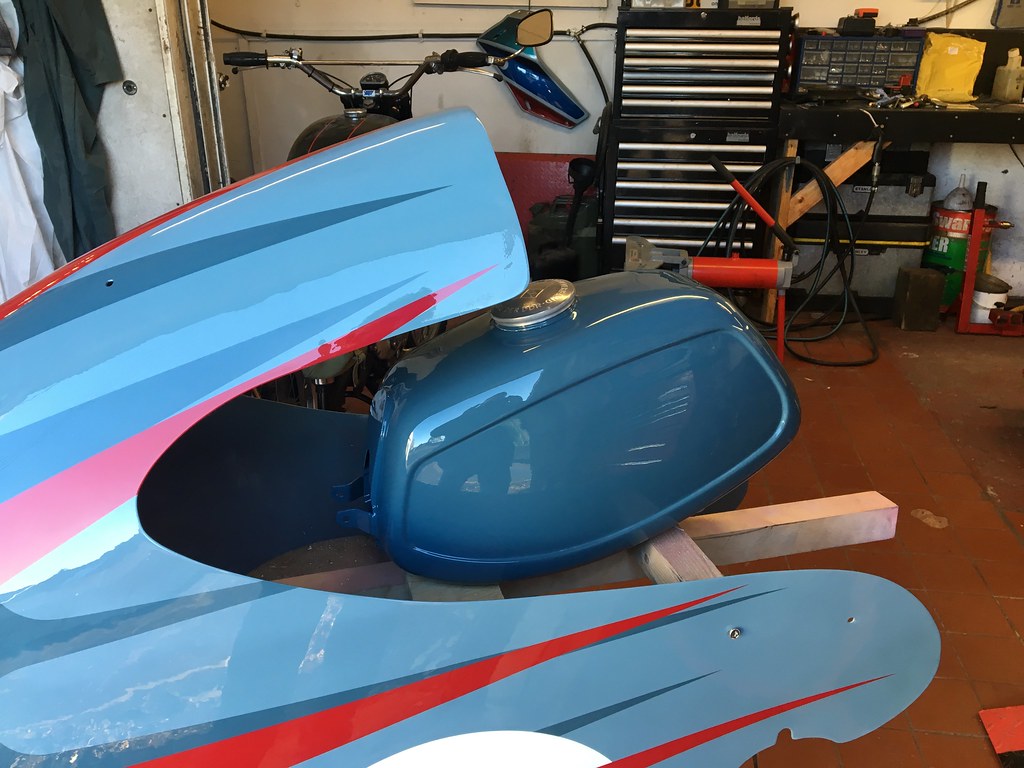
In the mean time I cracked on with the tank.
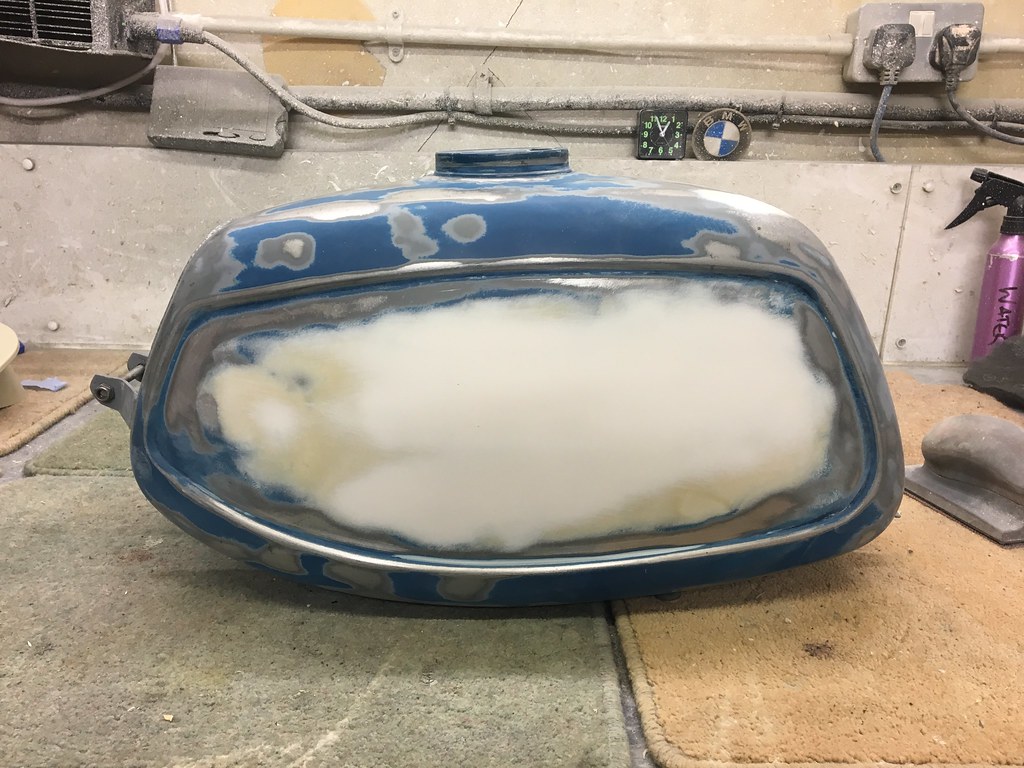
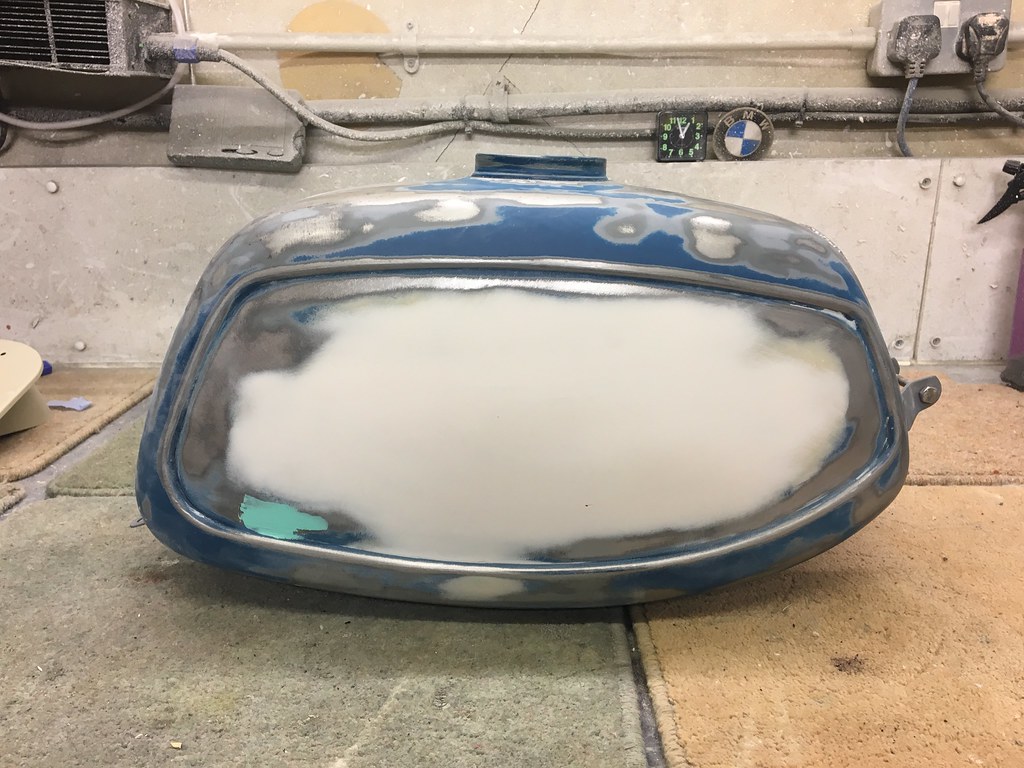
It's an MZ tank which originally had brackets welded to the sides which were removed. This then required bodywork to make the areas invisible.

IMG_3145 by tunneruk, on Flickr

IMG_3147 by tunneruk, on Flickr

A coat of etch primer and a big coat of high build primer followed by flatting and sanding before the main colour and clear coat went on

IMG_3164 by tunneruk, on Flickr

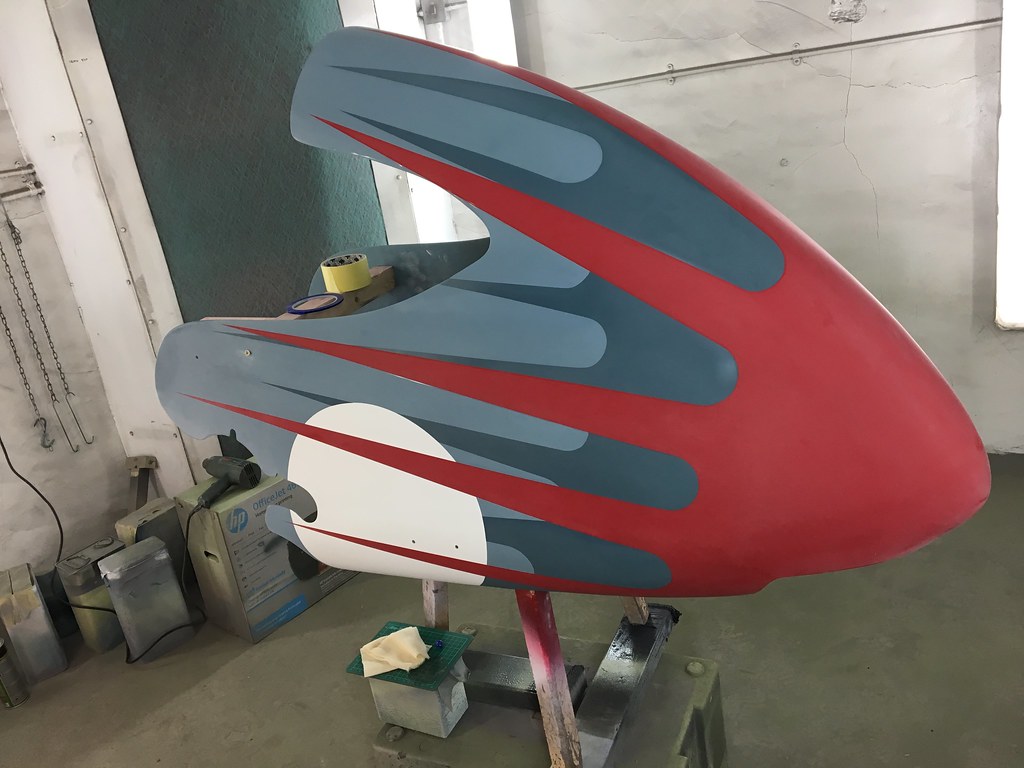
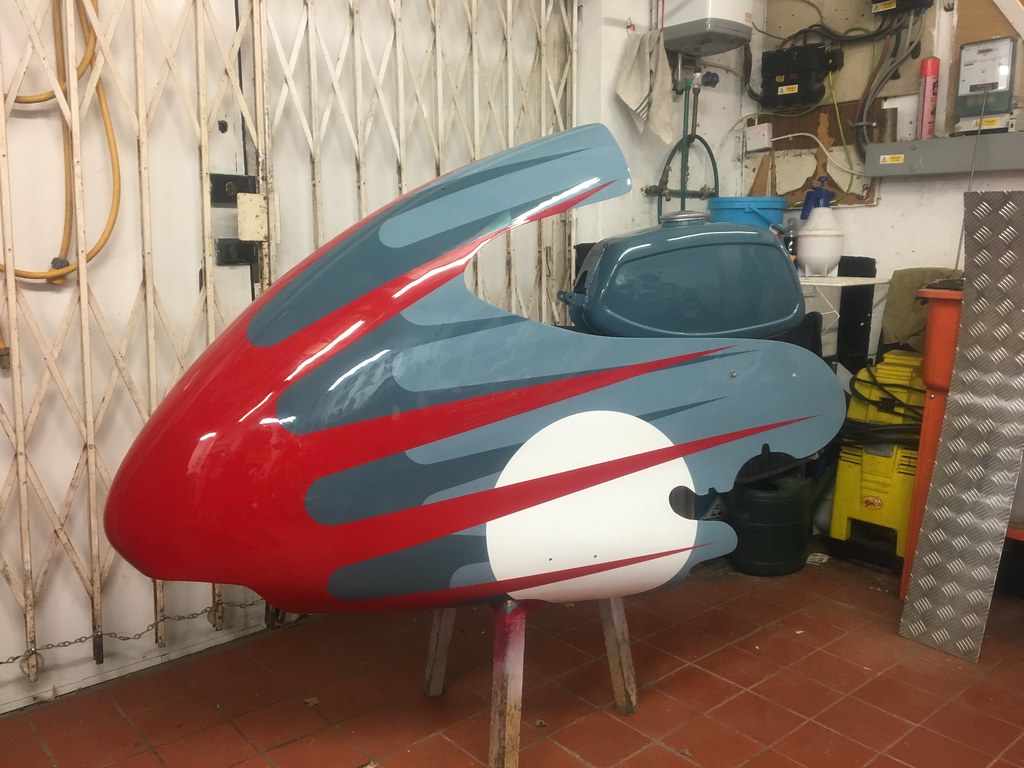
The dark blue base coat was by this time ready for further application so I repeated the process for the red sections and painted it in ..

IMG_3283 by tunneruk, on Flickr

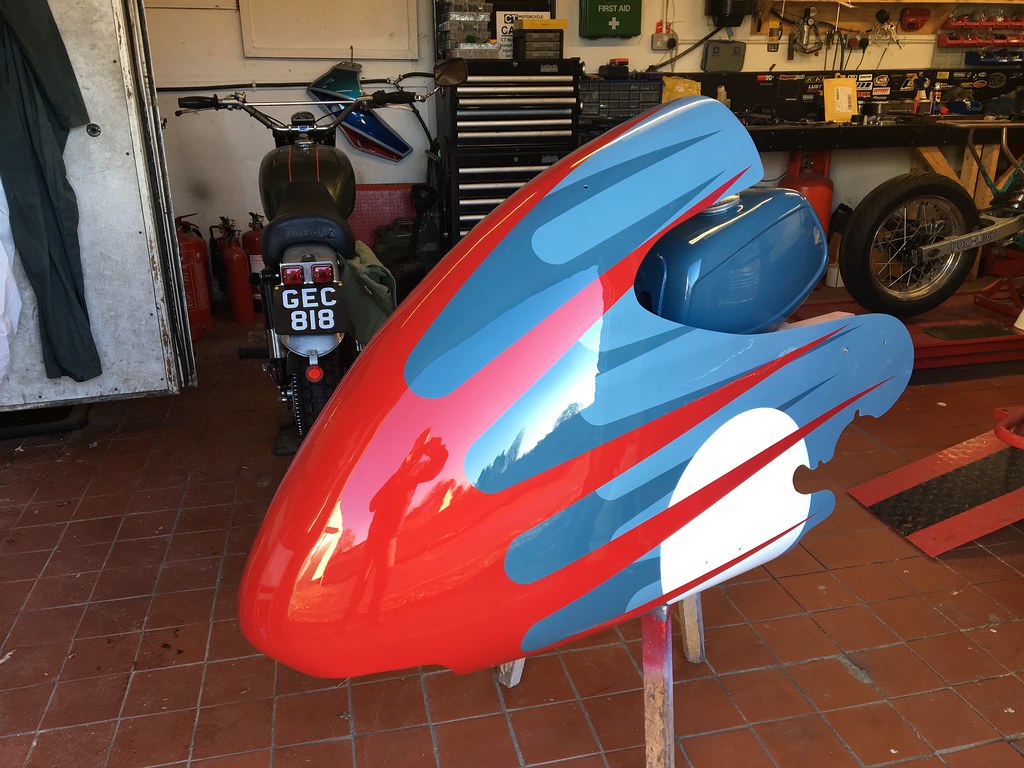
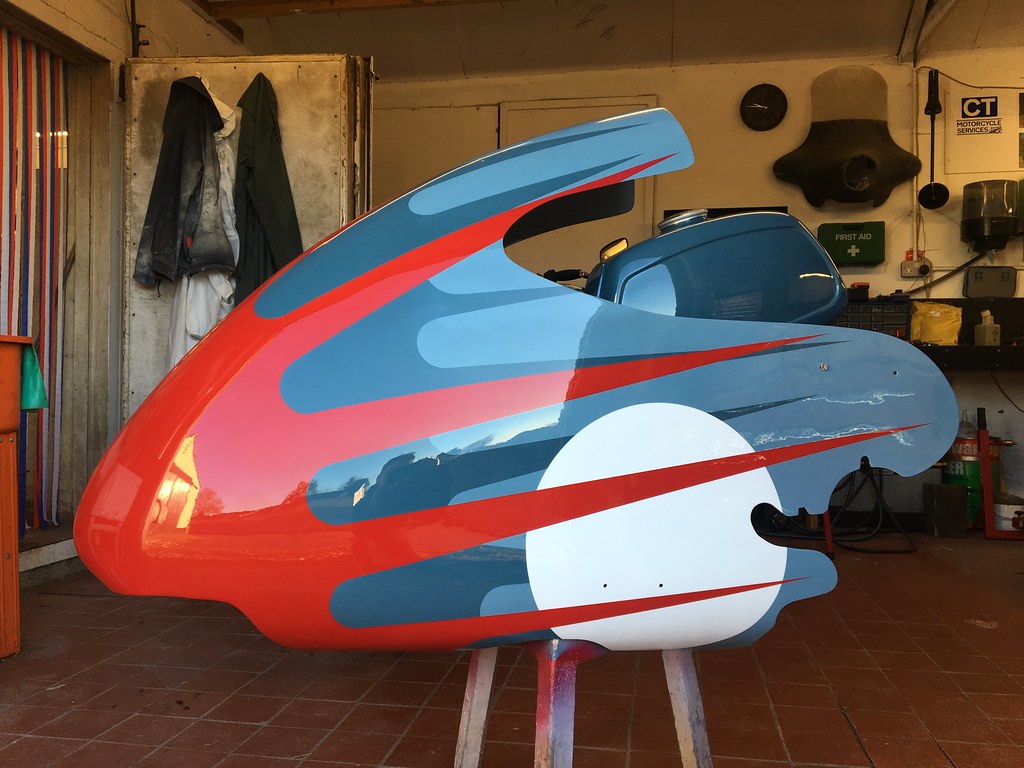
After 3x big coats of HS lacquer here's the big reveal! :blast

IMG_3299 by tunneruk, on Flickr

IMG_3313 by tunneruk, on Flickr

IMG_3325 by tunneruk, on Flickr

IMG_3327 by tunneruk, on Flickr

IMG_3332 by tunneruk, on Flickr

Couldn't resist an arty reflection pic of my Norton ..

IMG_3338 by tunneruk, on Flickr
 
I love the whole bike but that fairing is very special. I hope you get to show it off at some shows as it truly deserves it and will bring a little bit of joy to anyone who sees it who appreciates such things.
 
I have to say Chris did an excelent job and he would come highly recommended from me and not just for the paint but the whole process which has been quick and painless. I have some more pics which i will post up soon.

Thanks for all the nice comments.

The plan is to get this bike to a few shows/ events in 2017 not just the drag strip, there is the rolling road tune which has a tentative date this year so maybe a video or 2 of it running will be in order.
 
...We need a GSer outing for the first race

I could not agree more. As long as it doesn't add even more pressure to your first outing, please do let us know. I'd love the excuse to come and watch some drag racing. :D

What a great build, so many parts fabricated from scratch. The exhaust alone is an absolute work of art, in my opinion.

Paul g :clap
 
Hi Paul

Well maybe the second outing.....

So set up the carb balance and set up the static timing added 102 race fuel and WOW it lives.... let it warm up and adjusted the tickover popping on the overun it sounds the nuts, took some crap video which is not going to pass muster so it going to have to wait till the rolling road session, but safe to say well chuffed.

Few more pics as prommised.


Fantastic machine Paul, would like ti hear it running. Hope it's competitive.
 
Hi Solid

I know I know, as way of an update the bike is now loaded in the trusty T5 awaiting owner to sort out the rolling road, work is not the best leading up to Christmas but we will give it a go.

This was the first time the bikes been loaded in the van and to be honest we never expected it to fit with the fairing and going up and down a ramp looked like a good way to damage Chri's lovely paintwork + we use a front wheel stand so long story short its a fairing off job. Now thinking forward to the main event of drag racing and access to engine and tweaks that may be required the fairing was always going to need a stand something that protected the paint and when sat on the stand would be resistant to wind etc while sitting in teh paddock and could be used for transporting it in the T5, so this mornings mission was to get the jig saw out and make some dust... its not finished yet and will need a further support of the rear section and it would be good if we can add some form of carrying handle...

Anyway not the most extreme of conditions and may only need to fend off the cat but here it is pride of place in the lounge.......well it is a sort of Christmas decoration....


Back
Top Bottom