Yamaha RD250C Aircooled 1977 Refresh

steele01

Registered user
Joined
Dec 3, 2012
Messages
539
Reaction score
1
Location
North West
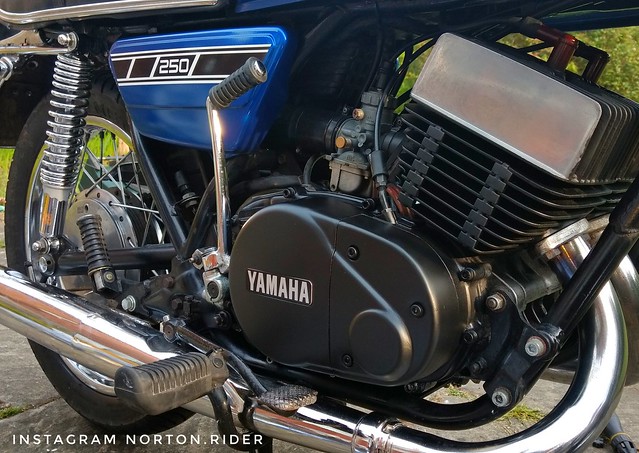
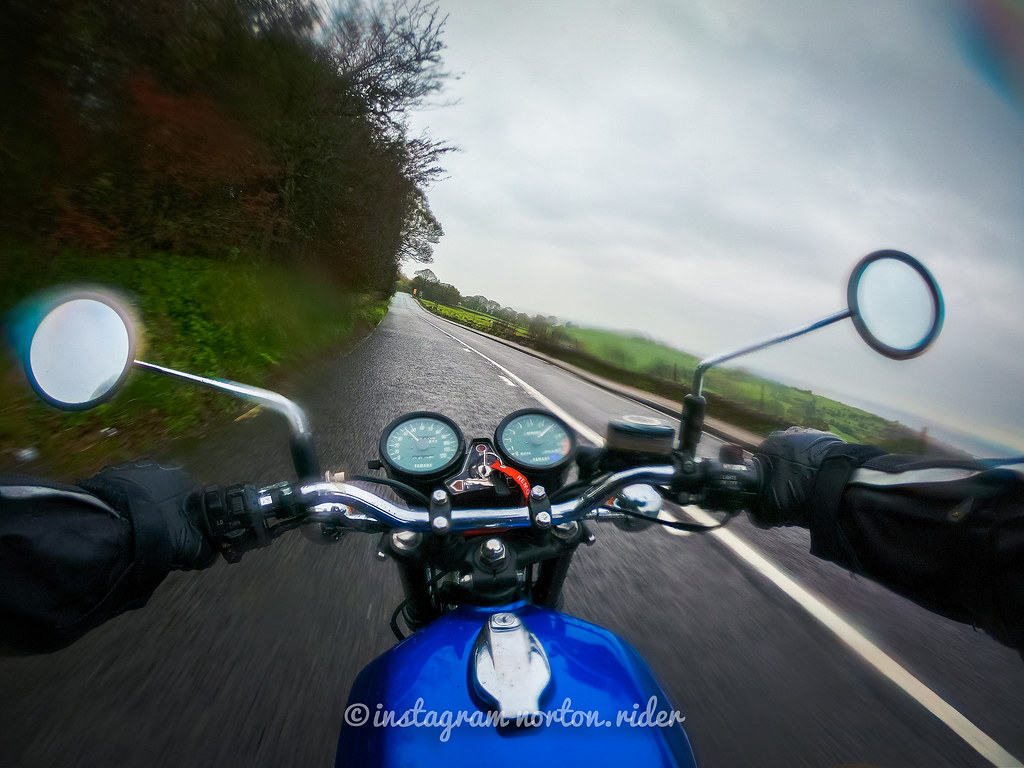
Hi everyone here's my Yamaha RD250C

After selling my F800GS an fancying a mini break from Beemer's the right 1150 gsa didn't turn up an not having the budget for a 1200gsa te again I decided to get another classic last year.

I ended up picking up and collecting my new baby on my 30th birthday no less! An a year to the day we all got made redundant from the litho print company huge life change since I've been around print since I was a kid an dad an entire life time. Currently decided to take some time out for another year again an spend time with family (my cousin is terminally ill but doing really good) an spend time with other family members dad an I didn't get to see much doing 70+ hour weeks.

Which will leave me stacks of time for riding and going on adventures on the bikes with dad well that's the plan an make more memories with dad!

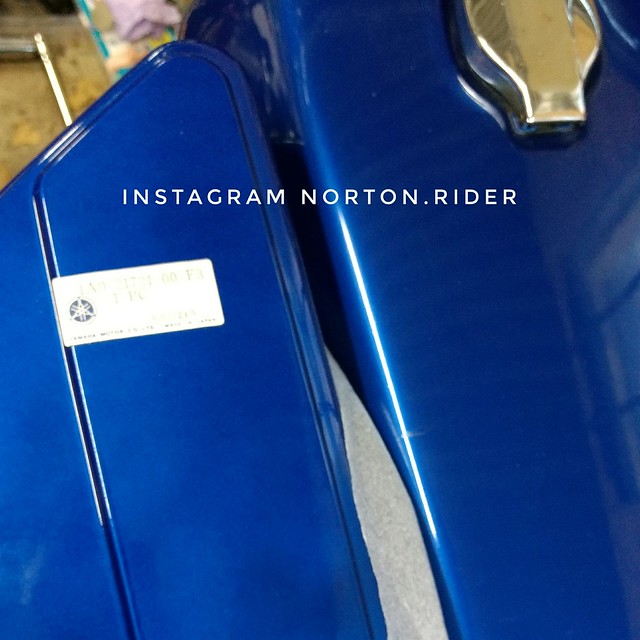
Enough rambling an onto the bike uk matching numbers 22k ish miles most importantly blue! Now my dads 250DX was blue an his older bro's 250C was blue I grew up on stories about these bikes so super excited to own one myself. Hopefully have some piccies coming of my uncles 250c. My mum actually met my dad through his 250 as she was watching him from a window a week or so before they met on the night he picked it the picture below. Even got pictures of my dads younger bro who doesn't ride whos the one that's ill sat on both of the 250's so will be ace to pop down to his on it alot as well

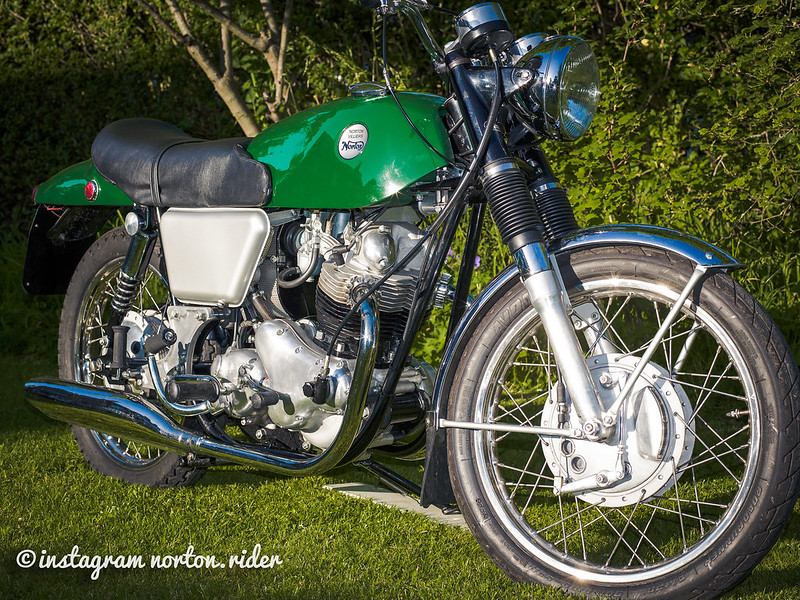
Initial plan is a rolling resto get her looking mint over time like I have with my Norton's but use regularly an by that I mean quite a bit haha did 2,000 miles in one week on my 250lc so like to get out an about. Main thing though is shes gonna be ridden alot!

Things I wanna sort so far are
Clean clean an more clean for a few days :)
Levers an missing bits cylinder rubber etc - already ordered on the way to pick the bike up haha so they should be here any day.
Tyres Avon's are my choice of protection :D Front tyres got a split from being stood so those are main priority
Tank - repair to the underside so gonna have a hunt about for a replacement. Respray once I figure out who to use.
Forks- Gotta decide what stanchions to get, new seals, dust covers, measure the springs up.
Electronic ignition - saw the huge improvement this made on the Norton's as it's gonna be ridden alot that's right up there with stuff to get done.
Re Chroming gonna start with the rear rack unless I can find a replacement that's ready to go. Pick who to use.

If anyone spots anything that's not standard etc appreciate the heads up Wanna get her as right as I can :)

This bike means a hell of alot to me so super excited to get started an to be a aircooled owner. Best of all I've set next door off on getting a bike again an let his lil Daughter have a sit on pull the throttle etc grins all round, Deffo a biker of the future an hopefully they will be doing a project as well.


So day 1 of the resto / lets get ready to ruuuummbleee! haha :)

Wheels are a bit grubby so decided to get cracking cleaning those.


Gotta decide what to do with the hub finish wise :)


Started coming up pretty good


Next thing to order is some new dust seal covers an a l/h Stanchion


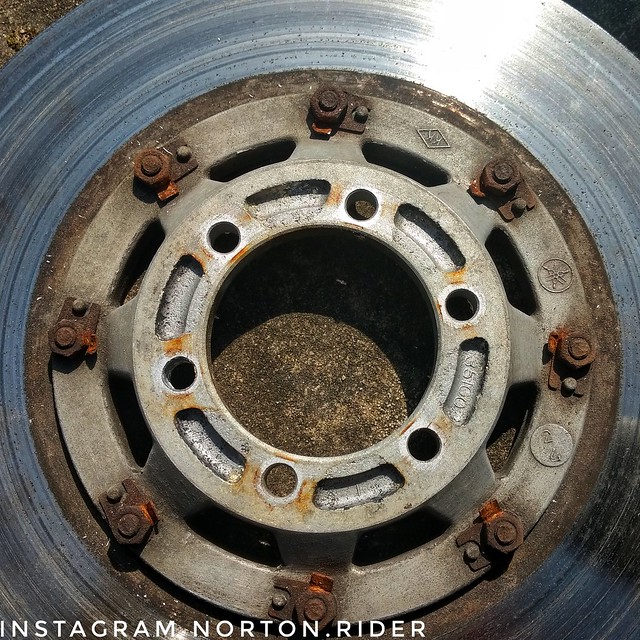
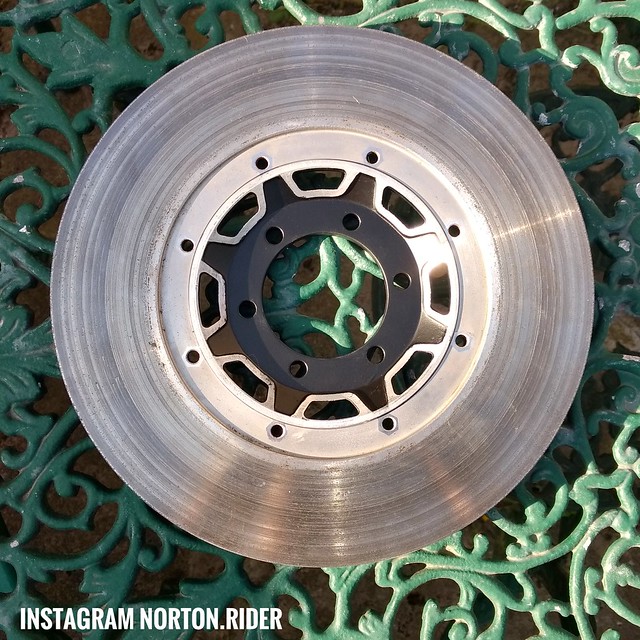
Got the bits on order for the Front Disk!!

Another before picture on the caliper another task for this week :)


Before picture on the exhaust


Rear shocks


Got a bit engrossed in cleaning the wheels only to look round an see dad had half removed the rear grab rail lol so dived in an helped him get it off my baby


Roll on hours an hours of dremel work trying to get the nightmare stuff off after paint stripper wouldn't touch it.
Quite a bit of an improvement Lot more to do on it though !!


Progress today an flipping freezing!! Did I say it was Freezing haha!

First thing I dad was clean the front brake metal hose up was covered in rust an had a quick go at some of the bolts on the front wheel came up really nice :)


Next front wheel again the joy!! Started working my way round the spokes cleaning the ends up bit by bit.


Next I had a go at getting the yellowing off the front hub shes really starting to come up good I think.


Dad came out an did a bit on the rear wheel for me :)


She's really coming up great bit by bit

 
Well I forgot to order some grips and a new throttle tube on my parts order the other day that arrived this morning so went in my Parts Cache for the Elsies. Total result!

Gonna run the pattern levers for a while got such a bad habit of catching levers haha! Few nice green bolts.... Ahhhhh Green!!

Looking forward to getting stuck in tomorrow and gonna order some tyres so I can get out toward the end of the week itching to go for a ride now especially with this nice weather forecast.


Today was one of those days where everything that can go wrong did go wrong haha!

Pattern Parts strike again had issues on my Elsie before so always bought genuine where I could, clutch lever assy was perfect so that's all fitted clutch pull feels alot better now.

Next up was the brake lever shoulder looked totally wrong bolt hole not lining up properly with the perch so stuck the old one back on and ordered a Genuine C one from our very own RDJames through ebay so soon as that baby arrives I'll get that fitted.

Just emailed Yambits so shall see what they say looks like it's a part they have bought in just really irritating.

Moved onto trying the anti vibration rubber that was missing luckily this bit fits lol.

Tomorrows job I'm gonna whip the l/h engine side casing off an just double check the oil I've seen then I'm gonna get back to polishing the wheels an order some tyres in at my local place and put a order in for some more parts once I work out whats still available.

Quite a bit of an improvement looks wise so gonna get the rest ordered an get the cylinders all sprayed up might have a painting day on Thursday and spray a few of the satin bits.


__

Got stuck in after finding the oil pipe joint issue checking a few other things out.

Missing the split pins under the anti vibration mounts on the bars, ones perished so sorted some new ones of those.

Checked behind the generator cover
Was pretty grubby with old stuff off the chain no signs of oil so that's good :) gave it a bit of a clean up.

Noticed the gear lever had been set to low an had put a groove in the l/h silencer so moved that a few notches.

Tried to get my tyres ordered but realised my tyre guy is on a half day gutter!

Fork seals are good although the dust covers are in the bin so fitting some new dust covers tomorrow. The pitting on the fork leg is well outta the travel area so just gonna turn that round so it's outta sight an then sort them later in the year.

So far so good gonna give it a compression test later cold just to see if the cylinders are reading the same then do it warm once I fix the oil feed.

Anyway back to polishing spokes!!


Bit more progress went round the bike polishing bolts.

An did a bit of work on the rear footrests quite far gone so didn't think they would come up


Finally did a quick compression test on a cold engine after finding the oil elbow loose just wanted to check :) nice and even between both the cylinders.

Few bits coming that I ordered earlier in the week should be here tomorrow so should make some more rapid progress tomorrow!
 
Lots progress the new lever from Yambits was even worse! Haha.

Decided today was a painting day ! The engine was driving me nuts cosmetically so got stuck in on that beauty did the cylinders and side casings best I could with a bit of wind :) also learnt a trick on the edges of the badge on one side so need to repeat that for the r/h side.

Tomorrows job is the front caliper and the brake m/c paint wise, then gonna fit the new dust covers on the forks. All in all feel like she's really coming along now!

Not perfect but the engine paint will see me through to the winter :) as I wanna get out on her soon as!

Green bolts inbound for the engine side casings :)

IMG_20190418_191502-01 by norton.rider, on Flickr

IMG_20190418_183246855-01 by norton.rider, on Flickr


IMG_20190418_183236767-02 by norton.rider, on Flickr

IMG_20190418_164620103-01 by norton.rider, on Flickr

IMG_20190418_181515602-02 by norton.rider, on Flickr
 
Not Forking around today :) bit more painting an got the forks off for new dust seals.

IMG_20190419_112507561-01 by norton.rider, on Flickr

Well today was one of those super long days!
Stripped the forks of the bike an dad spent pretty much all day getting some scrapes an scratches out of the fork lowers. Decided to check the front caliper put before paint which turned into splitting the caliper halves as the piston had seen far better days so gonna order a piston kit on Tuesday.

Next task was to split the disk from the carrier.. huge nightmare with some of the bolts got them all off though without breaking any, gonna order some of those as well.

While the bike was canted back with the forks of it started leaking gearbox oil outta the crankcase breather. Well up on the dipstick so gonna drop it an put the right stuff in. Wondering as well if it's got the right dipstick in :)

Painted the carrier up was really far gone but she seemed to come back ok.


Also took the rear brake pedal off an painted it just gotta sort the setup out on it again :)

All in all a super productive day not many pictures bar the brake carrier but I'll add some tomorrow when I get stuck in again.


IMG_20190419_130923475-01 by norton.rider, on Flickr


IMG_20190419_193834313-01-01 by norton.rider, on Flickr
 
Got really stuck in today bit of a late start after braving the food shopping madness!

Finished the brake carrier an tried it on the disk, then spent a while polishing all the rust from the locking tabs and bolt's they came up great :)


IMG_20190420_170755801-01 by norton.rider, on Flickr

Next up got all the deep gouges outta the fork legs lots an lots of polishing to manage it :) Gonna put the correct finish back onto them tomorrow looking really good though. Dust seals are a huge improvement!

IMG_20190420_183820729-02 by norton.rider, on Flickr

Painted the front MC up an fitted the genuine brake lever I got woop went on with no issues.

IMG_20190420_183700916-01 by norton.rider, on Flickr

IMG_20190420_183720904-02 by norton.rider, on Flickr

All in all 8 days in really feel like I've made allot of progress.

Got a set of Metzler ME77's on order so looking forward to getting those fitted on!

Dad did took over on the front wheel polishing while I was doing all the little tasks an he had a mess with the seized in half of the front caliper.

Tomorrow I'm gonna finish the front wheel polishing, finish the fork lowers, an then do the oil union repair on the carb. Finally thinking I'm gonna drop the oil then start checking all the oil pump an carb settings. Not far off the first ride now once the tyres are replaced.

IMG_20190420_185701355-02 by norton.rider, on Flickr

Wow I'm shattered!! Another full on day on the RD250C it's amazing how far its come from the wheels and other components being a corroded mess to the current state in just over a week since getting her on my 30th Birthday. Looking forward to the new tyres and getting out on her few more bits to order and a few more jobs to do this week.

So far rebuilt the forks.
Fixed the 2t oil joint union that was hanging out!
Refinished the engine cases and cylinders.
Replaced the engine anti vibration rubbers.
Removed all the paint from the rear grabrail/subframe.
Endless bolt polishing from rust back to the correct finish.
Fitted new Anti vibration bar rubbers + the missing clips to stop the handle bars falling off!
Compression test A OK!
Lots of cleaning and polishing on her.
Fitted new clutch perch + lever + genuine grips + genuine brake lever after 2 pattern ones didn't fit.
An the bane of my life got the front wheel an rear wheel from a corroded mess to shiny!
Stripped the front brake disk carrier an got all the corrosion off polished the splines and repainted it.
Stripped the front caliper and 1 half is beyond repair.

Hope you are all enjoying the progress.

Tomorrow's plan is going over the oil pump/engine setup new fluids and bleed it all through :)

As the gearbox oil is well overfilled been leaking out the crankcase breather with the bike canted back with the front wheel off or a seals gone on the pump an the 2t tank has emptied itself into the gearbox. gonna drop it tomorrow an find out whats going on.


IMG_20190421_191104_142 by norton.rider, on Flickr

IMG_20190421_191203_553 by norton.rider, on Flickr

IMG_20190421_191301_577 by norton.rider, on Flickr

IMG_20190421_191525_580 by norton.rider, on Flickr

IMG_20190421_191009_423 by norton.rider, on Flickr

IMG_20190421_191713_555 by norton.rider, on Flickr
 
Just started changing all the fluids so thought I'd check the pump out quite a bit of 2t kicking around not sure if it's been coming from the main shaft few mullered bolts as well.


IMG_20190422_125546_175 by norton.rider, on Flickr

IMG_20190422_125644_172 by norton.rider, on Flickr

Dropped the gearbox oil ready to remove the r/h casing to take the oil pump off.

Pump removed an ready to send off to arrow after finding the leak :)

IMG_20190422_155640896-01 by norton.rider, on Flickr

Gonna check the clutch out at the same time now it's all removed.

Todays progress

IMG_20190425_152947_218 by norton.rider, on Flickr

Well didn't expect to see this is the Rd250c rear wheel hub previous owner had left the inspection grommet off on the rear wheel hub.

New brake shoes on order for tomorrow an currently going to get some
Me77's fitted :) in a hail storm so glad they are in the back of the car!

Pumps currently away with Arrow for rebuild.

Steady progress interesting to see Yamaha's method for retaining the rear disk carrier compared to how Norton did it.


Well the ME77's are fitted! spent today working on the rear hub so that's all sorted ready to fit the brake shoes on tomorrow,

Always been pretty handy at turning new old stock parts up on the elsies, so after a bit of hunting this arrived today!!

One new old stock side panel! Interesting to compare against the current paintwork on the bike :) tank and current panel are totally original and the tank isn't a bad match at all.

While thinking about what to do regarding the tatty repair to the oil tank where the paint's gone on the lead edge of it, I tracked down a New Old Stock Oil tank in the right blue so that's on its way now. For what I got it for be way cheaper than respraying the current oil tank which I'll keep for a spare. Wasn't intending to use nos stuff on this but at the price I got them at well worth it even if I keep them as spares for now :)

IMG_20190501_141309174-01 by norton.rider, on Flickr

Few other remedial bits arrived today as well, new overflow line for the oil tank not got a cats chance of getting the original one back on, some new lines for the crankcase breather, oil tank mounts had all perished so got those to as well as some paint to touch the front of the frame in.

Other one is the brake caliper gonna test fit it over the next few days.

IMG_20190501_140621654-02 by norton.rider, on Flickr

Currently working on refitting the rear wheel before I do though decided to start working on the rear wheel spacer another NLA part left is before I started on the rh side of it :) slow progress but think it's gonna come up great.

Gonna have to swap the caliper bolts round as well stupidly tight considering its something that they describe as may need the order changing :) gonna use plenty of masking tape so I don't damage the green bolts.
IMG_20190505_141030924-01 by norton.rider, on Flickr
 
An a lil bit more progress learnt alot doing this one :) good enough to fit now though

Middle stage really really deep pitting.

IMG_20190505_185438_368 by norton.rider, on Flickr

Got the worst of the heavy pitting out she just needs a final polish tomorrow to bring it back to a nice shine.
IMG_20190505_185438_367 by norton.rider, on Flickr

Got the front Caliper fitted bit of a gutter that the supplier supplied the mounting bolts the wrong way round so ended up having to remove them an swap em round green finish is such a pain not to mark.

All in all a decent day an tomorrow I'll get the wheels re fitted to the bike :)

Lastest part :) on what's been quite a small parts spend with all the refurbing!

New Old stock oil tank that had been on display in a bike shop. Bike shop is gone now unfortunately.
IMG_20190507_112244_339 by norton.rider, on Flickr

Finally had a clear day to get stuck in !

She's alive! Well nearly ha 8)

Fitted the oil pump an new seal from the legend that is Arrow, then refitted the side case to the bike, kick start rear brake pedal etc.
Next job was to bleed the lines very painless that's for sure :)

After then fitted some new fuel lines as I wasn't mad on how tight the lines were :) huge progress an tomorrow gonna get her started bleed the front brake an she's ready to rock an roll for friday!

IMG_20190626_191441776-01 by norton.rider, on Flickr

IMG_20190626_191421603-01 by norton.rider, on Flickr

She fired up today sweet as a nut exciting stuff as she's nearly ready for her first ride out :)

IMG_20190627_161915462-02 by norton.rider, on Flickr

Had one issue with the yambits oil union creating a bubble in the line swapping back to gen yam cured the issue :)

IMG_20190627_120329750-01 by norton.rider, on Flickr

Bled the brake an new caliper feels really good.

Test ride tomorrow itching for that.

Got a ton of work done on my Norton-Villiers Commando as well :)

A0005877-2 by norton.rider, on Flickr

A0005882 by norton.rider, on Flickr

A0005893-2 by norton.rider, on Flickr
 
Had the first maiden voyage today!
Was lots of fun she's very raw that's for sure.

Ended up going to a local carb place at a recommendation of a fellow member.

Got a new carb union elbow ended up smoothing the plastic rough casting rib down that's on the raised points that sorted the air bubble out where it must have been sucking air in so for anyone that uses one from Yambits or elsewhere worth trying that.

Just gotta sort the throttle cable out tomorrow as it's revving up slightly when turned left, an the loose indicator bulb in the r/h indicator

Did a plug chop an she's spot on :)

IMG_20190628_173200457_BURST000_COVER-01 by norton.rider, on Flickr

What's it like to ride a classic all year round you ask? Exciting exhilarating and freezing haha got caught in an hour downpour on my Yamaha rd250c ! Starting to really catch up on cranking on the miles across the bikes now.

Spent most of the summer riding my daily rider Norton 650SS and sussing out some issues on my Norton Villiers 1968 Commando (previous owner left blast media in the head) so I'm halfway through rebuilding that at the moment.

Been using the aircooled inbetween thrashing about on the 650SS.

Decided today to go to Monyash and boy did we get drenched on the way back haha!! Still thawing out now :) exciting stuff anyways here's some pictures from the cat and fiddle part of the journey :) hope you all enjoy.

73016388_10220097370888965_3641168257303445504_o by norton.rider, on Flickr

73052413_10220097371688985_6985229171198787584_o by norton.rider, on Flickr

72851714_10220097373489030_2206190026960666624_o by norton.rider, on Flickr

74680744_10220097369928941_4557471672747163648_o by norton.rider, on Flickr

75247466_10220097375409078_6943121200159653888_o by norton.rider, on Flickr

73024016_10220097374929066_8425680233553723392_o by norton.rider, on Flickr

72634239_10220097375929091_5255289925749702656_o by norton.rider, on Flickr
 
Got a big stroke of luck today and managed to get two new old stock rd250c Tacho's gonna get one fitted an keep one spare exciting stuff.


74964069_10220296573228899_8011516017509400576_o by norton.rider, on Flickr

74634387_10220296573828914_707725466949124096_o by norton.rider, on Flickr

Hi guys sorry for the lack of posts been a crazy few months!

Decided to get her out again after the 650ss has been getting all my attention riding wise through the winter even rode her on xmas day in the fog!.

Ordered a battery and a master cylinder seal as that's wrecked the paint I did on it wasnt sure if it was a chip on the previous owners paint or a leak when I had it removed last. Looks like it's got a slight weep easy fix though only a few quid.


Cleaned the carbs out as well pilots were a little bunged up.


Ended up having a bit of an eventful day on Tuesday haha!

Went out for a spin on her luckily dad decided to follow in the car. Was swiftly reminded of just why I loved two strokes so much great handling and really grin inducing!!

On the return leg she started playing up quite interesting that early on while waiting for dad to grab some tools I pretty much hit the nail on the head issue wise :) I think anyway haha!!

Ended up pushing her 5 miles home just to be on the safe side.

Got some bits coming today to hopefully fix her so that'l be exciting.

Popped the heads off to have a look as well all's good shes on a 1.25 and still got the hone marks on the cylinders.

She was missing a few of the washers on the cylinder head bolts so ordered a new set of those :)

Video on the ride out an diagnosis.

Success! My initial road side diagnosis was correct the issue was with the condensers fixed that yay!
She has got an issue though I noticed that she sounded a bit top endy when I bought her anyways it's got a bit louder so next step tomorrow is to take the top end off and measure the piston skirt to cylinder clearances.
Thanks to my guru who gave me a bit of advice on piston slap. Learning all the time!
Rebore time I think.

Took the decision to pull the top end this morning get to the bottom of what's going on :)

All been knife edged and gonna measure the port heights shortly, top end is on 1.25.


Took the decision to pull the top end this morning get to the bottom of what's going on :)

All been knife edged and gonna measure the port heights shortly, top end is on 1.25.


_______________

Yaaaayy! Yamaha RD250C top end is mostly back together with my replacement cylinders.

Sourced a set of 0.25 Cylinders that were standard tune with proper yam pistons an a recent rebore

Left to do is replace the oil lines the previous owner had fitted that were causing issues for genuine an a few carb tweaks then repaint the side casings an its all good!

Just managed it before the thunderstorm. Painted the cylinders.


Video coming later on tonight with the current progress from today hope you all enjoyed the progress so far.
 
Wow you certainly get stuck in dont you. Don’t forget to fit the ant vibrating rubbers once the paint is dry on the cylinders.

Steve
 
What a great thread. Great to see someone who's under 50 getting stuck in with motorbikes. :beerjug:
 
Thanks everyone :)

Yep got the rubbers in they are original ones as well so slot in nice to!

Main aim with this one was to retain as much of the original parts as possible original rims seat cover tool kit etc.

Changing the oil lines to genuine from the ones the previous owner fitted will totally sort the top end issue out it had a full crank etc an top end rebore at 18k an a rebore at around 20k so looks like we got it sussed out now after consulting with a yoda on Yamaha oil pumps we traced it to the fact the lines are expanding at a different rate where they sit under the carbs as they are a different material to the gen yam lines. (Did quite a bit of miles on a few 250lc's that I no longer have with gen lines an pump with no issues)

So once the bike cools off after expanding oil enters the line so using it with those clear lines regularly ends up doing the top end. Although I think this one that was on it probably wasn't perfect to begin with piston slap etc always thought it sounded top endy hence me compression testing it earlier last year. As well the clips were not closing up on themselves as they should which they do when on the standard lines.


So today I finished fitting the reed valves, exhaust gasket's got the carbs re fitted and the new genuine oil lines,

Had a test ride an shes like a different bike the really hard edge has been replaced with power right through the rev range now smooth rev's no hanging or anything. Gonna stick some miles on her this week before I open her up just can't get over the smoothness on her compared to the tuned top end the previous owner had fitted.

 
Good to see, what was the extent of the tuning.


Back
Top Bottom