DIY colour change - any advice?

parabiker

Registered user
Joined
Jul 27, 2009
Messages
88
Reaction score
0
Location
Ashby de la Zouch
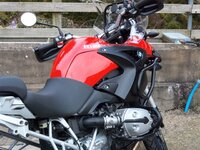
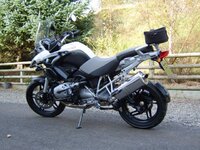
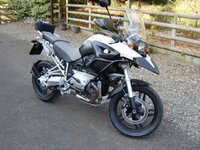
Thinking of painting my tank and beak panels, has anyone had success at doing this themselves using aerosol paints and lacquer?

I would be keen to see some pics and advice on preperation and best paints/primers to use etc. I notice Halfords to a lacquer speacially for motorbike tanks that resists the effects of petrol.

Sorry if this has already been done before, I did search for threads, but alas no luck. If someone could point me in the right direction if it has, I would be much appreciated.

Just got to decide on a colour now>>>>:eek:

Thanks in advance

Simon :thumb2
 
It all depends on where you are going to be spraying them, I have dabbles before and to my experience spray cans are not for me, I bought some spray gear for my compressor and the results where still not to pro standard.

By the time you spend rubbing down priming painting and laquering a pro could have done the job to a pro standard for little cost.
If it where me doing it again I would get some prices of you stipping the parts from the bike, preping them then getting them to spray them for you.

Just my 2 cents

spike
 
If its just a change of standard colour phone motorworks for some secondhand panels if not get a copy of Motorcycle Mechanics they done a piece on spraying with DIY gear not sure which issue, they also list specialists in the back.
Ian
 
Probably cheaper to buy the beak & Tank from Ebay or Motto works etc and then sell yours on ?

I tried to respray a damaged fariring on my Aprilla :blast dont bother

Jim:thumb
 
Spray cans arent the best but I have used them a few times. The paint finish doesnt last anywhere near as long as proper paint.
Anyway assuming there aren't any scratches in the existing paint then remove panels and trim and scuff the old paintwork with a red scotch bright pad until you get a matt finish. These are better to use than wet and dry but if you want to use that then use a 320 or 400 grit. If you are painting a similar colour then no primer is needed but if your going completely different then either get special plastic primer or epoxy primer. These stick to plastic far better than your standard primer.
Flatten the primer with 400 grit wet and dry (use wet) until its all smooth and the orange peel is gone. Allow to dry and give it a good dusting off with a tack rag or lots of lint free something or other. Give it a good wipe down with panel wipe to get rid of any contaminates.
Now spray the base coat/colour on. If your using aerosols then go easy and built it up slowly or it will run. Leave 10-15 mins between coats and build it up until it is uniform. If you go for metallic/mica (I wouldn't with aerosols) spray alternate coats at 90 degrees to each other. If you don't it will look stripy. Leave for a couple of hours before doing the lacquer .
Now for the clear coat. don't leave the base coat more than a few hours or it might not bond properly. Spray lots of coats of this so you have a fairly thick coat. I would do 3 coats when using proper paint but with cans being thin go for at least 6 and probably a few more. Again go easy or it will run but it isn't so important this tie round if it runs.
Leave for a day in the warmth and let it al cure and go hard or even a coupke of days if you have the time. Now get some 1000 grit wet and dry (use wet with a bit of washing up liquid in) and scuff the rub the clear coat until all the orange peel is gone. Be very careful on the edges so you don't go through the clear. Next give it a a sand with some 1500 wet and dry, again wet. You can use the 1500 first if you want to but it will take longer is all. Now you should have a pretty shiny paint job but it will still have a slight fog to it.
Get some rubbing compound, I use Ferecla G3, and soft cloth like mutton cloth and polish until shiny. Don't use T cut, its crap and also has ammonia in it with will damage fresh paint.
I like to leave new laint atleast a week before puting wax on but if in a rush you can use it after you have polished. Personally I use old fashioned hard wax. Harley wax (nothing to do with Harley Davidson) is about as good as it gets but something similar would also do and if you really must then use a cream wax.
If you flowed above and took your time you will now have a very shiny paint job and you did it all yourself. Now you can see why Spike says get someone to do it.
 
did this my self, but I am a professional (but not sure what at):nenau
 

Attachments

  • bike 005.jpg
    bike 005.jpg
    110.9 KB · Views: 224
  • bike 008.jpg
    bike 008.jpg
    101.9 KB · Views: 223
  • misc 003.jpg
    misc 003.jpg
    118.3 KB · Views: 223
I like very much. Exactly what I am looking at doing, but thinking white. That doesnt look like a spray can finish to me though.

Nice one.:thumb

Simon

like this you mean!
 

Attachments

  • bike at lake 001.jpg
    bike at lake 001.jpg
    96.1 KB · Views: 133
  • bike at lake 003.jpg
    bike at lake 003.jpg
    88.3 KB · Views: 137
like this you mean!

Exactly like that, even down to the seats, engine bars and painted wheels.:drool Come on how did you do it?

What colours did you use especially the black bits?

If I send you my panels will you do mine!!!!!!!!:thumb2

Looks really good.
 
I like very much. Exactly what I am looking at doing, but thinking white. That doesnt look like a spray can finish to me though.

Nice one.:thumb

Simon

Your quite correct Simon,I do it professionally,but certain colours are achievable with a spray can,white in particular,plus you won't need to use a clear coat over it.Best of luck and show us the result. ps just be carefull you don't spend two thirds the cost of a professional job on cans etc.:blast
 
Exactly like that, even down to the seats, engine bars and painted wheels.:drool Come on how did you do it?

What colours did you use especially the black bits?

If I send you my panels will you do mine!!!!!!!!:thumb2

Looks really good.

Why don't I just sell you the bike and save you all the hassle!:augie


Back
Top Bottom