Project Wrap

Great job:thumb2

How would you get around covering panels that have scratches already, would you need to sand them down first?

Let me know if you need to get rid of the black vinyl, i may take a piece to cover my faux tank, or maybe the whole bike, i wonder if they have the orange sparkly colour of the new Ford Focus ST:augie
 
As for scratches, this stuff is really thin, so I'd expect any dust or scratch to be shown through. So if you've got scratches, I'd probably say filler/sanding is in order. I'd probably also prime the surface, and potentially rattle-can spray it in something like satin black.
Having said that, you can now buy automotive class paint in a rattle can, but you'll need to go to a "real" car parts store. This paint, when properly applied, should be as close to "real paint" as it can be. They will mix and fill the cans for you when you order them (i.e it's not a shelf item).

As for left over material, if I have a lot surplus, I'll mention it in this thread. :)
 
Another panel done. It took me about 30 minutes to do this one.

It's still not perfect ("Will it ever be?" asks my inner perfectionist), there's a few air bubbles, very small ones, but they're still there. Then there's some creases on the sides, but they should be pretty much invisible.

Depending on how good I get at this, I might redo this one if it bugs me a lot. The shape of the panel is very simple too, so it's probably one of the easier panels to do.

Hopefully I'll get a few more done this w/e too, but I need to do some riding and I also have an extra power socket to install. :thumb2

Pictures!!

Before:
photo%201.JPG


During:
photo%203.JPG


Done:
photo%205.JPG
 
One more panel "done". :comfort

This time I attacked the "faux-tank" panel. It's curved in all directions, but luckily there's not any complicated shapes.

But I still didn't manage to do it with just one sheet of vinly. :blast In the end there's 4 pieces of vinyl on it.

The victim...
photo%2001.JPG


Attempt one... :blast
photo%2002.JPG


Attempt two.... :blast:blast:blast
photo%2004.JPG


New strategy; multiple sheets of vinyl.
photo%2006.JPG


Two stips at the bottom, and two at the top.
photo%2007.JPG


And this is the result; a few small air bubbles here and there, and obviously the inevitable "seams". :mmmm 
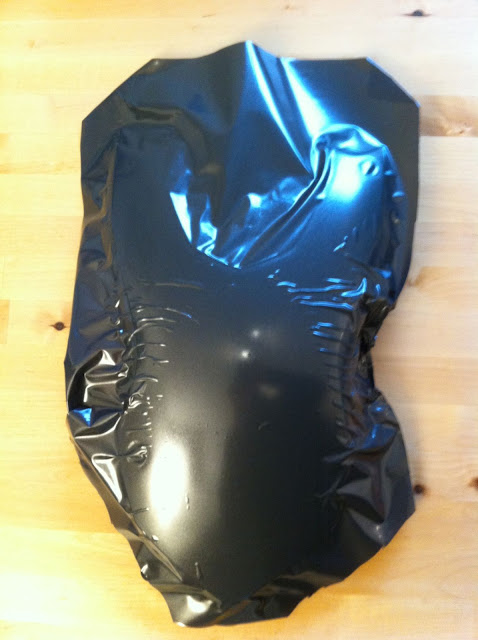
There's no big creases, only a few small on the sides where I've cut the vinyl so it can form to the shape. :rolleyes:
photo%2008.JPG


And from the other direction;
photo%2010.JPG


Note that I've tried to take the photos so that they show all the blemishes. From the two previous panesl, once they're on the bike you have to go really close to spot the issues. Really close. But perfect, it aint.

Three done, three to go. :augie
 
Looking at effort and results, I still think painting is a better option.
It's a free world and everybody should do whatever he wants but I delivered a box with all the plastic of my bike with the local painter. For about 200 pounds it was grinded, sprayed with 2 layers of paint and 3 layers of transparent coating with a perfect result. I was not limited to any color, I could choose whatever I wanted.
If I have to sell the bike and it would have a lot of scratches, simply do it again.

But hey, that's my choice. If you're happy with vinyl, go for that.
 
I think most of us know what a respray involves, and if you got it for £200, you're either good, lucky or have a good mate. One thing that a respray never will be and that's original. At sale or trade-in a respray is of lesser value than original panels.
So for my £15 for my colour and a few hours at the dinner table, I'm very happy with vinyl, and if I'm not, I can take it off and it'll be original.
 
Looking at effort and results, I still think painting is a better option.
It's a free world and everybody should do whatever he wants but I delivered a box with all the plastic of my bike with the local painter. For about 200 pounds it was grinded, sprayed with 2 layers of paint and 3 layers of transparent coating with a perfect result. I was not limited to any color, I could choose whatever I wanted.
If I have to sell the bike and it would have a lot of scratches, simply do it again.

But hey, that's my choice. If you're happy with vinyl, go for that.

This isn't a thread as to whether or not wrapping is better than painting. We all know that painting gives a better finish. Wrapping is a project, and has the advantage of being cheap. If you want a good quality finish and the spare cash, get the panels painted. If you want a project - wrap it :-) "simples"
Just my 2p
 
mate, youve got a lot more patience than me,
if you master it though it will be a good skill to have, you are right though- you could have any colour you want without de value'ing the bike,
nice work buddy
mike
 
Thanks! I don't think it's about patience, if I can't do something, I'll go crazy. Also, I'm curious to see if it can be done. If it can be done, then I can change my bike's colour at a whim - how about a red-white bike for xmas, or a chicken yellow for Easter? If it can't, I'll just rip it off and be happy with the colour the bike is. :)
 
From one perfectionist to another, the faux tank panel can be done with one sheet. It just takes time.

Background: Wanted to fit a bags connection tank bag to the bike but didn’t want to drill the original faux panel. Ebay came to the rescue with a silver panel for £20, but my girlfriend’s bike is red! Instead of a re-paint I opted for a product called 3M dinoc. Not cheap, but I like the end result...


<a href="http://s930.photobucket.com/albums/ad142/vtr1000sp1/?action=view&current=P1000272.jpg" target="_blank"><img src="http://i930.photobucket.com/albums/ad142/vtr1000sp1/P1000272.jpg" border="0" alt="Photobucket"></a>

The deep recessed screw holes posed a problem as the vinyl didn’t quite stretch. But after a bit of careful knife work I cracked it.

<a href="http://s930.photobucket.com/albums/ad142/vtr1000sp1/?action=view&current=P1000273.jpg" target="_blank"><img src="http://i930.photobucket.com/albums/ad142/vtr1000sp1/P1000273.jpg" border="0" alt="Photobucket"></a>

<a href="http://s930.photobucket.com/albums/ad142/vtr1000sp1/?action=view&current=P1000275.jpg" target="_blank"><img src="http://i930.photobucket.com/albums/ad142/vtr1000sp1/P1000275.jpg" border="0" alt="Photobucket"></a>

<a href="http://s930.photobucket.com/albums/ad142/vtr1000sp1/?action=view&current=P1000274.jpg" target="_blank"><img src="http://i930.photobucket.com/albums/ad142/vtr1000sp1/P1000274.jpg" border="0" alt="Photobucket"></a>
 
From one perfectionist to another, the faux tank panel can be done with one sheet. It just takes time.

Background: Wanted to fit a bags connection tank bag to the bike but didn’t want to drill the original faux panel. Ebay came to the rescue with a silver panel for £20, but my girlfriend’s bike is red! Instead of a re-paint I opted for a product called 3M dinoc. Not cheap, but I like the end result...

Nice work indeed! Thanks for proving it can be done. Looking at the shape, I knew it could be done, but I guess I need more patience, time, elbow grease, determination and stubborness. Oh, and I probably should try the hairdryer. :blast

Where did you start applying the vinyl? Which end/side/middle? :confused:

I've got the big side panel off the bike now, and I'm fearing I'll make a dogs-dinner out of it. :eek: :blast

Thanks again for posting the pics - nice work! :bounce1:clap
 
Started at the wider end and worked my way down, only covering the top first and then pulled the vinyl over the sides. Used a silicone spatula to smooth out the bubbles as I went along and a hairdryer is a must! This was the first thing I’ve wrapped so I was mighty impressed with myself that I managed it in one go :bounce1

When I peeled off the vinyl from its backing all planning went out of the window and all I could think was ‘This is never going to work!’:eek:. However, the 3M Di-noc was very forgiving allowing me to remove/re-stick a number of times. Also, when warmed up with a hairdryer, it’s that good at forming around shapes/curves that I only had to use a Stanley knife to cut off the excess and fill the screw holes – no nips/tucks/cuts to cover those big angles. As for bubbles, the glue on the back of the vinyl has a diamond effect that allows the air to channel out – result = no bubbles! :thumb

<a href="http://s930.photobucket.com/albums/ad142/vtr1000sp1/?action=view&current=diagram.gif" target="_blank"><img src="http://i930.photobucket.com/albums/ad142/vtr1000sp1/diagram.gif" border="0" alt="Photobucket"></a>

Cheers :beerjug:
Phil
 
Here's Lloyd showing how it's done

<object width="640" height="385"><param name="movie" value="http://www.youtube.com/v/g354Y49v-Hw?fs=1&hl=en_US"></param><param name="allowFullScreen" value="true"></param><param name="allowscriptaccess" value="always"></param><embed src="http://www.youtube.com/v/g354Y49v-Hw?fs=1&hl=en_US" type="application/x-shockwave-flash" allowscriptaccess="always" allowfullscreen="true" width="640" height="385"></embed></object>
 
From one perfectionist to another, the faux tank panel can be done with one sheet. It just takes time.

Background: Wanted to fit a bags connection tank bag to the bike but didn’t want to drill the original faux panel. Ebay came to the rescue with a silver panel for £20, but my girlfriend’s bike is red! Instead of a re-paint I opted for a product called 3M dinoc. Not cheap, but I like the end result...


<a href="http://s930.photobucket.com/albums/ad142/vtr1000sp1/?action=view&current=P1000272.jpg" target="_blank"><img src="http://i930.photobucket.com/albums/ad142/vtr1000sp1/P1000272.jpg" border="0" alt="Photobucket"></a>

The deep recessed screw holes posed a problem as the vinyl didn’t quite stretch. But after a bit of careful knife work I cracked it.

<a href="http://s930.photobucket.com/albums/ad142/vtr1000sp1/?action=view&current=P1000273.jpg" target="_blank"><img src="http://i930.photobucket.com/albums/ad142/vtr1000sp1/P1000273.jpg" border="0" alt="Photobucket"></a>

<a href="http://s930.photobucket.com/albums/ad142/vtr1000sp1/?action=view&current=P1000275.jpg" target="_blank"><img src="http://i930.photobucket.com/albums/ad142/vtr1000sp1/P1000275.jpg" border="0" alt="Photobucket"></a>

<a href="http://s930.photobucket.com/albums/ad142/vtr1000sp1/?action=view&current=P1000274.jpg" target="_blank"><img src="http://i930.photobucket.com/albums/ad142/vtr1000sp1/P1000274.jpg" border="0" alt="Photobucket"></a>


That looks bloody good, got me thinking now although I doubt I have the patience to do it properly.
 
Started at the wider end and worked my way down, only covering the top first and then pulled the vinyl over the sides. Used a silicone spatula to smooth out the bubbles as I went along and a hairdryer is a must! This was the first thing I’ve wrapped so I was mighty impressed with myself that I managed it in one go :bounce1

When I peeled off the vinyl from its backing all planning went out of the window and all I could think was ‘This is never going to work!’:eek:. However, the 3M Di-noc was very forgiving allowing me to remove/re-stick a number of times. Also, when warmed up with a hairdryer, it’s that good at forming around shapes/curves that I only had to use a Stanley knife to cut off the excess and fill the screw holes – no nips/tucks/cuts to cover those big angles. As for bubbles, the glue on the back of the vinyl has a diamond effect that allows the air to channel out – result = no bubbles! :thumb

<a href="http://s930.photobucket.com/albums/ad142/vtr1000sp1/?action=view&current=diagram.gif" target="_blank"><img src="http://i930.photobucket.com/albums/ad142/vtr1000sp1/diagram.gif" border="0" alt="Photobucket"></a>

Cheers :beerjug:
Phil

Thanks! I think your CF vinyl is thicker than the stuff that I'm using. Started with the side panels now and I got CrazyCaz's hair dryer down, and BLIMEY what a difference it makes to the vinyl. Should have tried it before, but trying to learn one thing at a time. Unfortunately it blows too much air so with only two hands things start flying off the table and the vinyl starts to flap and adhere where it shouldn't. :eek :D

Either way, it's coming along nicely, but I had to restart one part. The top part turned out really nice. :thumb2

Thanks again! :thumb2
 
...video of Paddy Dakar wrapping....

I've seen that video before, and it's great advertising (which I'm assuming is its intention), but not very much use as an instructional video (and why would he give out his professional secrets). :thumb2


Back
Top Bottom