Strip Down and Service New to me GS

AJJCornish

Registered user
Joined
Oct 27, 2024
Messages
121
Reaction score
70
Location
Cornwall
Below is a list of things I've already done sine the couple of weeks I've had the bike...I think its ready for a shake down ride and then I'll consider what the next stages are.

Milage on purchase 36635
Purchased on 7th October delivered on 9th October 2024
Started strip down for Major service 9th October 2024
Drained Engine oil and refilled with new oil to flush through. Ran engine to operating temperature then drained. Removed Oil filter.
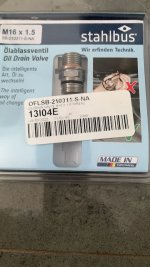
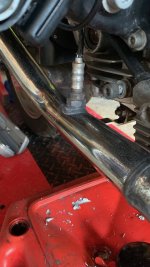
Fitted Stahlbus Oil Drain Valve (SKU: OFLSB-210311-S-NA M16 x 1.5MM
Fitted new K&N oil filter and refilled with Liquid Moly 4T Synth 10w-50 4lts
Drained Gearbox oil and refilled with Castrol TransMax 75w-90
Drained Final drive and refilled with Castrol TransMax 75w-90
New crush washers as required
Remove Plastic Front engine cover for Alternator belt check and front cover repaint.
Remove steel screws and prep alloy cover for repainting
Wurth Lacquer Spray Special Silver
Wurth High Gloss Clear Alloy Wheel Lacquer
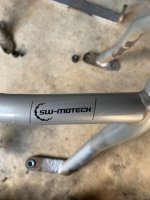
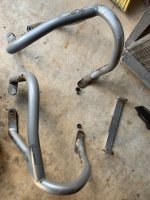
Remove Crash bars for blasting and powder coating Silver
Replace all steel bolts/screws with Wunderlich Torx Engine Kit Stainless A2 Socket Cap screws from Nippy Normans Replace Black plastic alternator cover and glue new BMW Roundel (60mm)
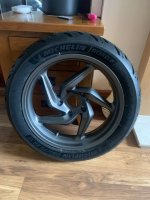
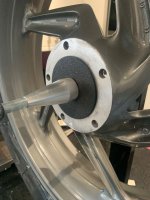
Remove Wheels and Rear Tyre (Michelin Road 6)
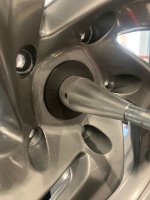
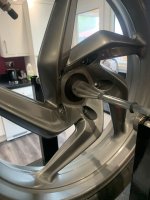
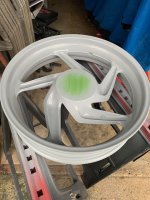
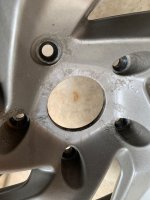
Remove wheel weights and Front discs and prep ready for painting
Remove complete Exhaust for cleaning and Polishing
Refit exhaust system with new Header Gaskets and clamp for collector
Remove rear TPMS from rear wheel
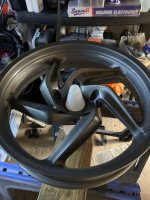
Paint both wheels with TeqPro Alloy wheel paint kit GTR Graphite Grey and clear coat
Replace rear tyre with new Michelin Road 6 150 70 17
Balance both wheels and refit
Replace front Brake calliper pinch bolts with Stainless ProBolt kit (SSFBCALIP20)
Replace all brake calliper mount bolts with stainless steel bolts from stock
Fitted 4way fuse block 12V 20A Waterproof fuse relay box kit with LED
Install front and rear camera system Innovv K6 from previous bike
Remove Air filter and replace with new
Remove Spark plugs and check
Check and adjust inlet and exhaust valve clearances (found very slightly tight) and replace spark plugs
Check and adjust throttle body sync.
Remove old number plate and replace with new
Remove genuine BMW Pannier racks and sell eBay
Service Vario Top Box. Lube sprockets and cut corner “reliefs” to help with smooth operation.
Fitted tank lid carbon protector
Fitted Tank protector from Motografix
Date finished above work 26th October 2024.
Work to do…
Remove ABS unit for rebuild
Replace Givi 330AF screen as it has crack and part missing. Replace with Givi 330DT then use upper part of screen of 330AF
Any recommendations or comments on what I’ve already done would be very welcome.

Cheers AJ
 
Hi thats sounds a comprehensive start! I'm due to get my older GS delivered end of this week so will be going along the same path as you. I'm interested in the "Service Vario Top Box. Lube sprockets and cut corner “reliefs” to help with smooth operation" line as the previous owner of the S/H luggage set I have just bought said the top box is stiff in operation so any info/video on how you did it would be appreciated.

Cheers SullyUK
Hi SullyUK,
I'll send you a link
where this guy made a video of the corner relief. I watched and thought this is a good fix. The only thing I would say, he doesn't take care when handling the panniers, so it's paramount that if your luggage is in good condition, put them on a soft surface like a towel or carpet.
After you undo the lower/base screws, carefully prise the top from the bottom. Do not touch any screws on the sides as this wont be necessary because the lifting gears are exposed for cleaning and lube to be applied. The corners are then accessible but care is needed.
Also the cutting of the corners are best done with a multi tool then clean up carefully with a craft knife, this removes the rag from the cut. Make sure the swarf and any other crap is cleaned from the little channel which is around the perimeter. Finally clean the box/pannier and wipe the rubber seal with a very small amount of silicone spray lube.

Good luck
AJ

featured_channel.jpg


0:08 / 3:35
 
:postpics

Please post em up

Re the ABS Servo unit

Drop a PM to Steptoe of of this parish, - he's you man when it comes to those units


Rear drive issues - contact mikeyboy, a true gent & a bona fide legend when it comes to the mechanical's
 
:postpics

Please post em up

Re the ABS Servo unit

Drop a PM to Steptoe of of this parish, - he's you man when it comes to those units


Rear drive issues - contact mikeyboy, a true gent & a bona fide legend when it comes to the mechanical's
Got it will do! Thanks for the info Santa-2512
 
These are some of the photos taken, I will take better ones soon. These were not intended to use for a Forum, but I have only joined yesterday. I will take photos with posting in mind in the future. Cheers AJ
 

Attachments

  • A2EE643E-D368-4E9A-91FA-E18E833CB7B3.jpeg
    A2EE643E-D368-4E9A-91FA-E18E833CB7B3.jpeg
    47.1 KB · Views: 68
  • IMG_1266.jpeg
    IMG_1266.jpeg
    101.7 KB · Views: 62
  • IMG_1246.jpeg
    IMG_1246.jpeg
    57.1 KB · Views: 62
  • IMG_1240.jpeg
    IMG_1240.jpeg
    45.4 KB · Views: 56
  • IMG_1239.jpeg
    IMG_1239.jpeg
    51.7 KB · Views: 56
  • IMG_1237.jpeg
    IMG_1237.jpeg
    51.1 KB · Views: 53
  • IMG_1217.jpeg
    IMG_1217.jpeg
    68.4 KB · Views: 53
  • IMG_1198.jpeg
    IMG_1198.jpeg
    95.2 KB · Views: 54
  • IMG_1193.jpeg
    IMG_1193.jpeg
    48 KB · Views: 53
  • IMG_1192.jpeg
    IMG_1192.jpeg
    43.7 KB · Views: 54
  • E69BED8D-1CE8-486E-9543-4E73DEDA8DA1.jpeg
    E69BED8D-1CE8-486E-9543-4E73DEDA8DA1.jpeg
    79.8 KB · Views: 53
  • IMG_1168.jpeg
    IMG_1168.jpeg
    40.7 KB · Views: 54
  • IMG_1166.jpeg
    IMG_1166.jpeg
    74.4 KB · Views: 59
Hi thats sounds a comprehensive start! I'm due to get my older GS delivered end of this week so will be going along the same path as you. I'm interested in the "Service Vario Top Box. Lube sprockets and cut corner “reliefs” to help with smooth operation" line as the previous owner of the S/H luggage set I have just bought said the top box is stiff in operation so any info/video on how you did it would be appreciated.

Cheers SullyUK
 

Attachments

  • IMG_1283.jpeg
    IMG_1283.jpeg
    36.4 KB · Views: 65
This was one of the cuts...about 3mm wide. dont be shy with it as you can see it closes as the box/pannier is compressed.
 
Just a shout out to the guys who helped with an economical solution for rear wheel balancing. Great adapter at a great price! link here.

 
I thought cutting varios to relieve pressure and binding was the way to go, turns out i was wrong, it made no difference.

The root cause of Stiction and binding is all down to the gear timing in the mechanisms.

One tooth out on any of the cogs is enough to cause the problem


If you strip the mechs there are 3 gears in each, they each have, if i recall a timing mark which is both the start and end mark.

You need to align the the cogs and assemble each mech assy. Then each mech assy needs fitting with the relevant case part in the right position.

Its the timing of gears, mechs, and case position that gives the smooth operation with no Stiction or binding

What happens is the varios get stiff, and people pull on them, this causes one or more gear cog to jump a tooth, then its downhill from there

The difficult part is fitting an aligned gear assy into the case, and then putting the other half of the variio in to screw it together
Yea I checked the alignment marks and they were in line, so I lubed very carefully, although they shouldnt need it, and tried the corner cuts. Before cutting the corners, the box would only move a small amount...now the box compresses easily. It worked for me.
 
Hi SullyUK,
I'll send you a link
where this guy made a video of the corner relief. I watched and thought this is a good fix. The only thing I would say, he doesn't take care when handling the panniers, so it's paramount that if your luggage is in good condition, put them on a soft surface like a towel or carpet.
After you undo the lower/base screws, carefully prise the top from the bottom. Do not touch any screws on the sides as this wont be necessary because the lifting gears are exposed for cleaning and lube to be applied. The corners are then accessible but care is needed.
Also the cutting of the corners are best done with a multi tool then clean up carefully with a craft knife, this removes the rag from the cut. Make sure the swarf and any other crap is cleaned from the little channel which is around the perimeter. Finally clean the box/pannier and wipe the rubber seal with a very small amount of silicone spray lube.

Good luck
AJ

featured_channel.jpg


0:08 / 3:35
Thats great AJ thank you that really helps.
 
wow...that a major going over! I havent taken the tank off yet, but will be getting the ABS unit out and check the motor, as the Brake Failure light is on permanently. The guy who I bought the bike off, put it on the diagnostic tool when I was there and it pointed to the motor as the possible cause.
Since my post, I have changed the Clutch Fluid and the Brake Fluid. Both were slightly discoloured.
Good luck with the strip down, I'll look forward to updates.
Cheers AJ
Did you use Brake and clutch fluid in the Clutch circuit ????

You can replace the Motor with one from a Mk9 Fiesta I've done it a couple of times
 
No, they are different. The Brake circuit has Dot 4 standard fluid and the Clutch has Hyspin V10 which is mineral based. Very important that you get the correct fluid for the clutch. I got mine from Nippy Normans at a price of £17.70 plus shipping


Back
Top Bottom