Hi guys,
I thought I'd share this for those who were hesitating about doing a DIY strip down and Denali installation.
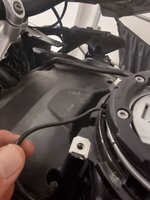
Despite some concern before starting the job and a deal of trepidation regarding my size 13 hands and 5 thumbs I went the whole hog and removed everything including the tank which, as it turned out, is remarkably easy. The fuel line and two electrical connections to the tank are robust and easy to remove and replace. Removing the tank and following the video made threading the cables a snip, (checking that everything worked before doing the final installation) fitting them snuggly along the existing cable trunking using a plethora of small zip ties as I went. A la Steve Abel I also threaded the three cables (horn and lights x2) into some Plastic Net Expandable Cable Trunking from Amazon between the tank and rear bulkhead. Whilst on that subject I also used Corroplast Thin Fabric Tape (Amazon) to finish off the task and make the entire install appear OEM. This is the same tape BMW use for their wiring looms. I also used that tape to cover the ends of the horn cable as it connects to the horn masking the exposed cables to look OEM and giving them further protection as they're exposed to the elements under the beak. Other than that I followed Steve Abel's guidance with one exception. One of the right hand panels (the one with the silver radiator cowling on a Triple Black) is secured with a plastic rivet and plug. I found it next to impossible to remove it without destroying it. The thing is buried deep in the bowels of the bike. I would suggest that if you really want to remove the panel completely a special tool is needed to remove the pin and plug, which can again be purchased on Amazon. As it turned out I removed all the retaining screws from that panel save the plastic rivet leaving the panel loose enabling access to the cable routes without difficulty. I also removed the entire rear assembly, including the luggage frames, exposing the rear of the bike which again made threading the cables so much easier. The horn cable, as it turned out, was only just long enough to comfortably reach the Cansmart, something to bear in mind when doing the final fitting. Lastly, apart from liberally using cable ties to secure everything, making sure cables did not get pinched or risk rubbing on any moving parts I also liberally sprayed every connection internally with WD 40 Specialist Contact spray to ensure there would be no moisture getting into the plugs as a precaution, even though the plugs are well built and apparently weather proof. Lastly I then did another system check with all the cables etc secured, making sure everything worked, programming the Cansmart as I wanted. That is very easy, especially if you follow Steve Abel's instructions.
And now to the re-build. This worried me more than anything else before starting the job. It shouldn't have. Again if you follow Steve Abel's videos all that's required is patience and some precision. His instructions are absolutely correct down to every type of bolt and screw used and where to use it. Follow his guide precisely and you'll have no problems. I used my phone for this, pausing as I went to complete each task before moving onto the next. Don't force anything, take your time, if something doesn't appear to be correct that's undoubtedly your fault, so stop and think it through. This happened to me once or twice when screws didn't fit as described. After a deal of patience and a bit of panel wiggling the screws do fit, patience is the key. The feeling of achievement and some relief when the last screw went in leaving nothing in the tupperware box I used to keep them safe, was a total joy. The whole exercise took me three days. One to disassemble, one to fit and the final day to rebuild everything working for 4 hrs or so each day. Bear in mind I'm a complete numpty mechanically and a cluts with no patience whatsoever causing me to stop regularly, have a cuppa, recoup my patience and have a think, re-watching parts of Steve's video as needed. I cannot stress the word PATIENCE highly enough. Tools wise a quality set of Torx bits (Wera Tool-Check Plus), an electric screwdriver (Bosch), manual screwdriver handle for the bits (Wera), a quality socket set (Wera again) and ratchets particularly a small one, needle nosed pliers to help with hard to get at screws (sadly BMW screws are not magnetic), a sharp cable tie cutter and lastly an LED camping head light to help my old eyes see the job (essential in my case).
After all this the results far exceed expectation. I used Denali S4 lights, Denali GSA under beak bracket for the lights, Denali compact SoundBomb and bracket and a Denali CanSmart. The lights are incredibly bright, nobody could fail to see you using them and the Soundbomb output is nothing less than shattering. Now couple it to strobing lights and even an errant Italian on a promise cannot fail to take note
")
. I ride quite a lot through Italy......love the place and the people but boy oh boy they drive like Fangio on crack

.
Apologies for the length of this, hope it will help those thinking about DIY lights etc. Stay safe and well. Regards, Tony
LASTLY A HUGE SHOUT OUT AND THANK YOU TO STEVE ABEL AT 'A BIKE THING'
https://www.youtube.com/c/ABIKETHING/videos. He's a Denali dealer who has taken enormous amounts of time to make countless excellent entertaining and concise videos. Without his video's I would not of even thought about doing this. Thank you Steve.