
You are using an out of date browser. It may not display this or other websites correctly.
You should upgrade or use an alternative browser.
You should upgrade or use an alternative browser.
Two stroke winter project
- Thread starter (RIP) Tunneruk
- Start date
Thanks for taking the time to show everything that you have found. Looking forward to seeing how matters progress
+1

do like a nice rebuild report and piccy's
I've had the last 5 days off work so I've been hard at it. Unfortunately I don't have lots of finished components to show for it. It's been more of the same, prep, prep, prep and more prep. I have started to get some bits in primer but I have also found some parts which I now realise that I'll have to replace....
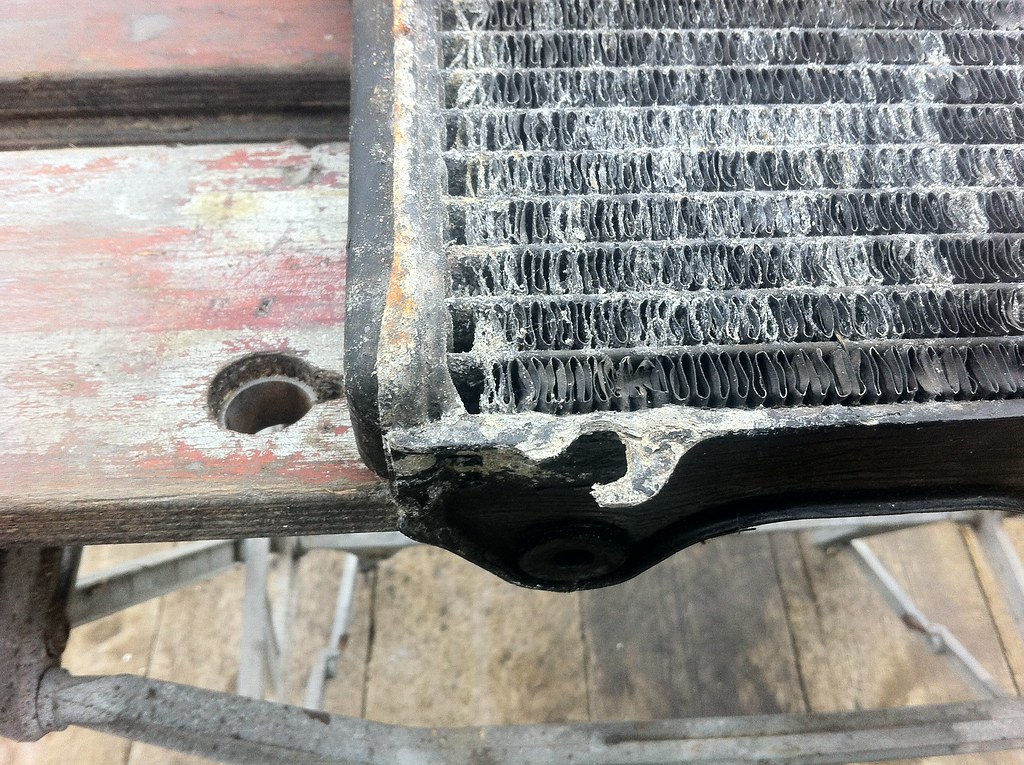
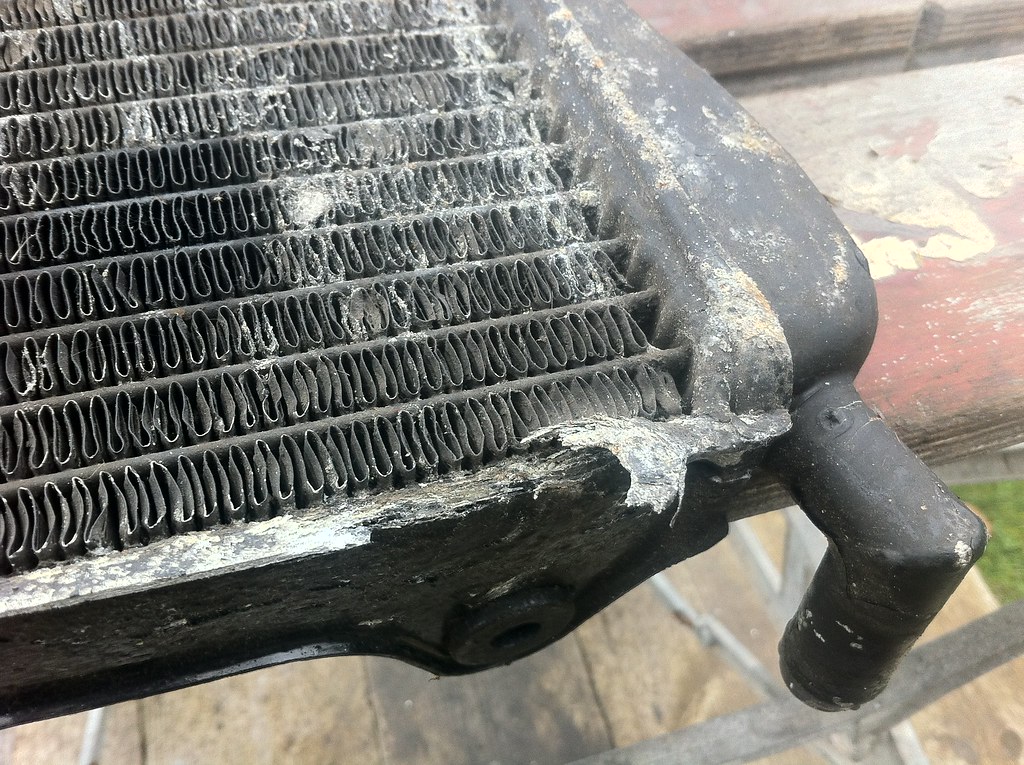
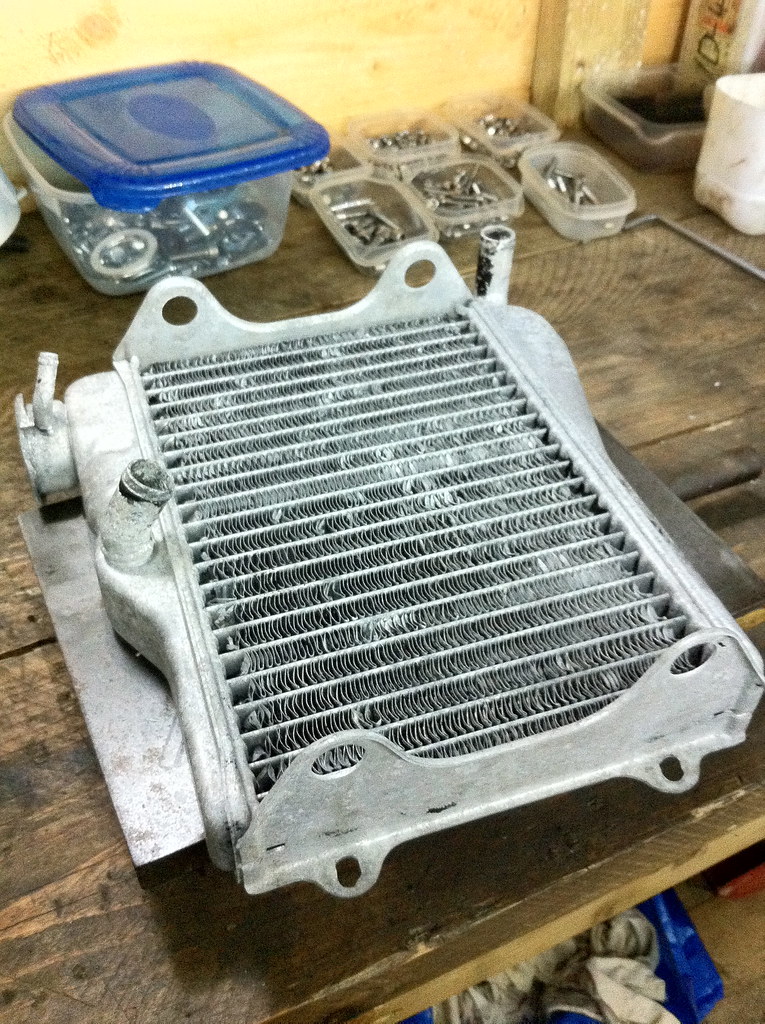
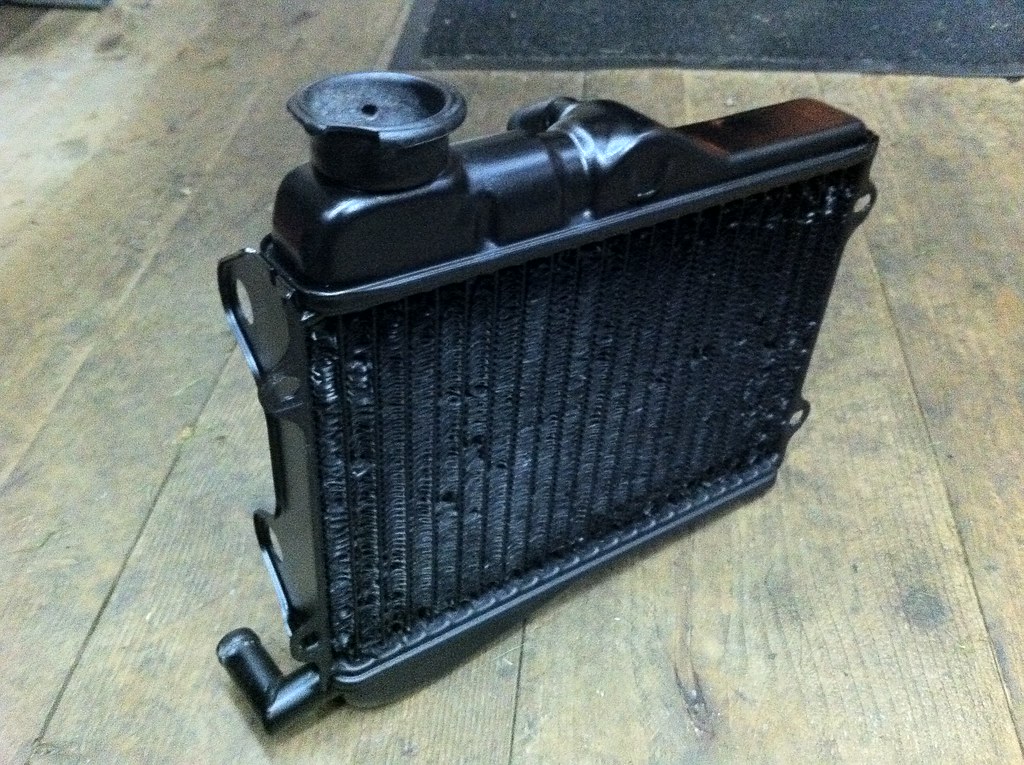
The radiator had a chrome guard bolted to it, I actually quite like it so I've decided that it's going to go black and go back on. I'd the rad and the guard from the bike as an assembly and put it to one side, imagine my dismay to find this when I dismantled the assembly .......
IMG_1581 by tunneruk, on Flickr
It has literally disintegrated! So, I'm hunting out a suitable replacement!
IMG_1583 by tunneruk, on Flickr
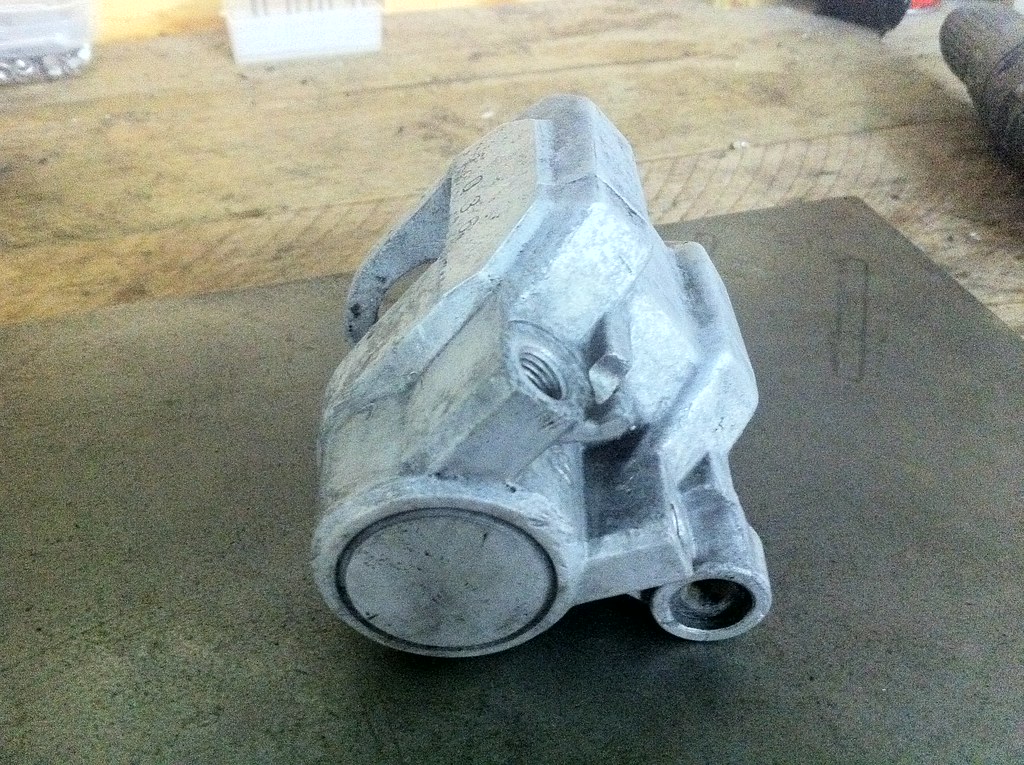
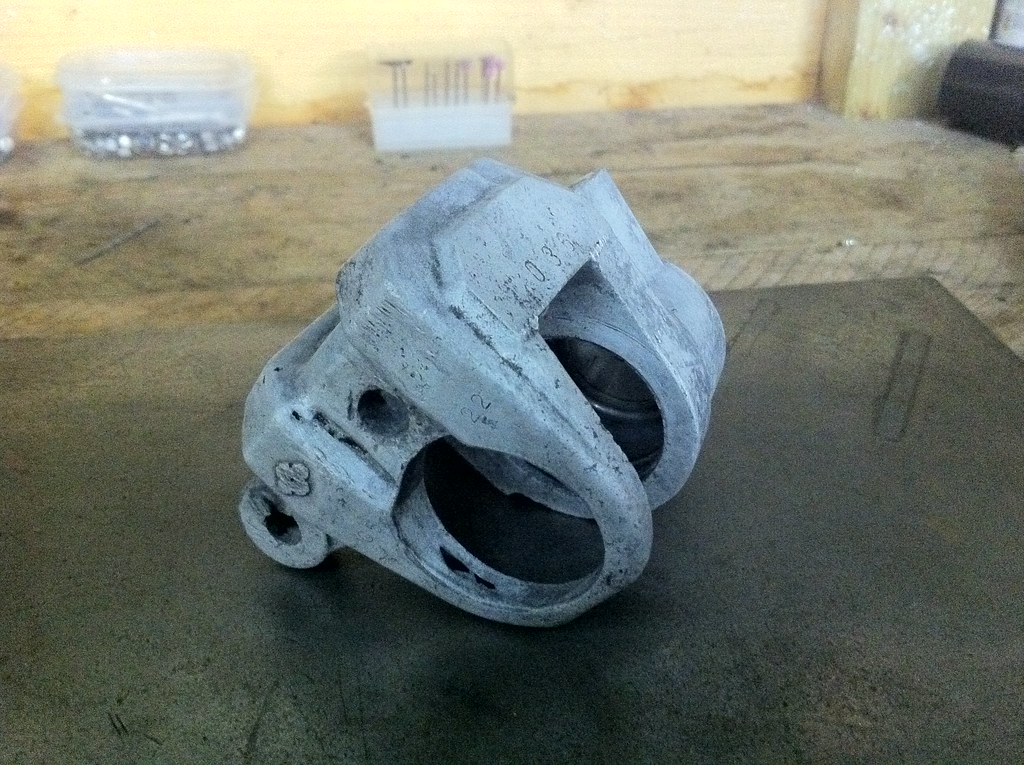
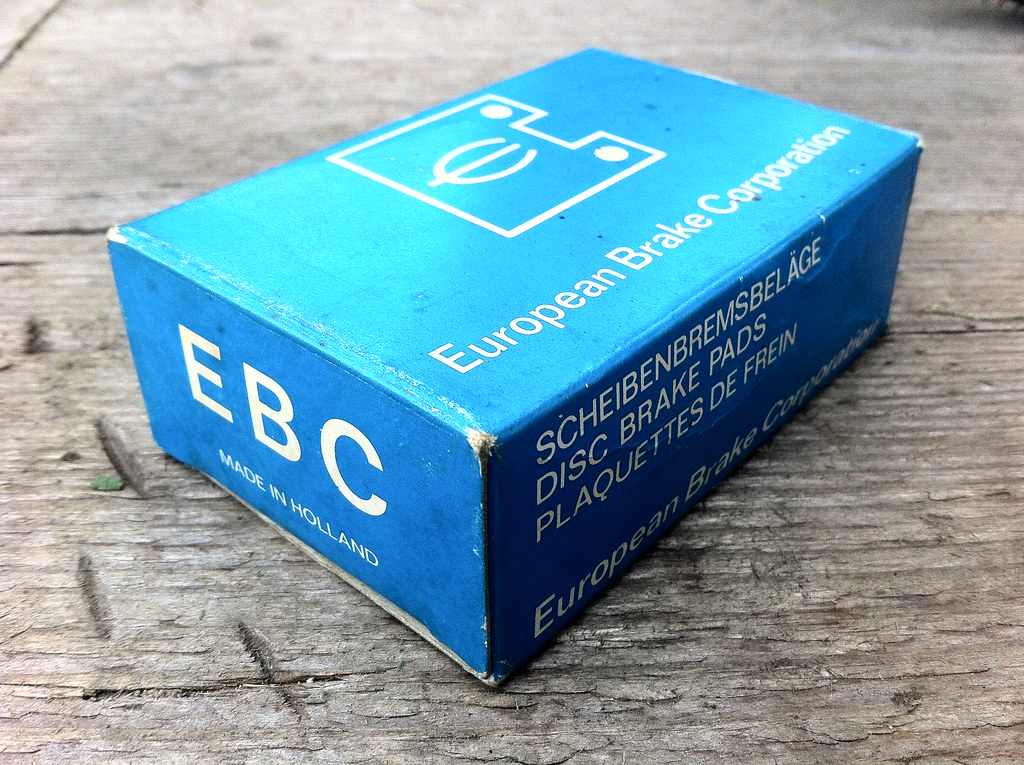
I pulled the complete brake calliper out of the 'to do' box and set about assessing the damage, a full rebuild is required including a new piston, "I'll just whip the beed nipple out" I thought, "Oh no you won't" it thought ...... Snap..... swear ...... drill and tap. Into the paint stripper it went and here's the result. It's actually now in primer but I've not photographed it. It's a bit knocked about so it'll need a fair bit of work to make it lovely again.
IMG_1592 by tunneruk, on Flickr
IMG_1594 by tunneruk, on Flickr
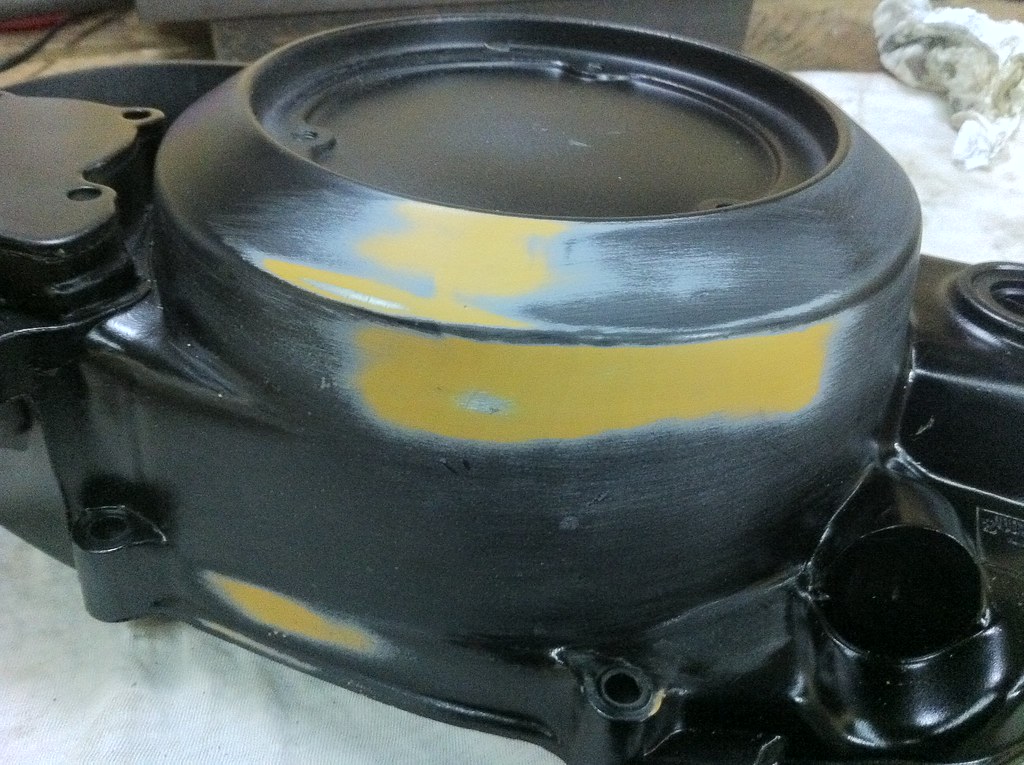
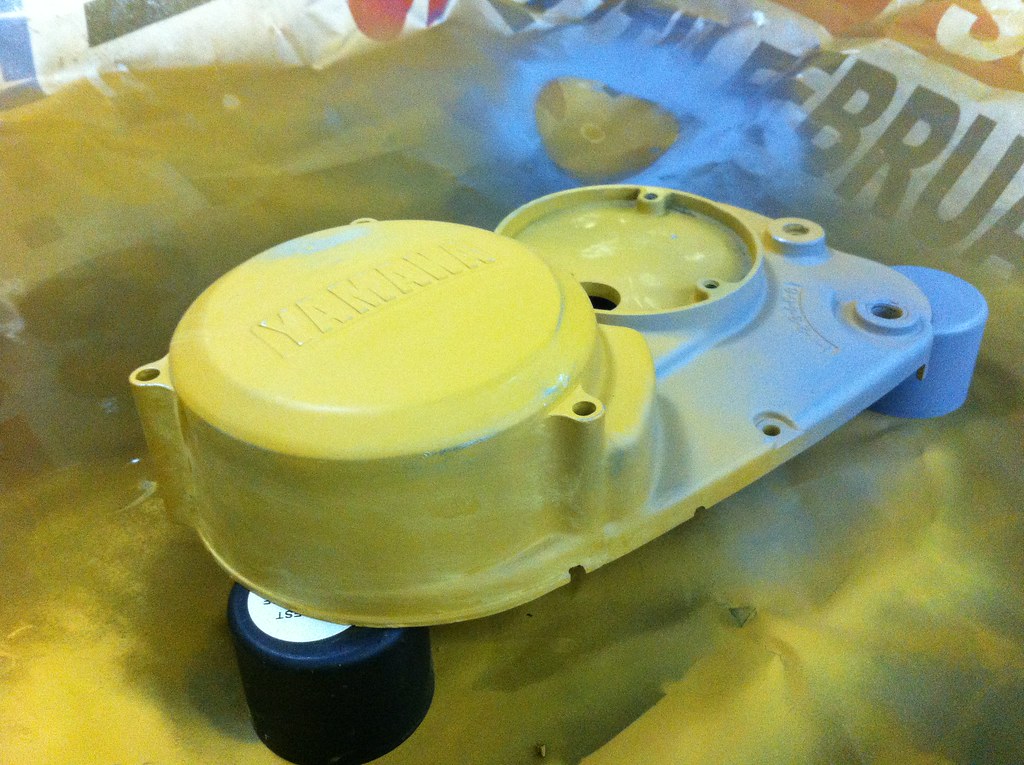
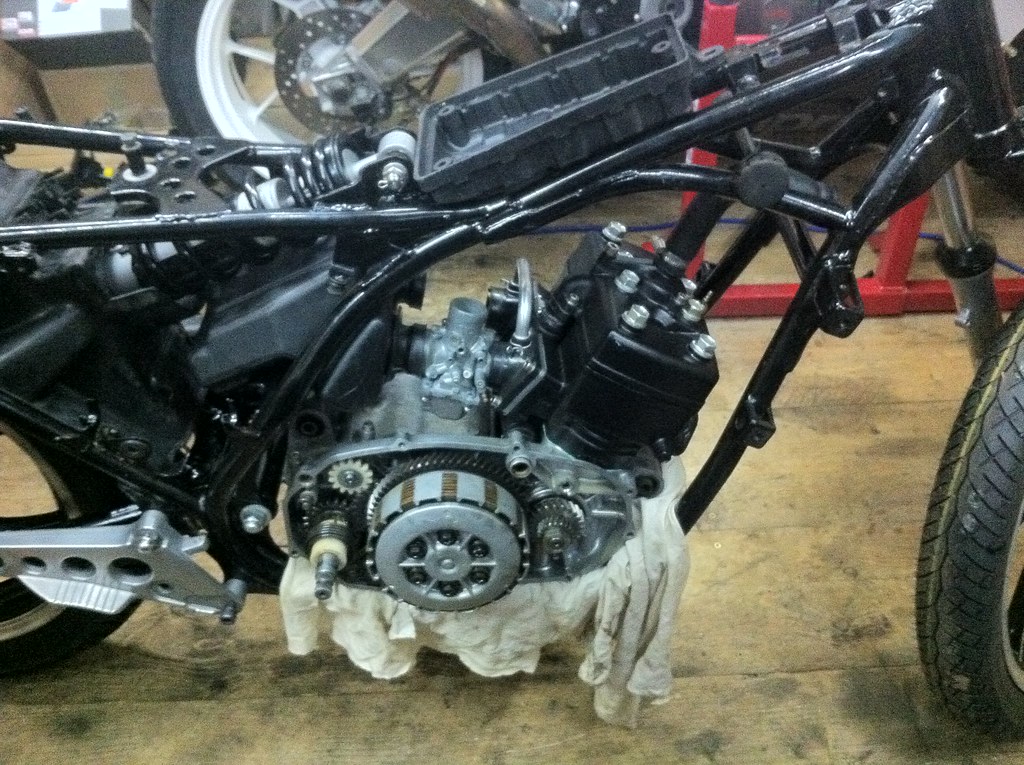
I filler primed, primed and painted the clutch side casing in quick succession, only to find that when the paint had dried that there were some unacceptable blemishes in the primer, so back on the bench it went and out with the 600......
IMG_1607 by tunneruk, on Flickr
That's better ..........

IMG_1611 by tunneruk, on Flickr
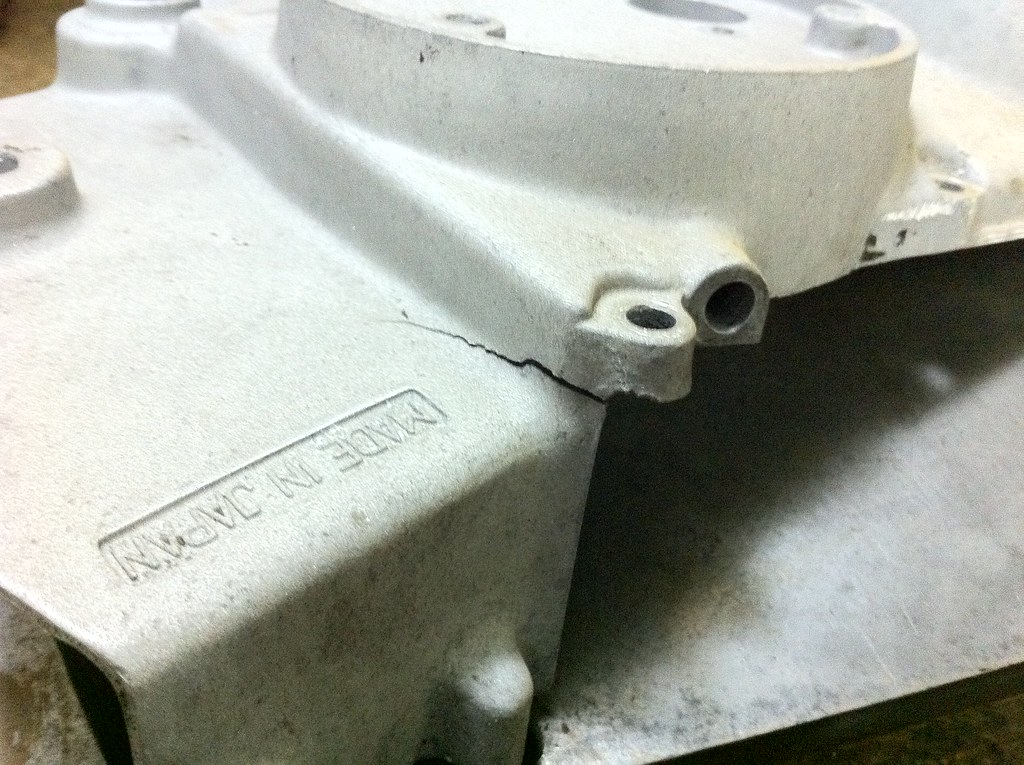
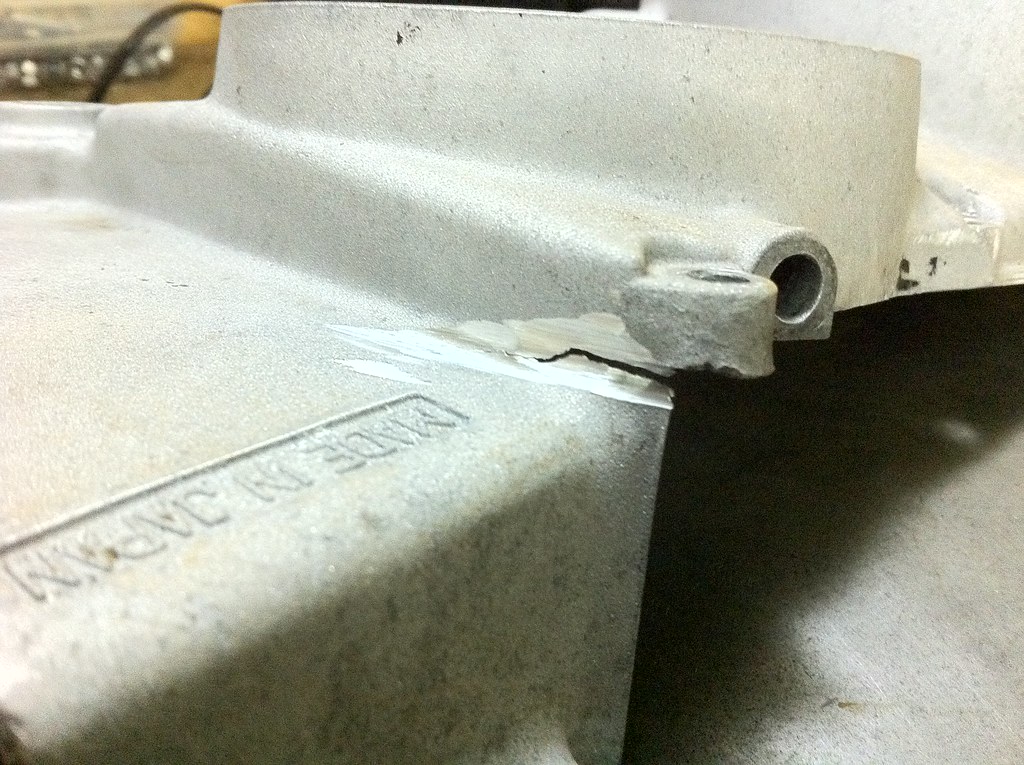
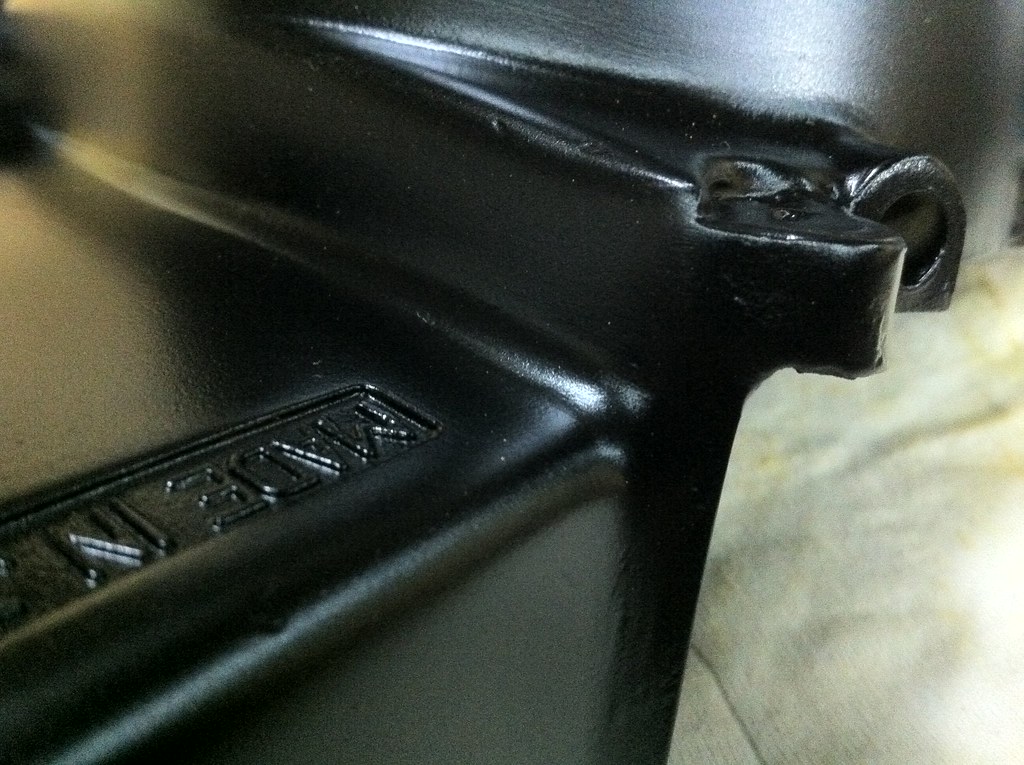
Having stripped the flywheel casing I have found a small crack. It's not structural nor does it really matter as it only covers the front sprocket. However I've not stripped it for nothing and ordinarily I'd weld it up but as it's only cosmetic out came the chemical metal.
IMG_1601 by tunneruk, on Flickr
IMG_1603 by tunneruk, on Flickr
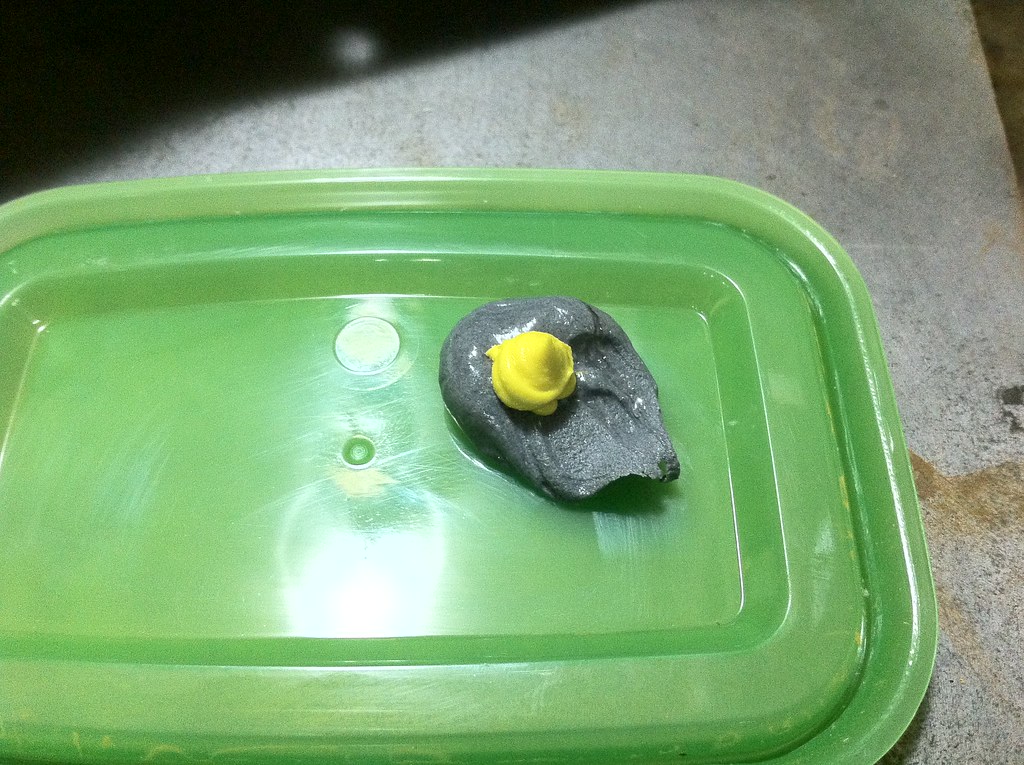
I did take a photo of the application but for some reason It hasn't saved on the phone?
IMG_1605 by tunneruk, on Flickr
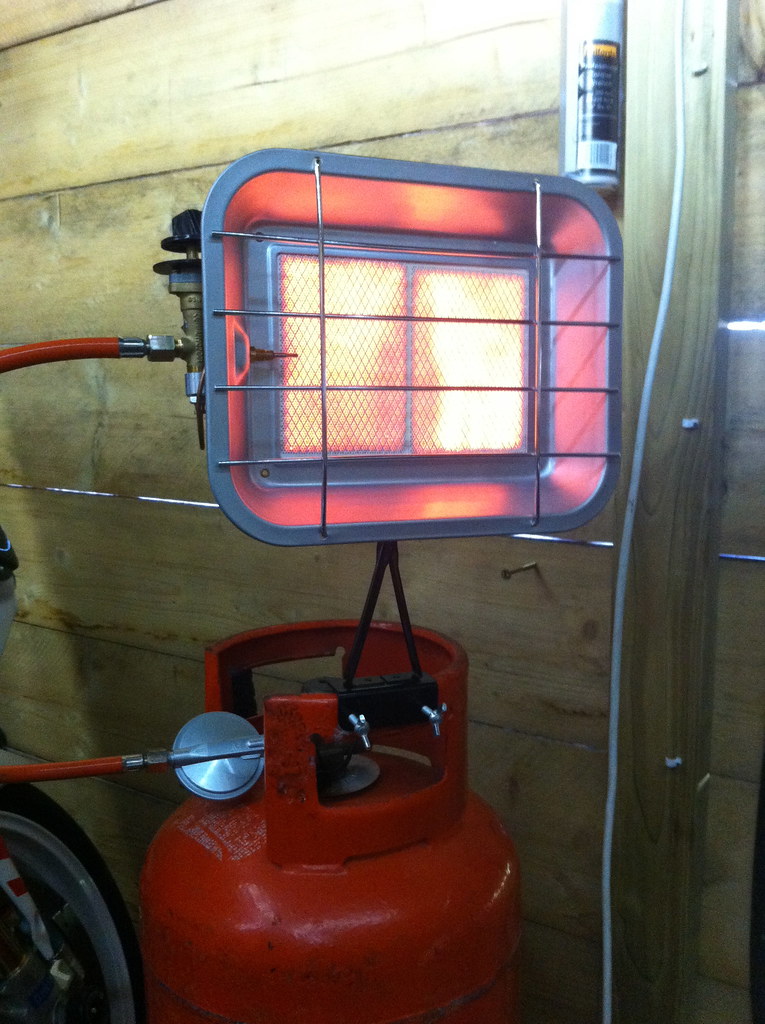
I do have a new best friend up in my workshop. Never underestimate how much comfort can come from a companion like this......
IMG_1588 by tunneruk, on Flickr
I would have love to have bought all original Yamaha replacement parts but alas cost and availability have both been factors. These small end bearings came from a company that advised not to buy cheap rubbish from other sellers and "Buy these Japanese quality components, your engine is not worth the risk"
Perhaps these were made in the aftermath of the Tsunami
I think they are more likely to have been made in a small but famous town in Northern Italy...... Naturally the said company can have them back and I have another set on the way

IMG_1599 by tunneruk, on Flickr
There are now a few bits and pieces in primer waiting to be painted. I'll photograph them before their final coats ..........
The radiator had a chrome guard bolted to it, I actually quite like it so I've decided that it's going to go black and go back on. I'd the rad and the guard from the bike as an assembly and put it to one side, imagine my dismay to find this when I dismantled the assembly .......
IMG_1581 by tunneruk, on Flickr
It has literally disintegrated! So, I'm hunting out a suitable replacement!
IMG_1583 by tunneruk, on Flickr
I pulled the complete brake calliper out of the 'to do' box and set about assessing the damage, a full rebuild is required including a new piston, "I'll just whip the beed nipple out" I thought, "Oh no you won't" it thought ...... Snap..... swear ...... drill and tap. Into the paint stripper it went and here's the result. It's actually now in primer but I've not photographed it. It's a bit knocked about so it'll need a fair bit of work to make it lovely again.
IMG_1592 by tunneruk, on Flickr
IMG_1594 by tunneruk, on Flickr
I filler primed, primed and painted the clutch side casing in quick succession, only to find that when the paint had dried that there were some unacceptable blemishes in the primer, so back on the bench it went and out with the 600......
IMG_1607 by tunneruk, on Flickr
That's better ..........
IMG_1611 by tunneruk, on Flickr
Having stripped the flywheel casing I have found a small crack. It's not structural nor does it really matter as it only covers the front sprocket. However I've not stripped it for nothing and ordinarily I'd weld it up but as it's only cosmetic out came the chemical metal.
IMG_1601 by tunneruk, on Flickr
IMG_1603 by tunneruk, on Flickr
I did take a photo of the application but for some reason It hasn't saved on the phone?
IMG_1605 by tunneruk, on Flickr
I do have a new best friend up in my workshop. Never underestimate how much comfort can come from a companion like this......
IMG_1588 by tunneruk, on Flickr
I would have love to have bought all original Yamaha replacement parts but alas cost and availability have both been factors. These small end bearings came from a company that advised not to buy cheap rubbish from other sellers and "Buy these Japanese quality components, your engine is not worth the risk"
Perhaps these were made in the aftermath of the Tsunami
I think they are more likely to have been made in a small but famous town in Northern Italy...... Naturally the said company can have them back and I have another set on the way
IMG_1599 by tunneruk, on Flickr
There are now a few bits and pieces in primer waiting to be painted. I'll photograph them before their final coats ..........
So here it is ........ all finished!
Ha ha, if only!
SWIMBO has been away on business this week so I've had plenty of time on my hands and I've spent nearly all of it up in my shed!
It's been pretty much more of the same really, lots and lots of prep and a few finished bits. It's starting to come together, slowly but surely.
I repaired the crack in the casing flange. It's completely invisible now.
IMG_1623 by tunneruk, on Flickr

IMG_1626 by tunneruk, on Flickr
IMG_1630 by tunneruk, on Flickr
IMG_1631 by tunneruk, on Flickr
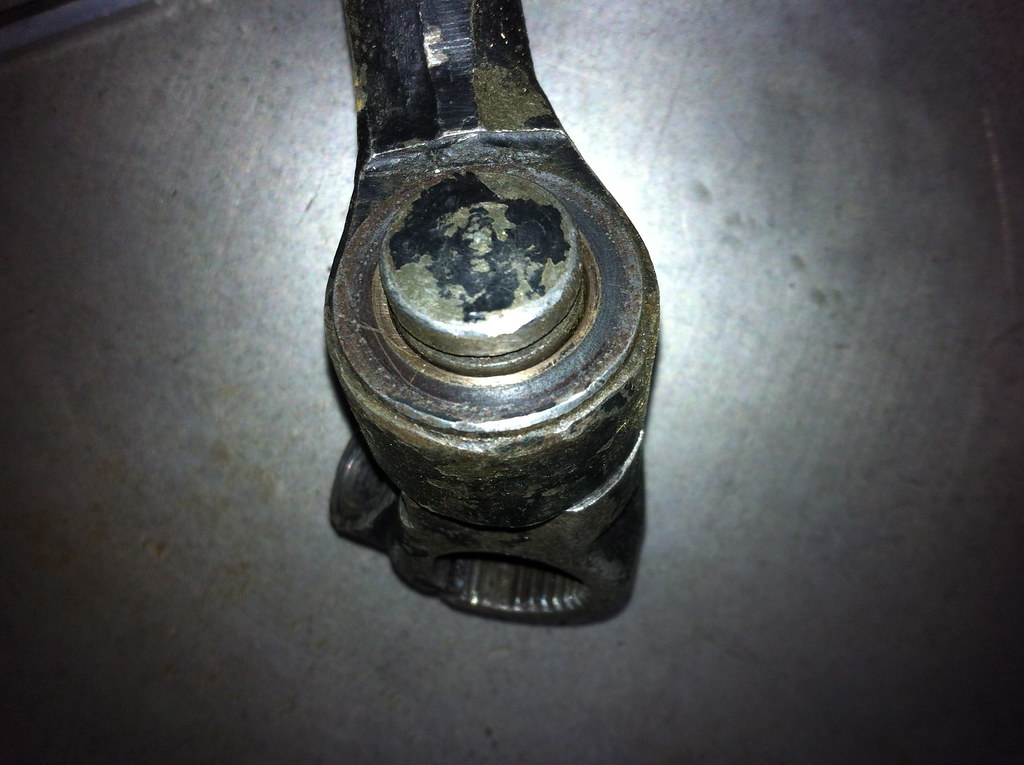
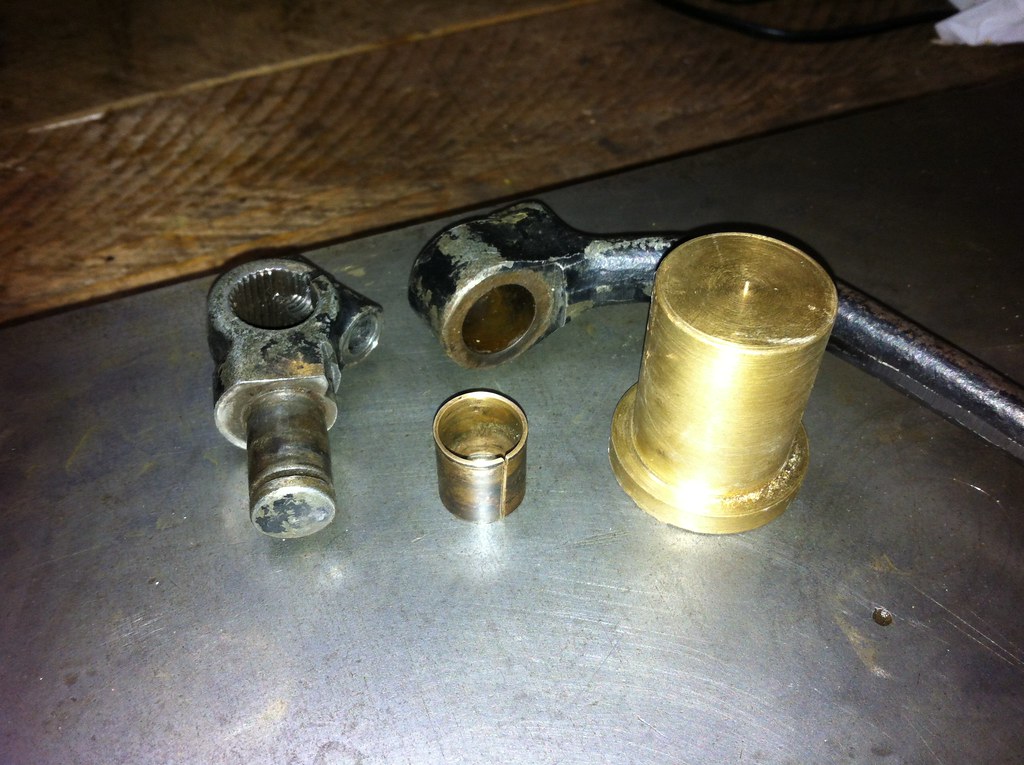
The kickstart was like a dick in a bucket ( sorry, old engineering saying)
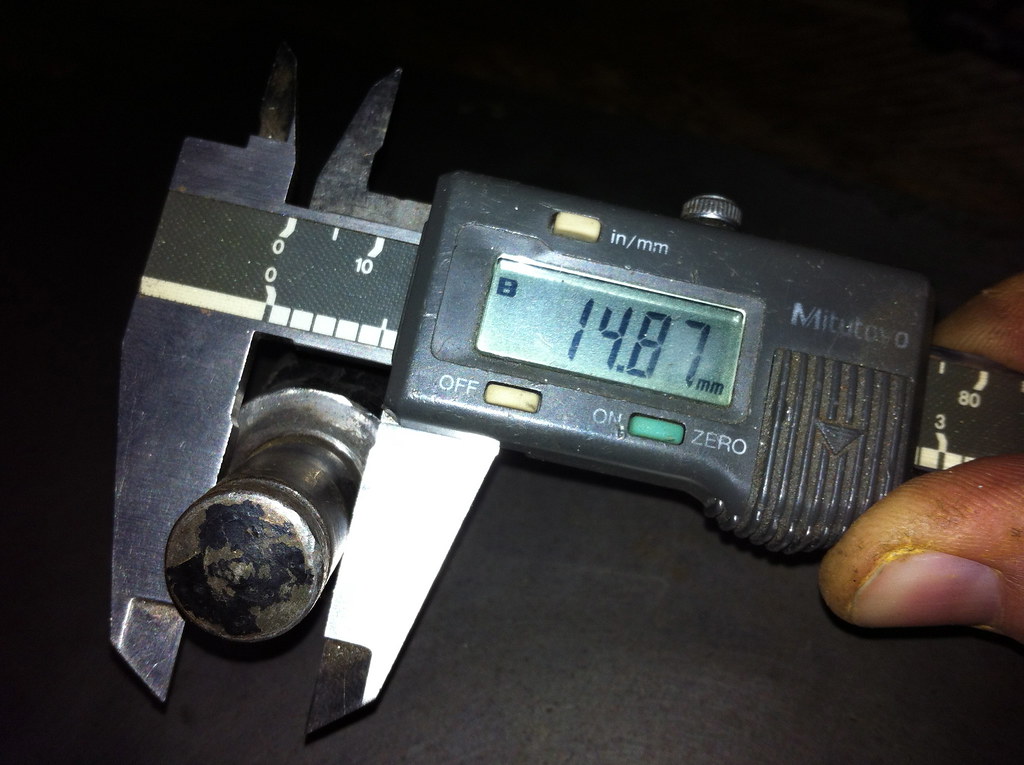
I'd talked myself into leaving it as it was but every time I picked it up the play in the bush would bug me. Nothing else for it, it had to be sorted. I had a small billet of phosphor bronze so after a couple of very helpful and friendly guys on here offered to let me use their lathe I was all set.
IMG_1638 by tunneruk, on Flickr
IMG_1639 by tunneruk, on Flickr
IMG_1640 by tunneruk, on Flickr
IMG_1642 by tunneruk, on Flickr
IMG_1643 by tunneruk, on Flickr
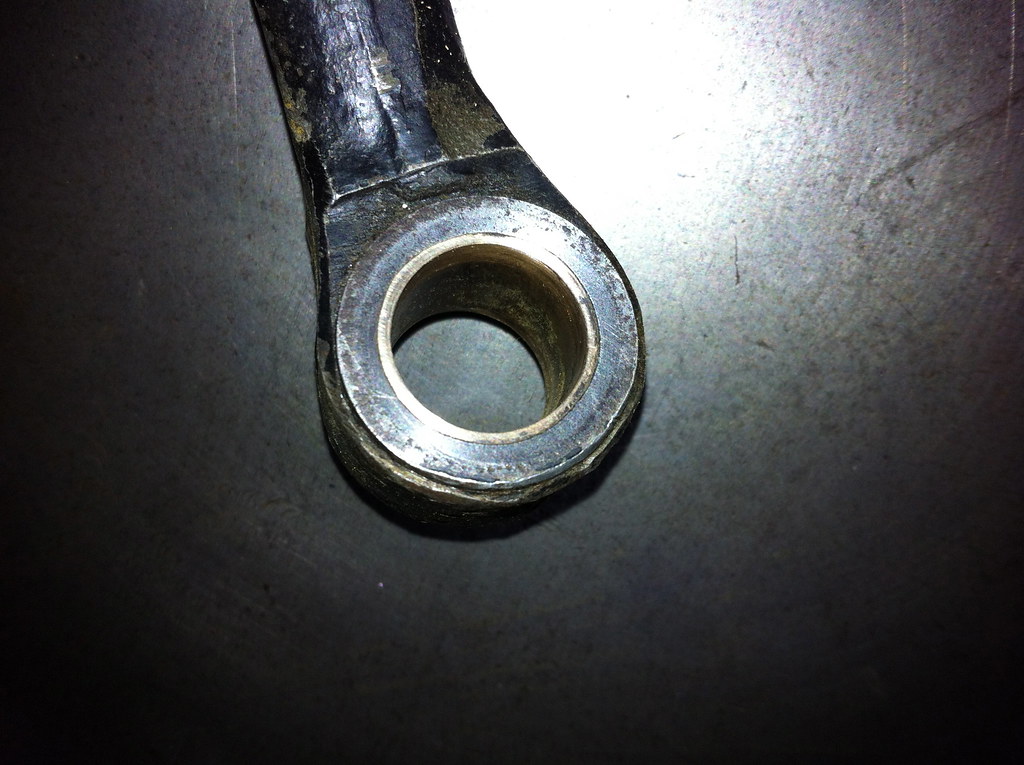
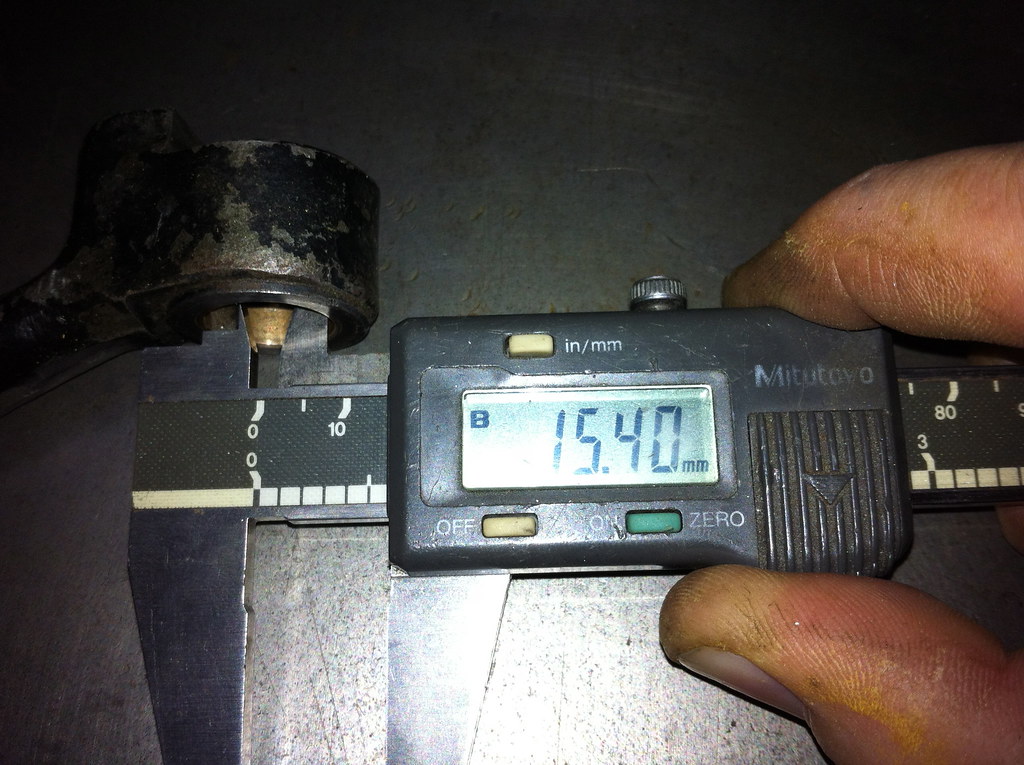
The new bush all turned and ready to go in (I forgot to photograph it in the lathe )
)
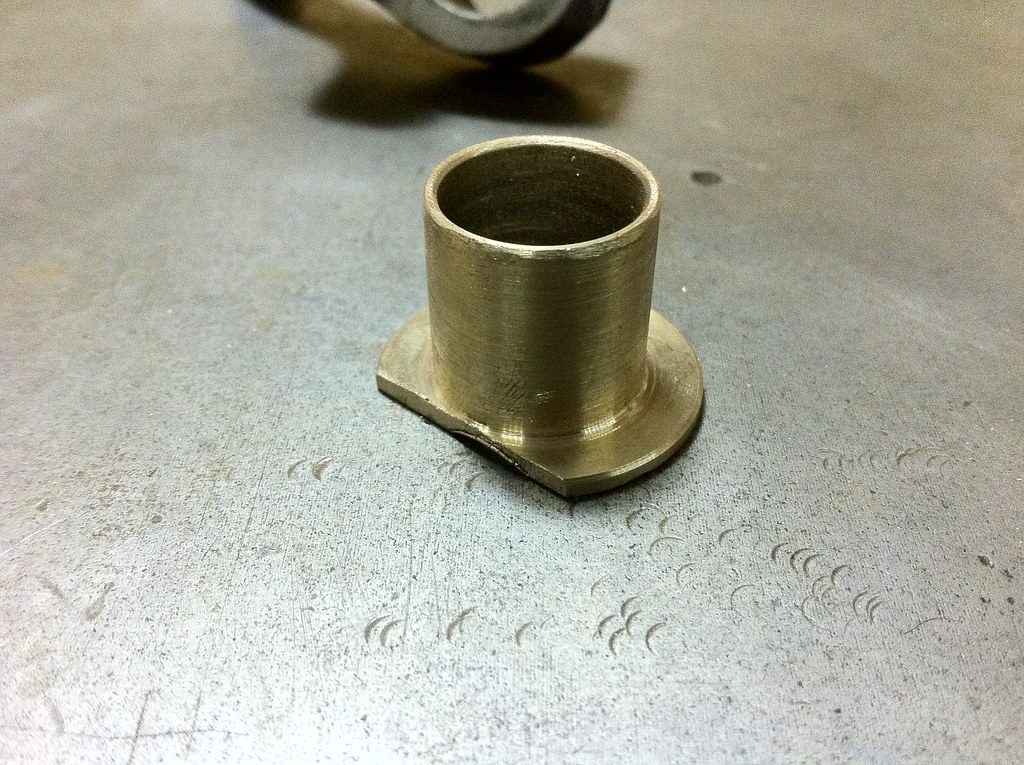
IMG_1659 by tunneruk, on Flickr

IMG_1660 by tunneruk, on Flickr
IMG_1662 by tunneruk, on Flickr
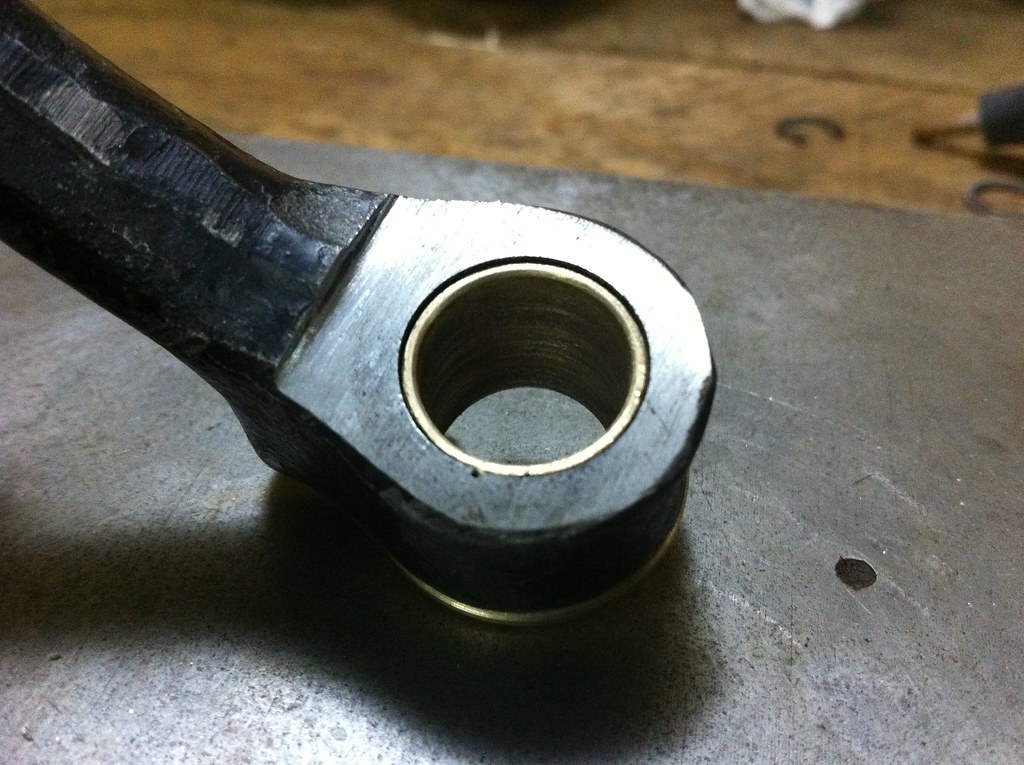
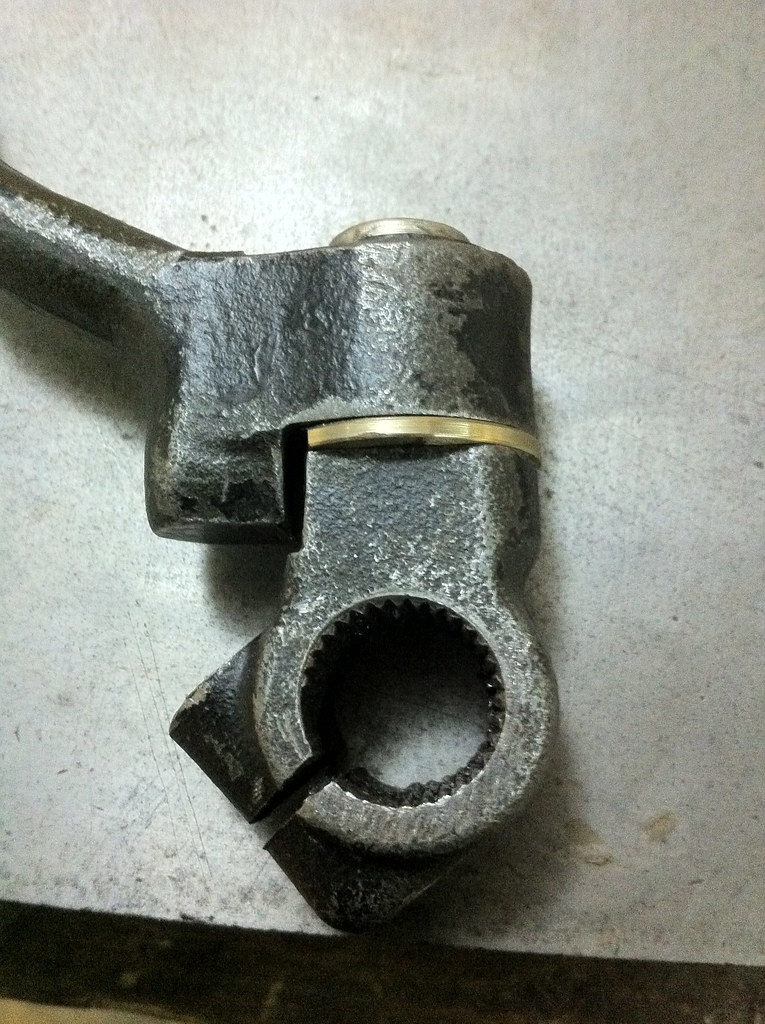
All back together. I left a thou or so in the bore and lapped the spigot into it, it's bloody lovely now!
IMG_1665 by tunneruk, on Flickr
I could have saved myself a much time and effort by replacing a lot of the parts on this bike for new, a few friends have asked 'Why don't you just buy a new one of these and a new one of those"
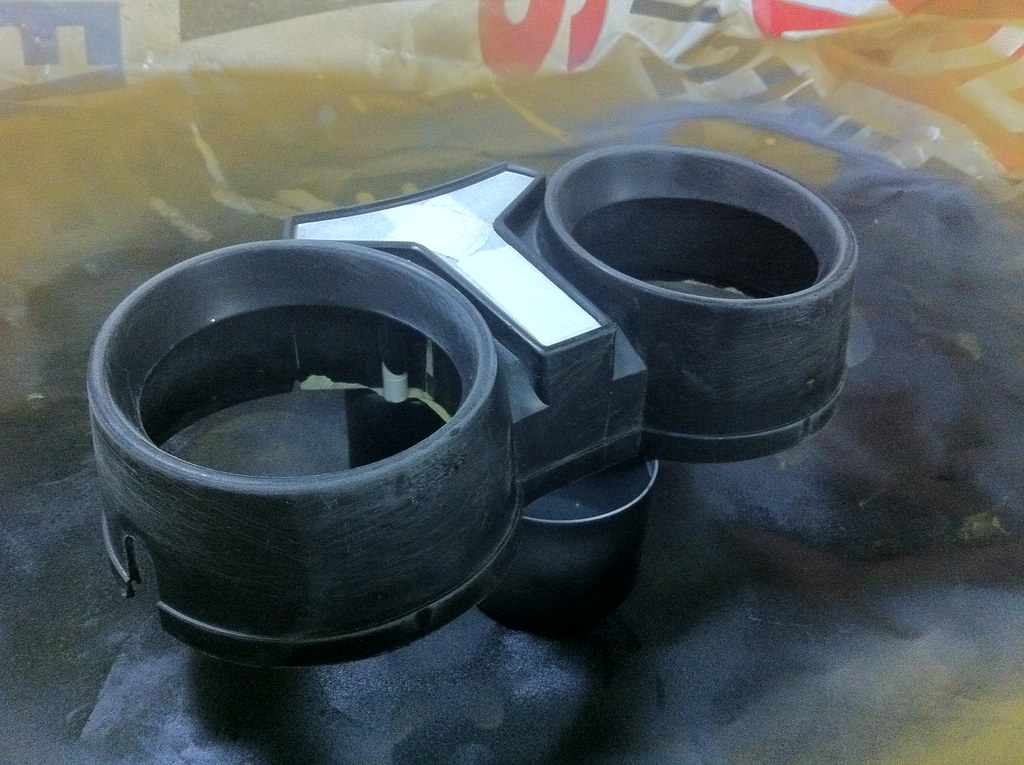
I bought this bike to restore it not replace it. This it the clock surround (unless you didn't guess) It's a bit knocked about and a brand spanking new Yamaha old stock one is only about £40 but none the less, restorable it is so restored it will be!
IMG_1646 by tunneruk, on Flickr
IMG_1648 by tunneruk, on Flickr
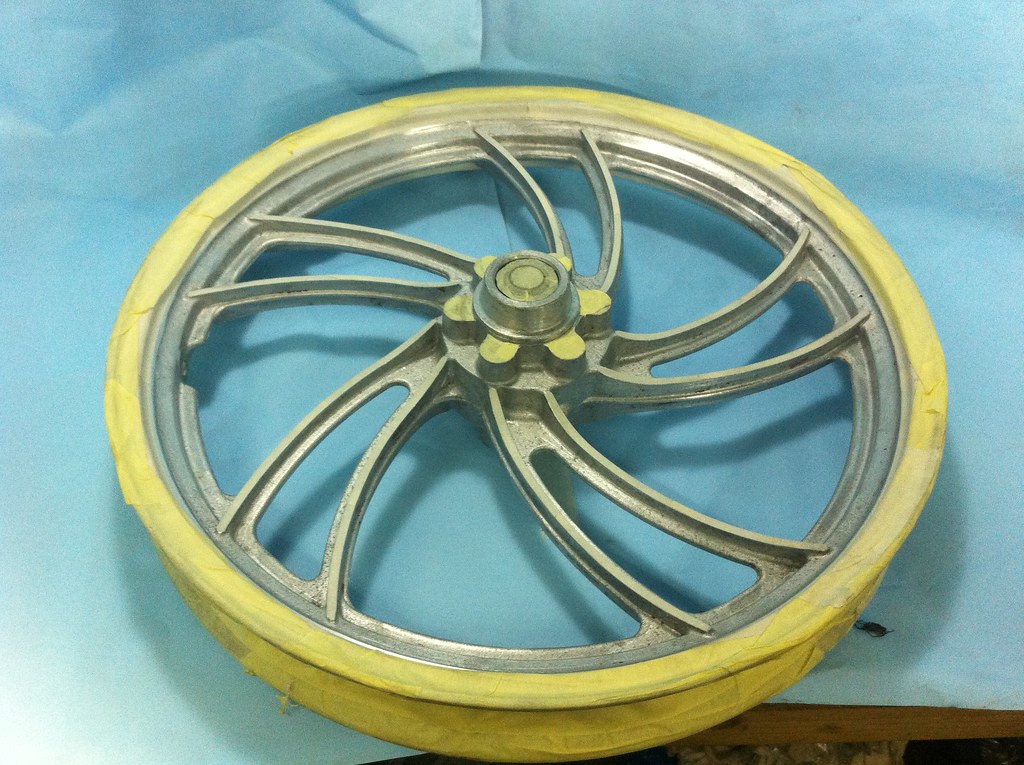
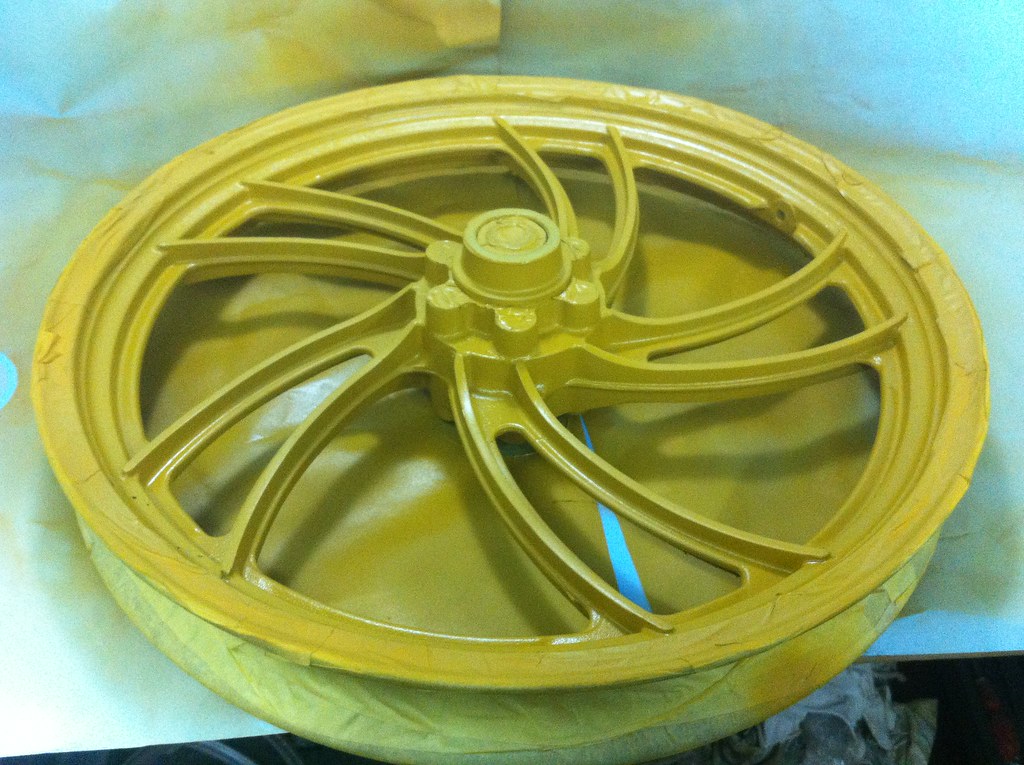
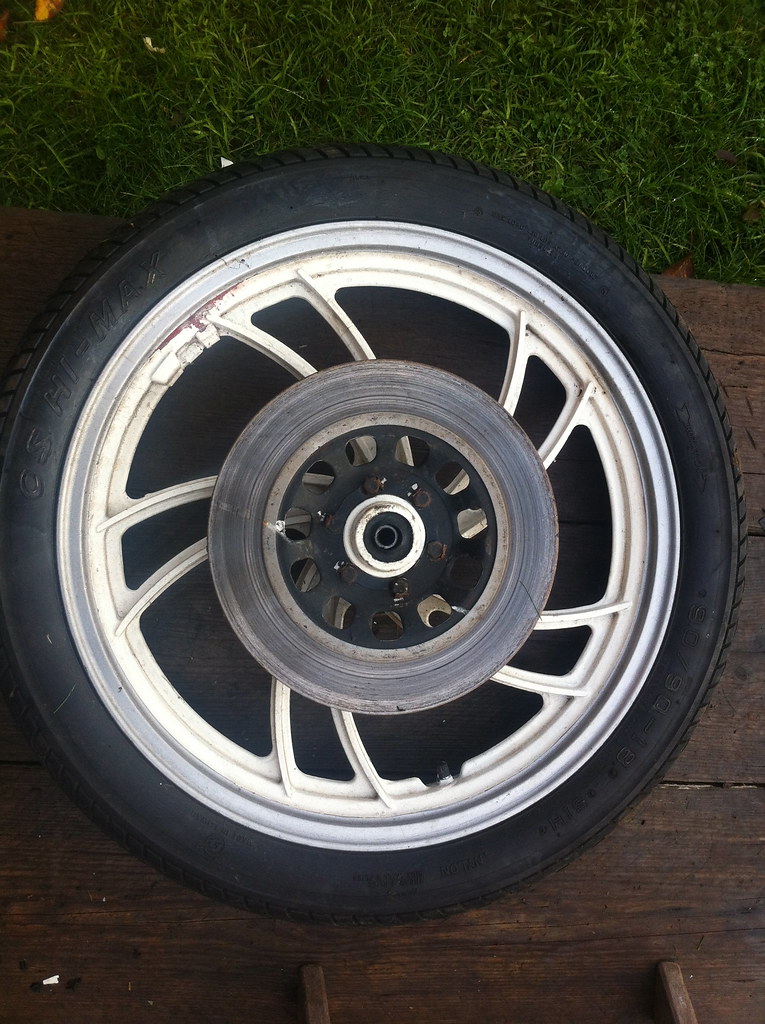
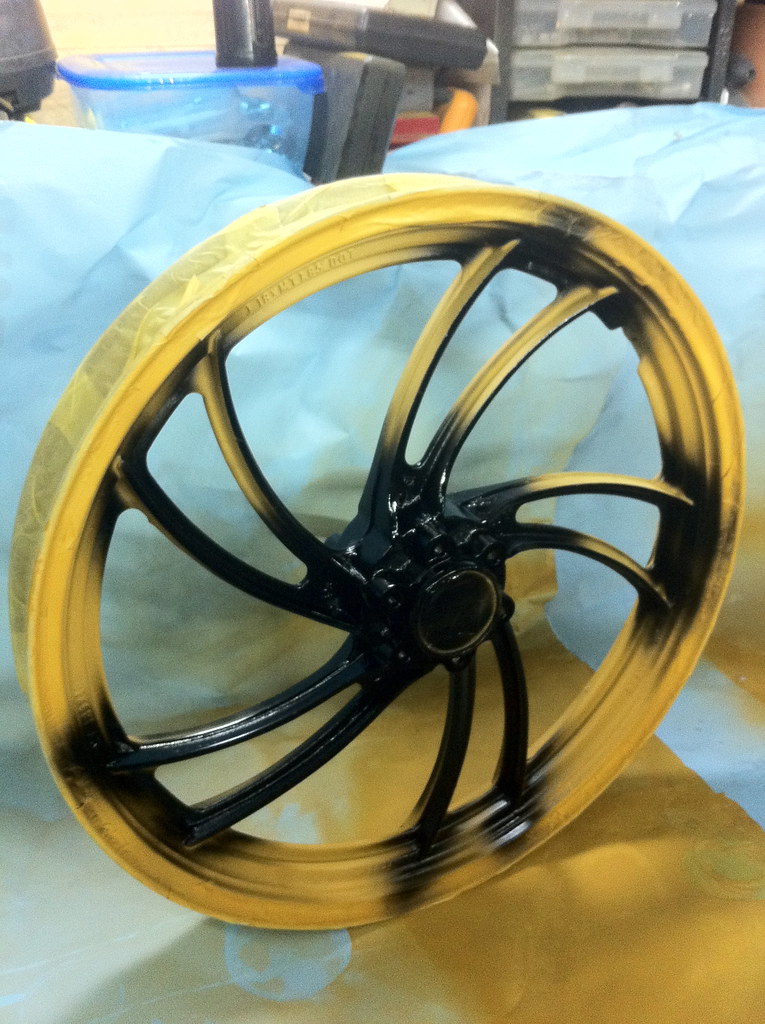
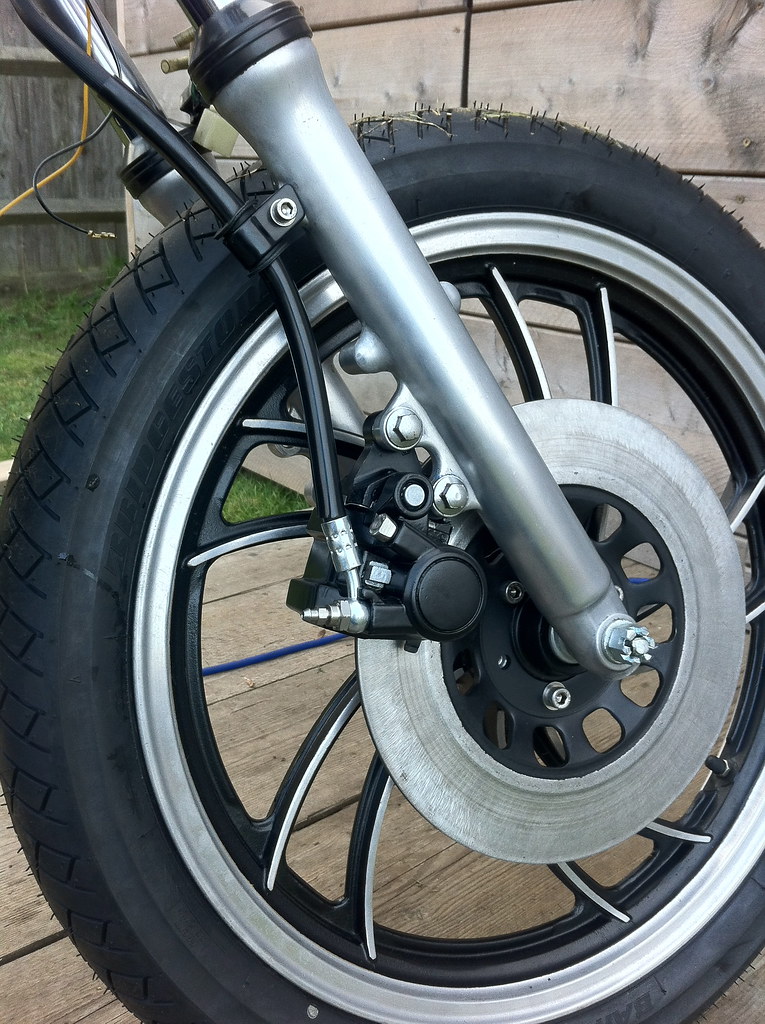
Finally after hours and hours and hours of stripping and prepping I have actually managed to get some primer on the wheels. The front wheel alone took THREE hours just to mask it up, I could have sent them off to be done but again that's not much different to buying the new parts ......
IMG_1676 by tunneruk, on Flickr
IMG_1678 by tunneruk, on Flickr
That's about all I've done up to now, I switched on the torch and switched off the shed lights ............. Jaysus that's some paint in the air!!! I'll be picking myself up new filters for my mask tomorrow!
IMG_1653 by tunneruk, on Flickr
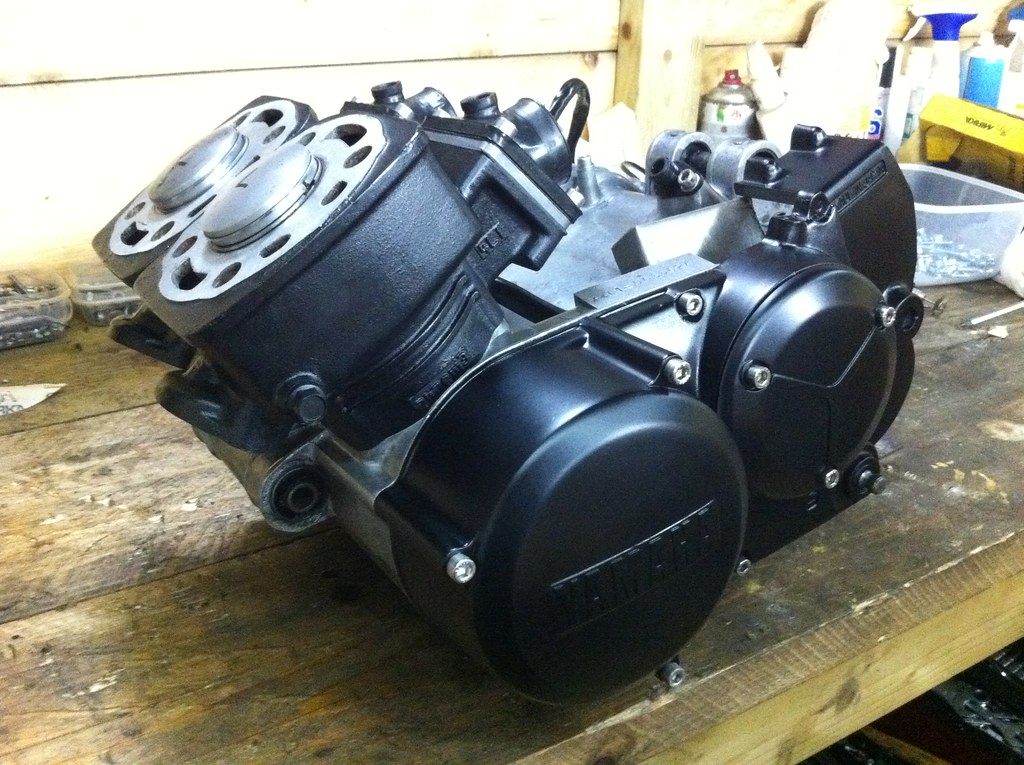
I've prepped many other parts for paint and assembled the top end on the engine, Photo's to follow .........
Ha ha, if only!
SWIMBO has been away on business this week so I've had plenty of time on my hands and I've spent nearly all of it up in my shed!
It's been pretty much more of the same really, lots and lots of prep and a few finished bits. It's starting to come together, slowly but surely.
I repaired the crack in the casing flange. It's completely invisible now.
IMG_1623 by tunneruk, on Flickr
IMG_1626 by tunneruk, on Flickr
IMG_1630 by tunneruk, on Flickr
IMG_1631 by tunneruk, on Flickr
The kickstart was like a dick in a bucket ( sorry, old engineering saying)
I'd talked myself into leaving it as it was but every time I picked it up the play in the bush would bug me. Nothing else for it, it had to be sorted. I had a small billet of phosphor bronze so after a couple of very helpful and friendly guys on here offered to let me use their lathe I was all set.
IMG_1638 by tunneruk, on Flickr
IMG_1639 by tunneruk, on Flickr
IMG_1640 by tunneruk, on Flickr
IMG_1642 by tunneruk, on Flickr
IMG_1643 by tunneruk, on Flickr
The new bush all turned and ready to go in (I forgot to photograph it in the lathe
)IMG_1659 by tunneruk, on Flickr
IMG_1660 by tunneruk, on Flickr
IMG_1662 by tunneruk, on Flickr
All back together. I left a thou or so in the bore and lapped the spigot into it, it's bloody lovely now!
IMG_1665 by tunneruk, on Flickr
I could have saved myself a much time and effort by replacing a lot of the parts on this bike for new, a few friends have asked 'Why don't you just buy a new one of these and a new one of those"
I bought this bike to restore it not replace it. This it the clock surround (unless you didn't guess) It's a bit knocked about and a brand spanking new Yamaha old stock one is only about £40 but none the less, restorable it is so restored it will be!
IMG_1646 by tunneruk, on Flickr
IMG_1648 by tunneruk, on Flickr
Finally after hours and hours and hours of stripping and prepping I have actually managed to get some primer on the wheels. The front wheel alone took THREE hours just to mask it up, I could have sent them off to be done but again that's not much different to buying the new parts ......
IMG_1676 by tunneruk, on Flickr
IMG_1678 by tunneruk, on Flickr
That's about all I've done up to now, I switched on the torch and switched off the shed lights ............. Jaysus that's some paint in the air!!! I'll be picking myself up new filters for my mask tomorrow!
IMG_1653 by tunneruk, on Flickr
I've prepped many other parts for paint and assembled the top end on the engine, Photo's to follow .........

644andy
Registered user
Lovely bike
I restored a 250LC myself 7 years ago, absolutely love it!! I've had a couple of 350's but sold them on but kept the 250, I'll post up some pics when i have a little more time. Keep up the good work
Andy
I restored a 250LC myself 7 years ago, absolutely love it!! I've had a couple of 350's but sold them on but kept the 250, I'll post up some pics when i have a little more time. Keep up the good work
Andy
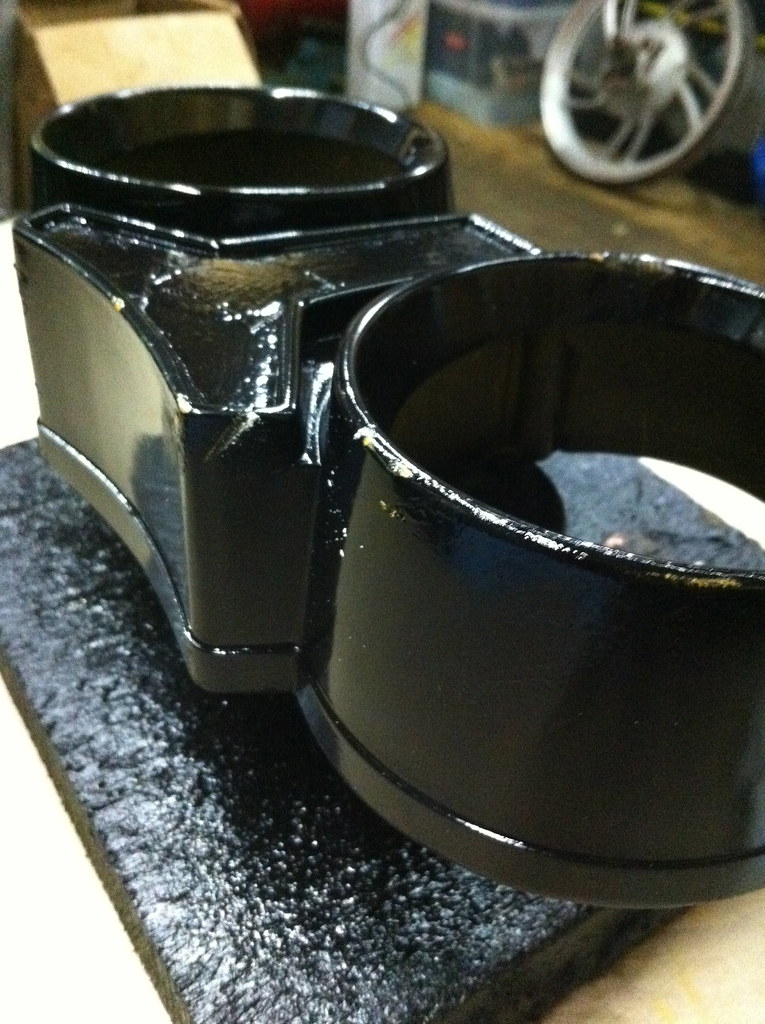
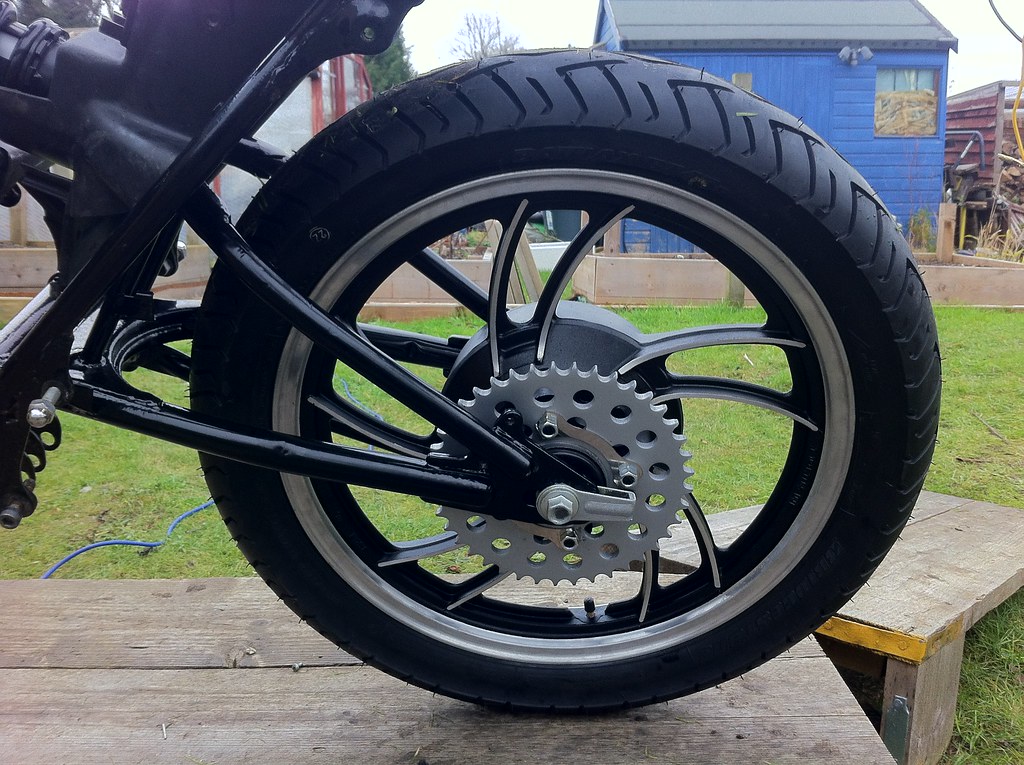
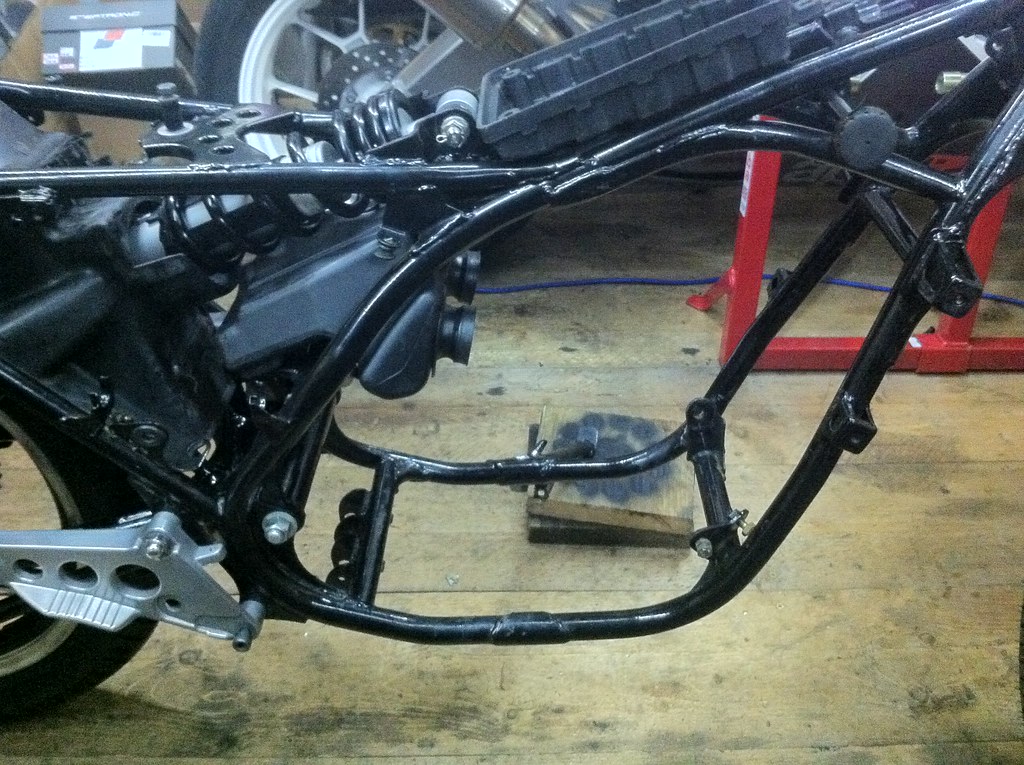
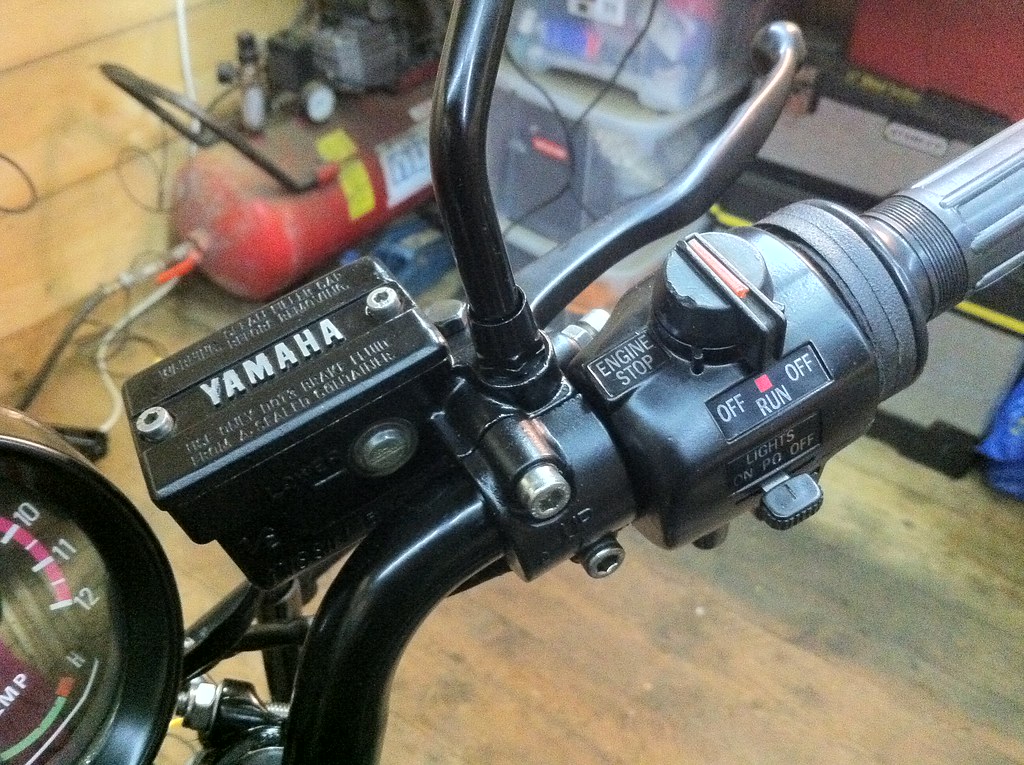
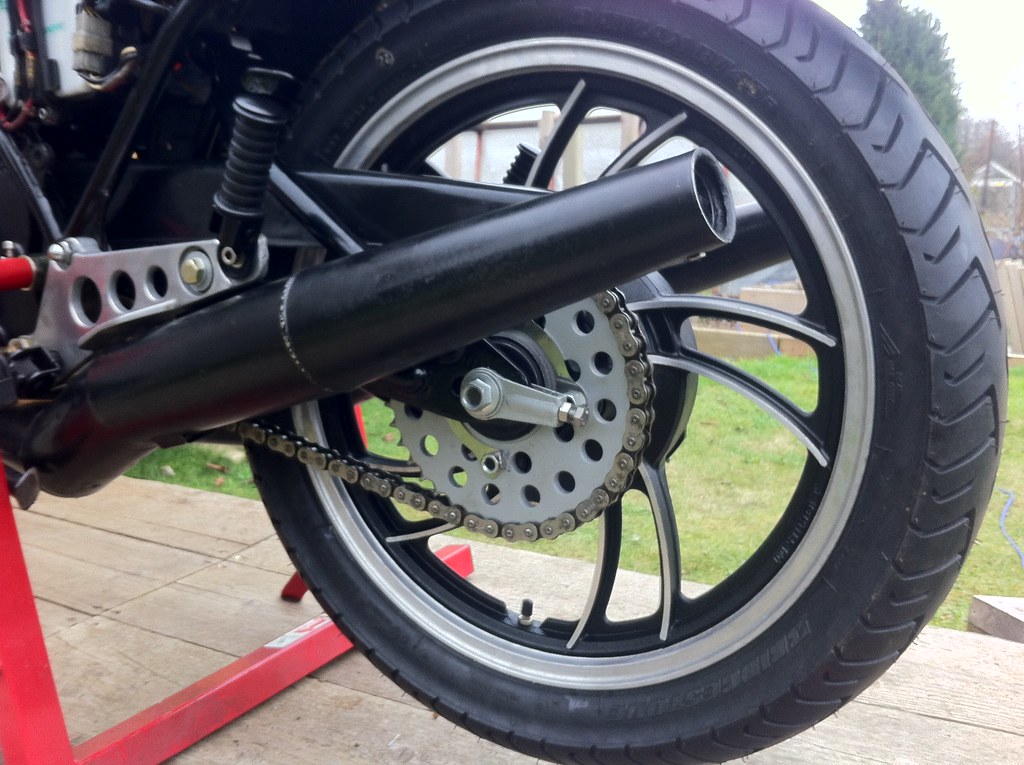
Go on then ............ seeing as it's all been prep clean prep clean, here's a lovely finished bit!
The feeling of satisfaction when taking off the masking tape more than makes up for the 20+ hours of prep!
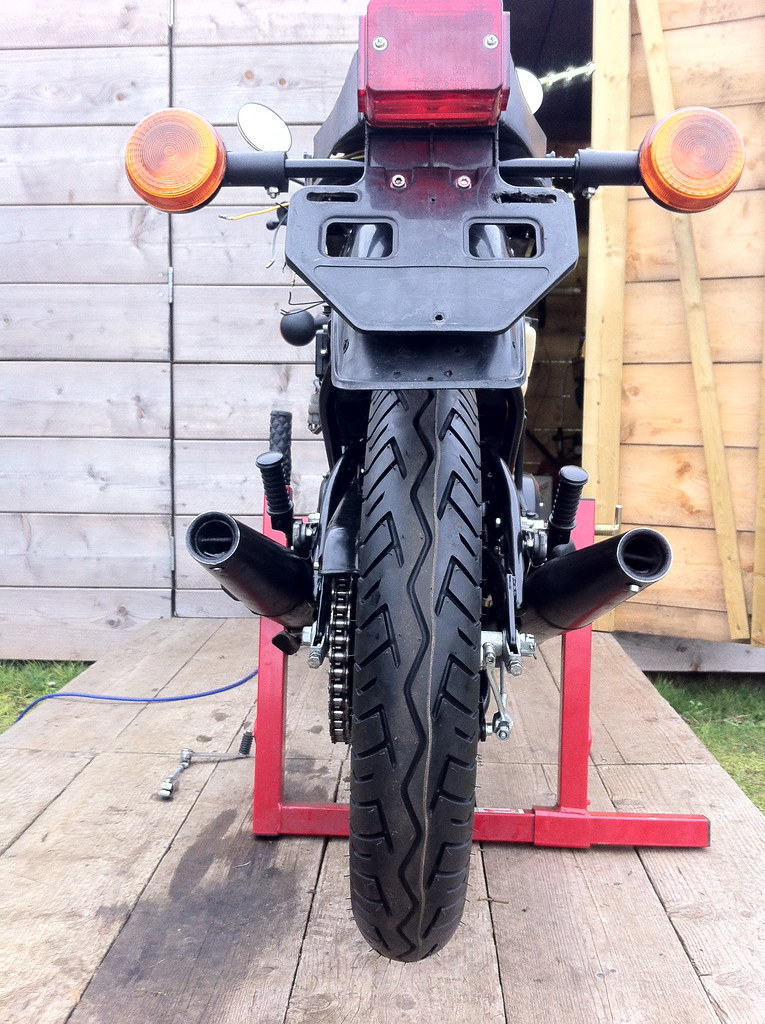
A reminder of what I started with .......
IMG_1526 by tunneruk, on Flickr

IMG_1528 by tunneruk, on Flickr
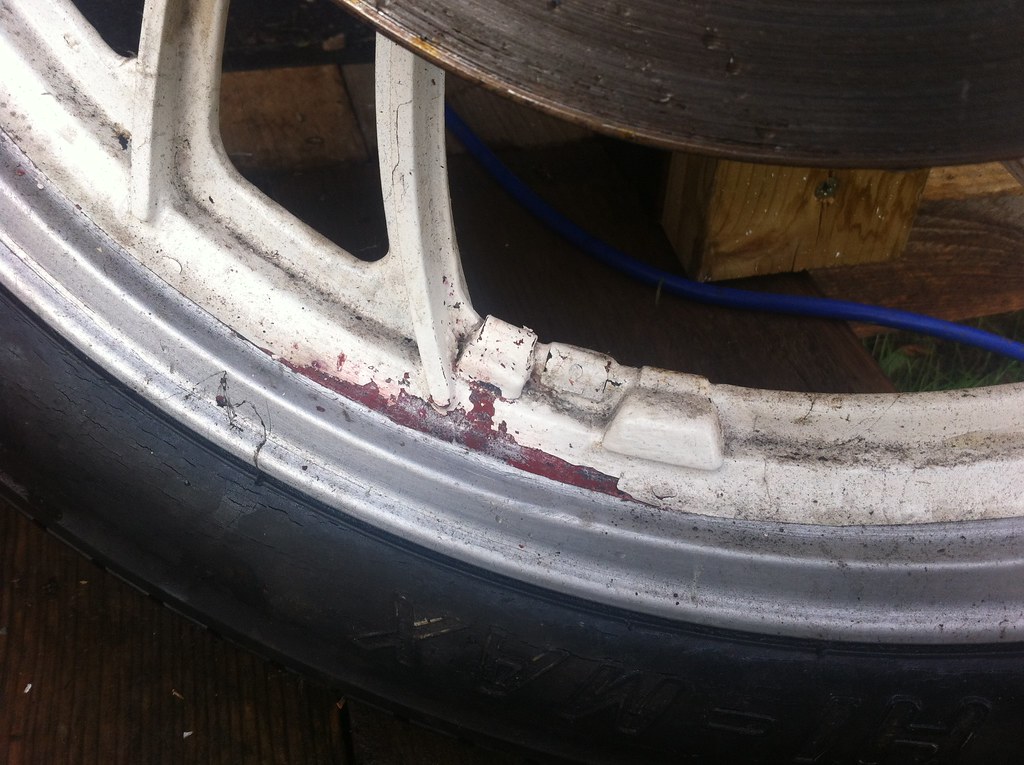
IMG_1527 by tunneruk, on Flickr
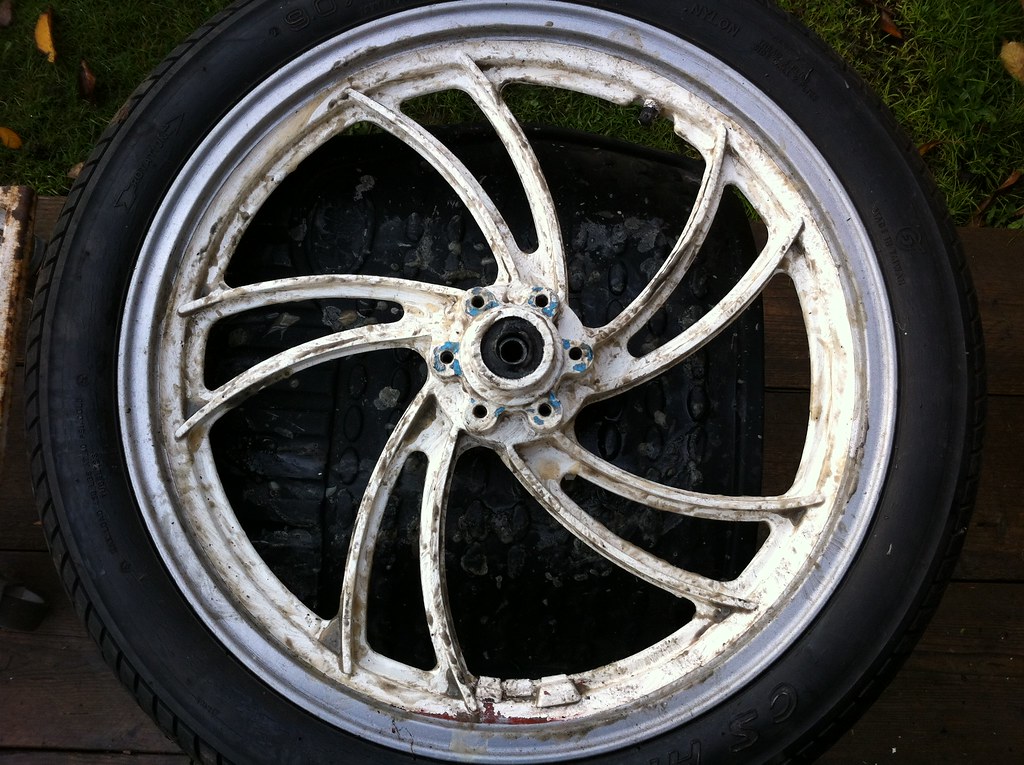
IMG_1529 by tunneruk, on Flickr
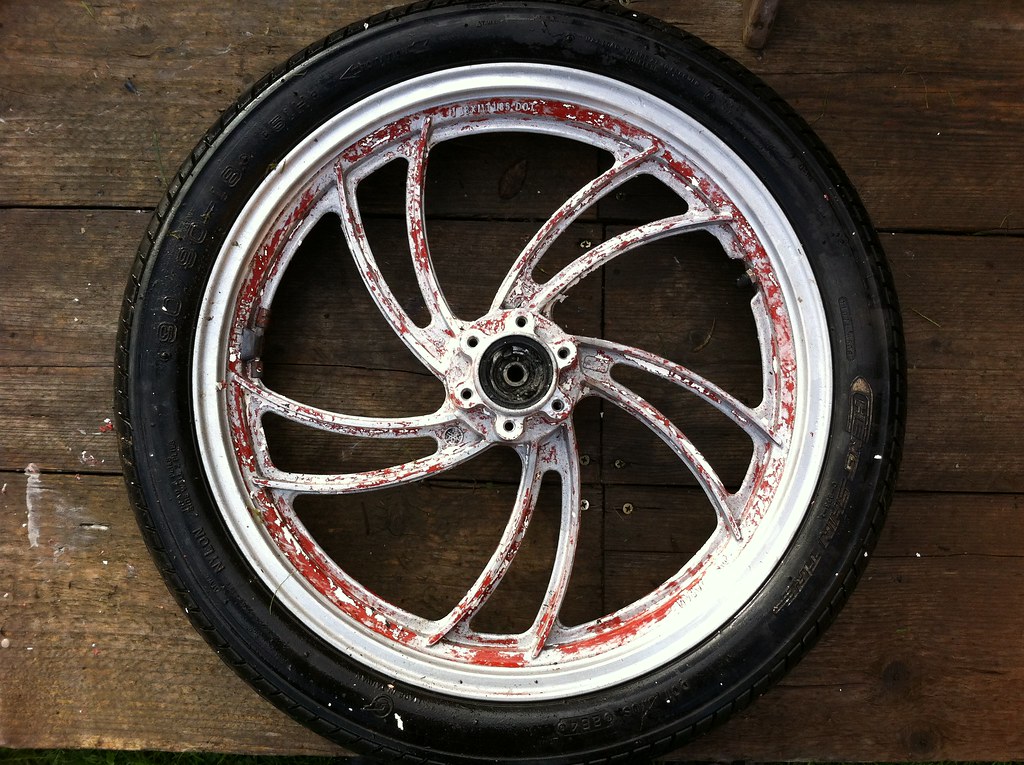
IMG_1530 by tunneruk, on Flickr
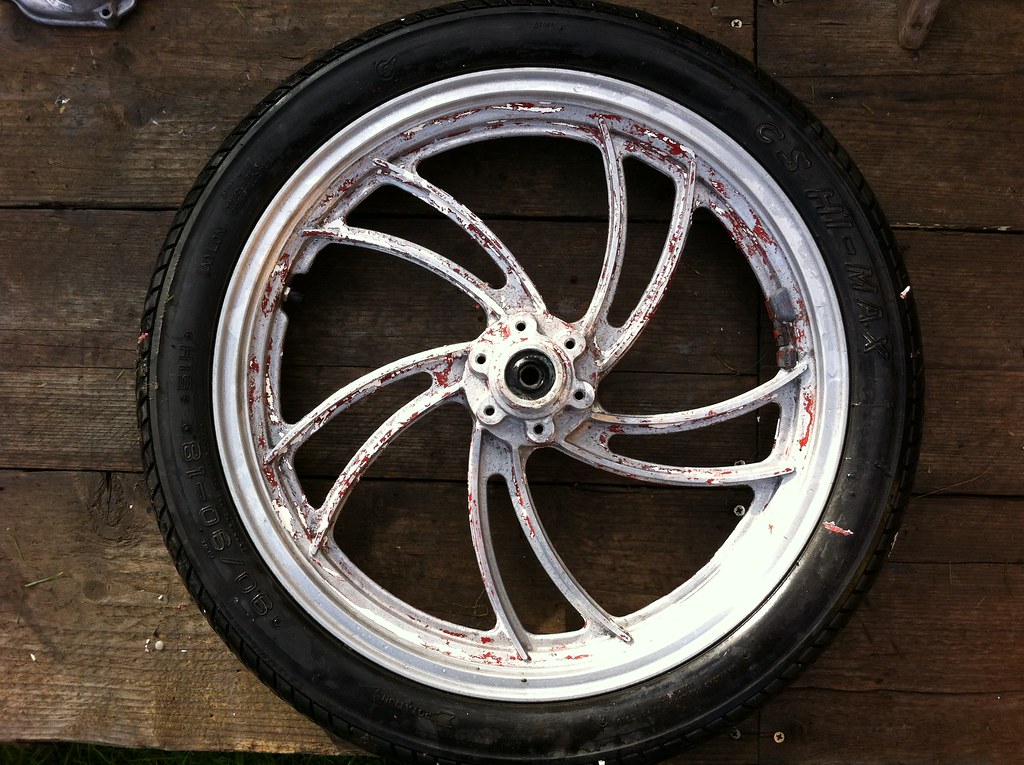
IMG_1532 by tunneruk, on Flickr
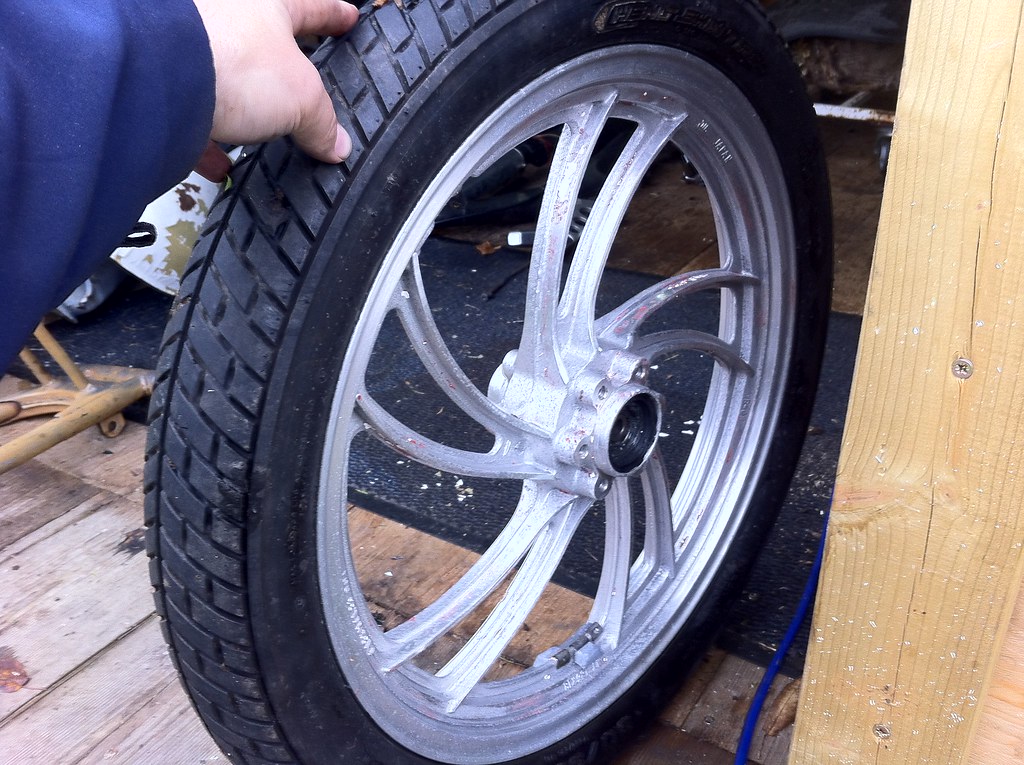
IMG_1537 by tunneruk, on Flickr
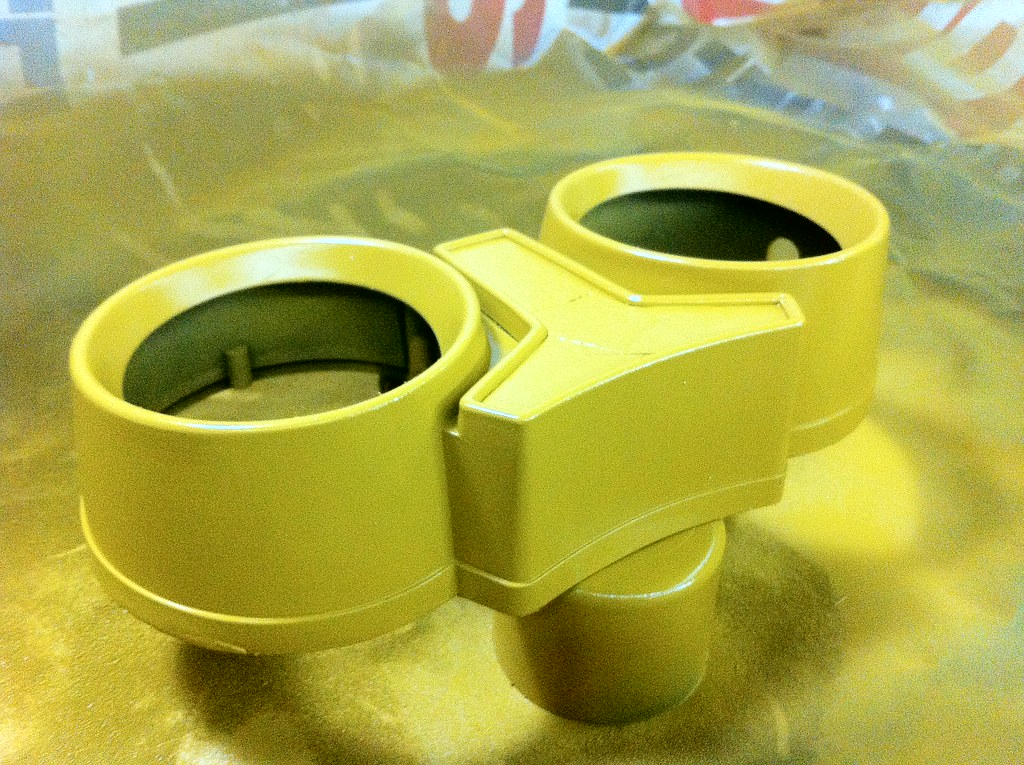
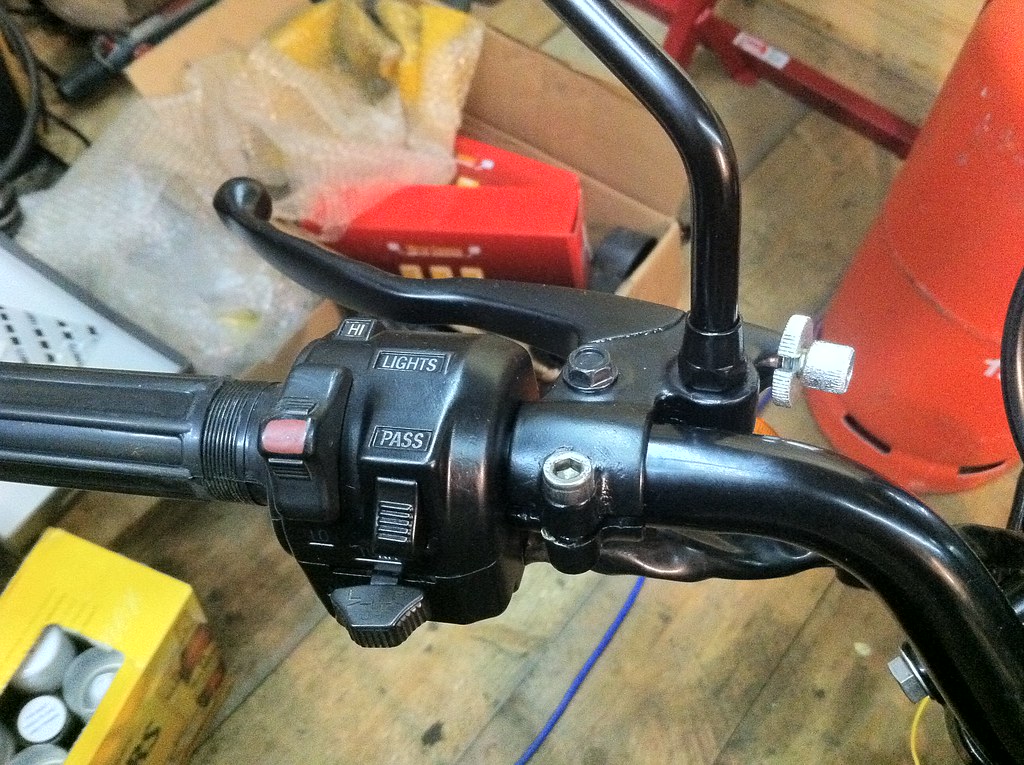
And now here we are ........
IMG_1676 by tunneruk, on Flickr
IMG_1678 by tunneruk, on Flickr
IMG_1683 by tunneruk, on Flickr
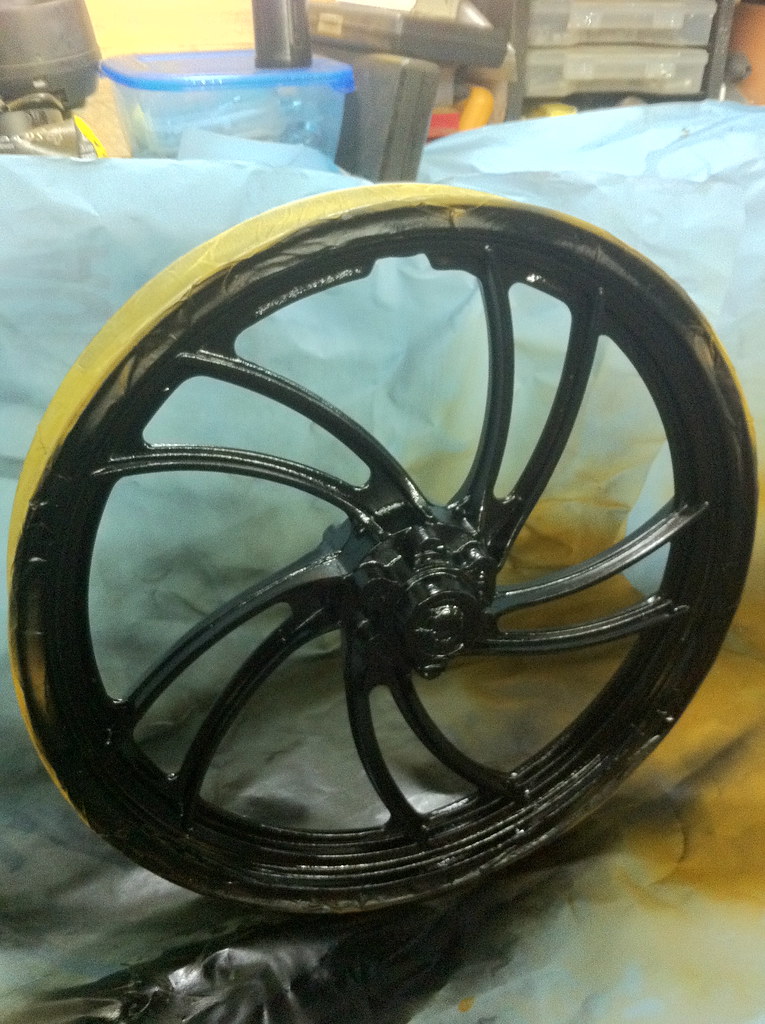
IMG_1685 by tunneruk, on Flickr
Drum Roll ..............
.
.
.
.
.
.
.
.
.
.
.
.
.
.
.
.
.
.
.
.
.
.
.
.
.
.
.
TA DAAA
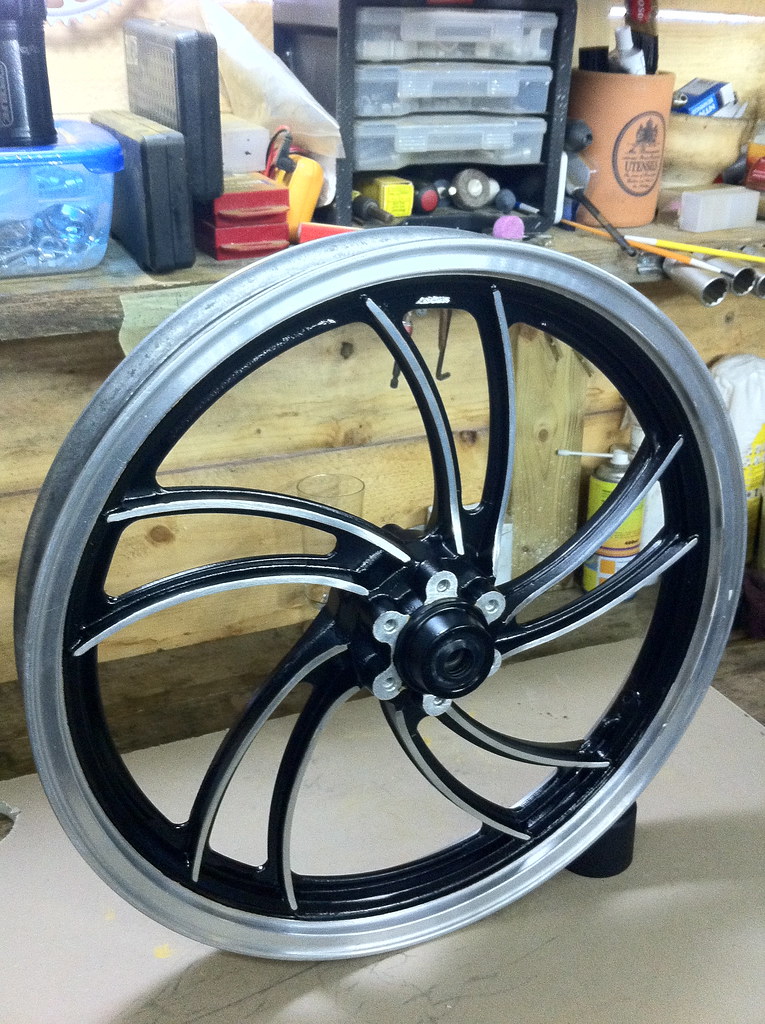
IMG_1687 by tunneruk, on Flickr
There's a little bit of finishing to do where the masking has bled slightly in a couple of places, I'll block that out once it's sat for a couple of days.
Now then.. Better make a start on the rear!
The feeling of satisfaction when taking off the masking tape more than makes up for the 20+ hours of prep!
A reminder of what I started with .......
IMG_1526 by tunneruk, on Flickr
IMG_1528 by tunneruk, on Flickr
IMG_1527 by tunneruk, on Flickr
IMG_1529 by tunneruk, on Flickr
IMG_1530 by tunneruk, on Flickr
IMG_1532 by tunneruk, on Flickr
IMG_1537 by tunneruk, on Flickr
And now here we are ........
IMG_1676 by tunneruk, on Flickr
IMG_1678 by tunneruk, on Flickr
IMG_1683 by tunneruk, on Flickr
IMG_1685 by tunneruk, on Flickr
Drum Roll ..............
.
.
.
.
.
.
.
.
.
.
.
.
.
.
.
.
.
.
.
.
.
.
.
.
.
.
.
TA DAAA
IMG_1687 by tunneruk, on Flickr
There's a little bit of finishing to do where the masking has bled slightly in a couple of places, I'll block that out once it's sat for a couple of days.
Now then.. Better make a start on the rear!
Quick question - what did you use to clean the gasket seats up with?
Thanks
Thanks
You've been shopping with John Kenworthy @ Sunrise

Quick question - what did you use to clean the gasket seats up with?
Thanks
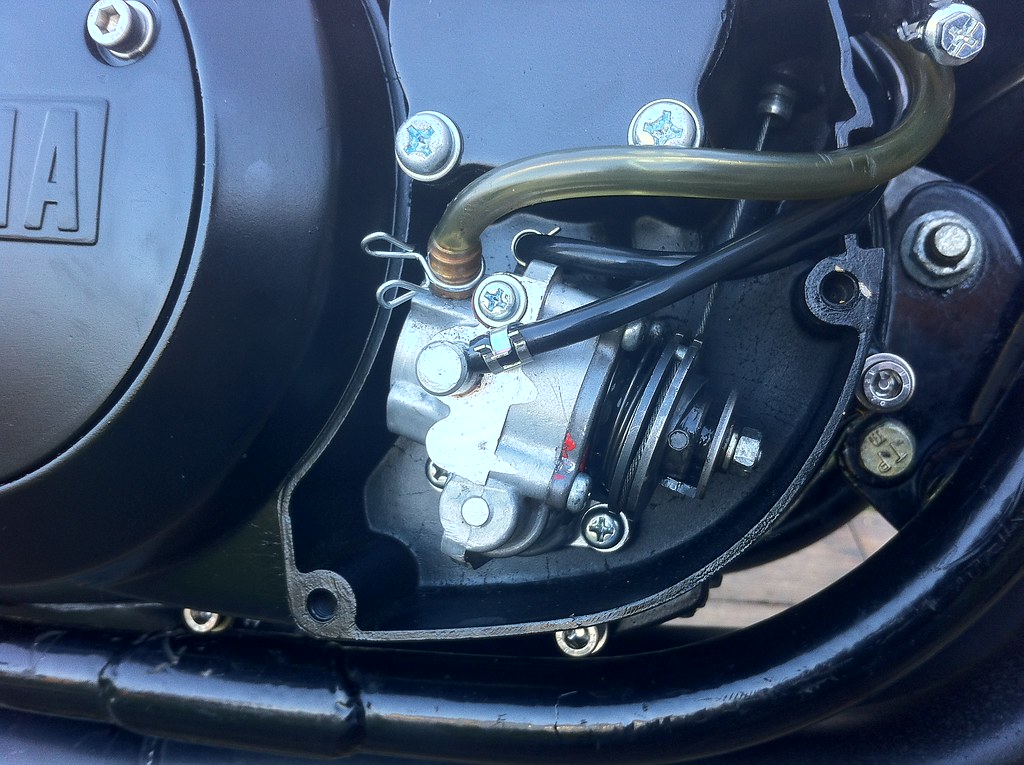
I use a single edge blade to lift away the main bulk of the gasket then clean the rest of the residue off with a 3M Scotchbrite pad and WD40.
I don't use aerosol WD40. I bought a 5ltr can of it in plain liquid form and apply it using a pump spray. It's almost identical to duck oil in this application.
The cylinder tops and cylinder head were slightly different in that I first cleaned them up then with the blade. I then lapped them on my engineers plate with medium lapping paste. Once they were all totally 'flat' I brought the finish back up with Scotchbrite and WD40.
You've been shopping with John Kenworthy @ Sunrise
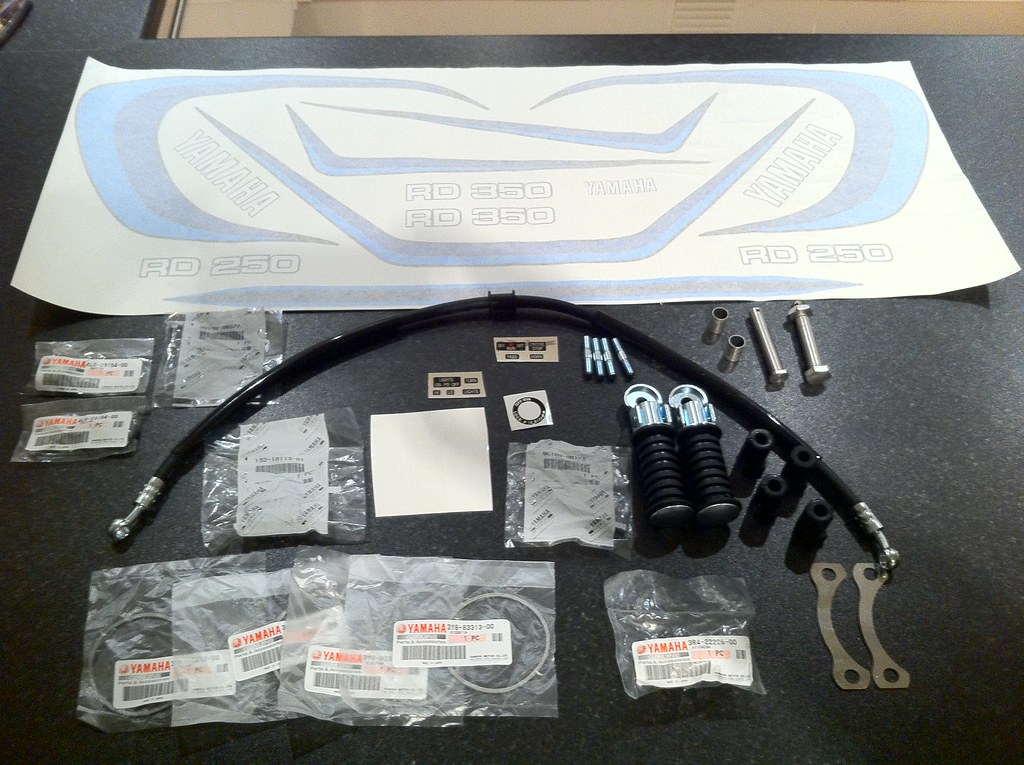
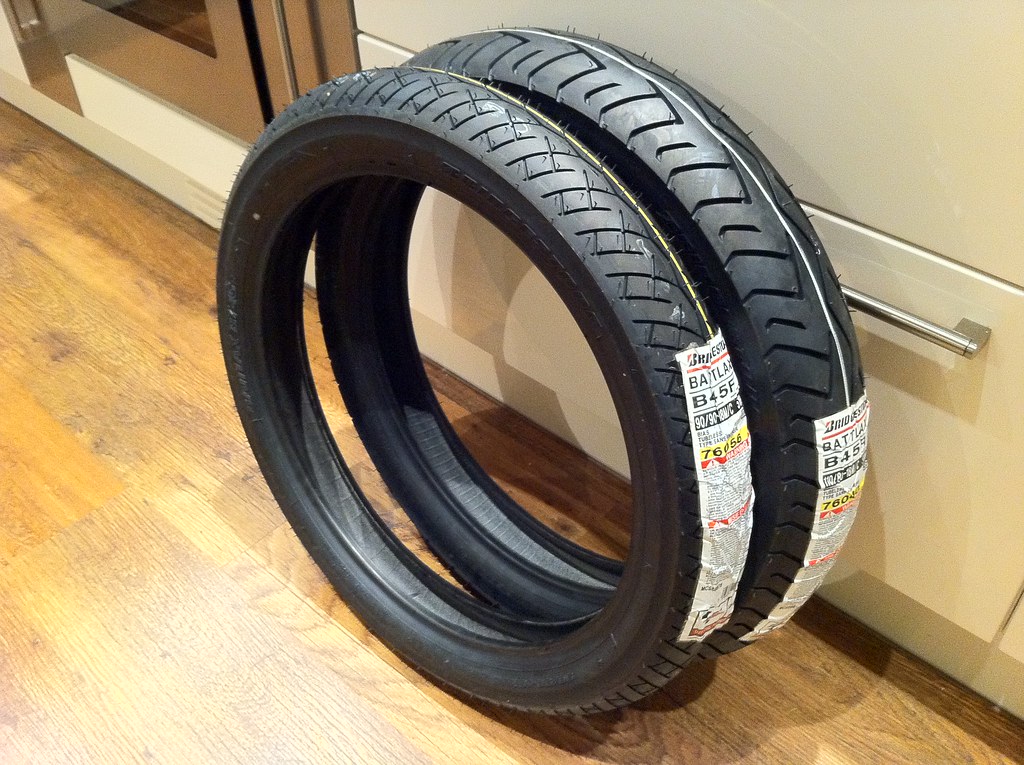
Aha ..............
This little lot (including the tyres) came from 'Norbo' of the LC Crazy forum.
I've sourced most of the non genuine bits from 'Yambits'
I'm still trying to hunt down a reasonable condition set of sensibly priced standard pipes, it would appear that the combination of both these criteria is difficult to find!
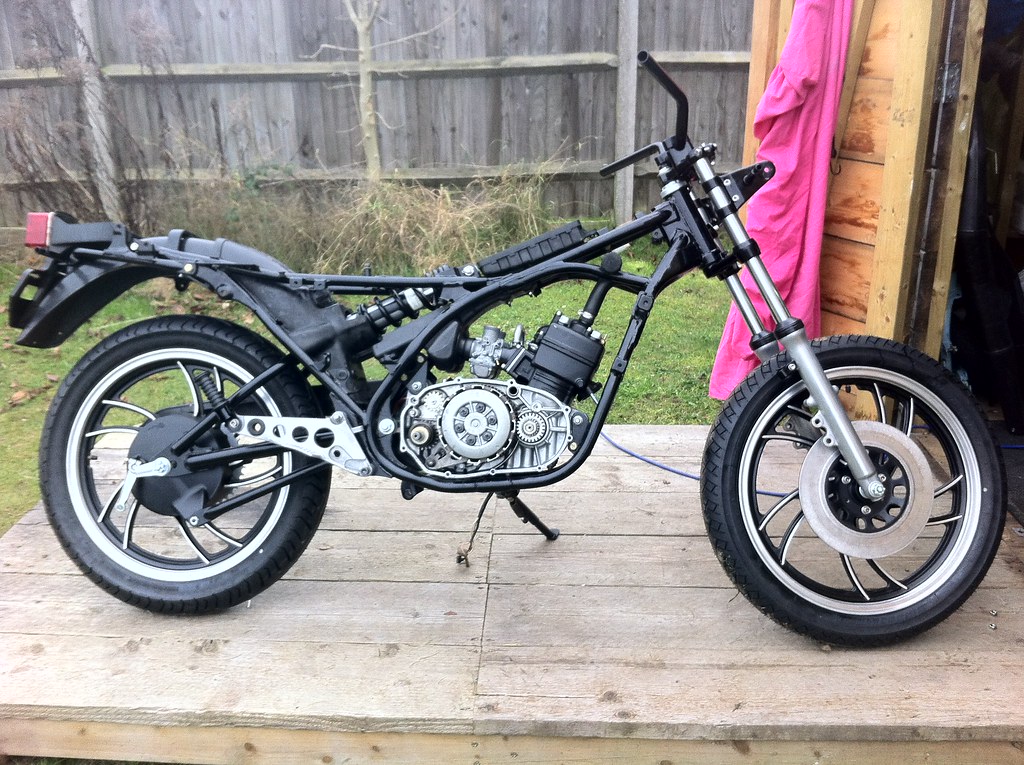
Well much progress has been made over the last couple of weeks.
It was a bitter sweet moment to get all my powder coating back from work, this is one of only two jobs that I've not done myself (The Zinc plating being the other) so I can now start re-assembling some of the bike.
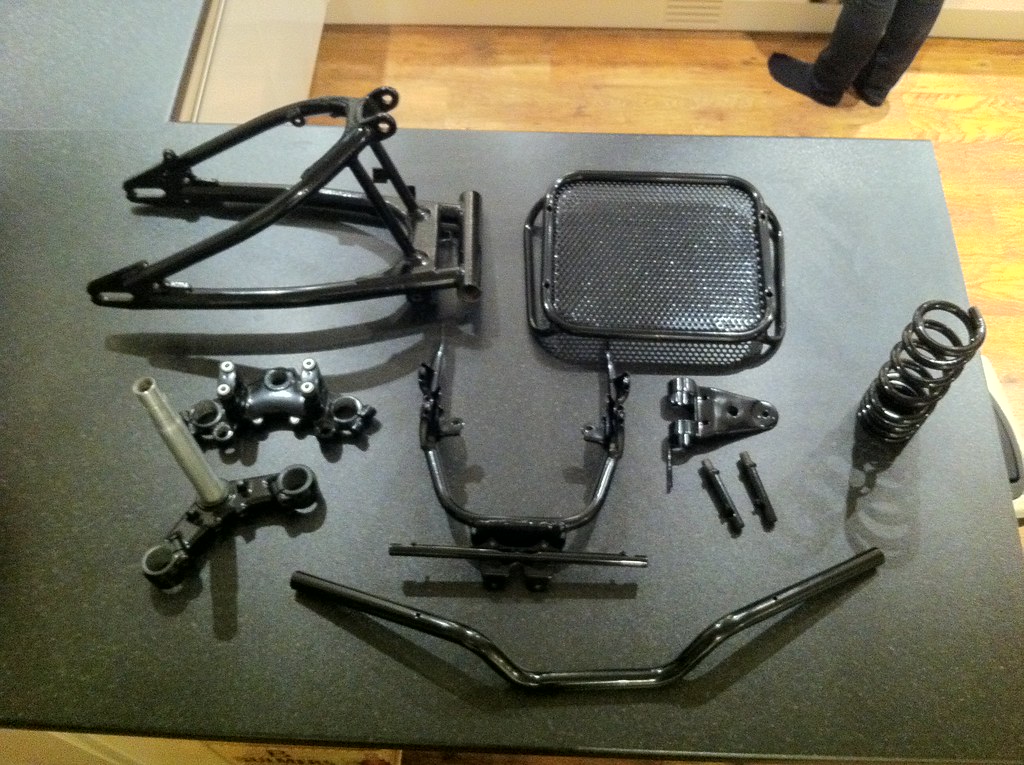
IMG_1701 by tunneruk, on Flickr
Got the shock all rebuilt
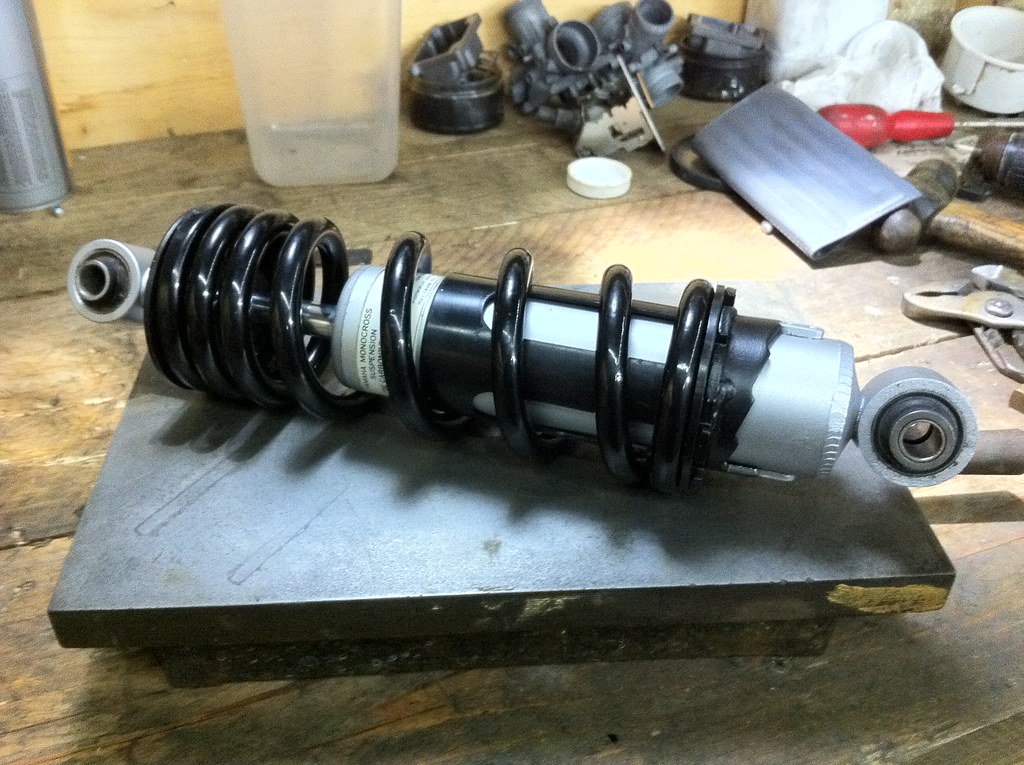
IMG_1703 by tunneruk, on Flickr
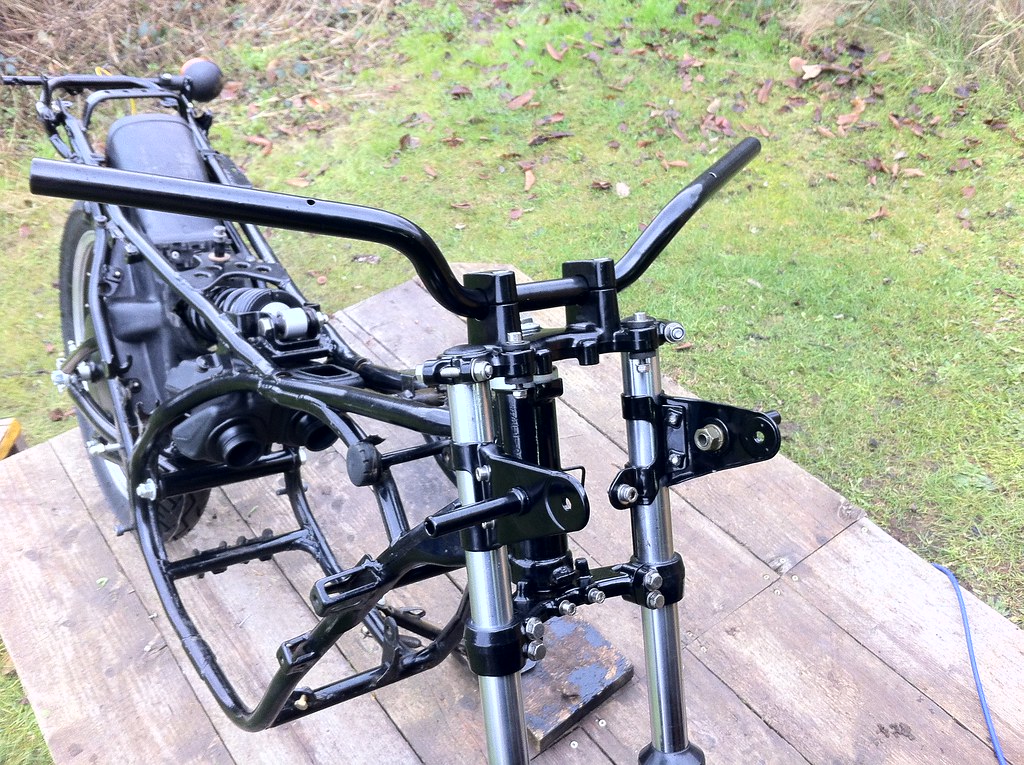
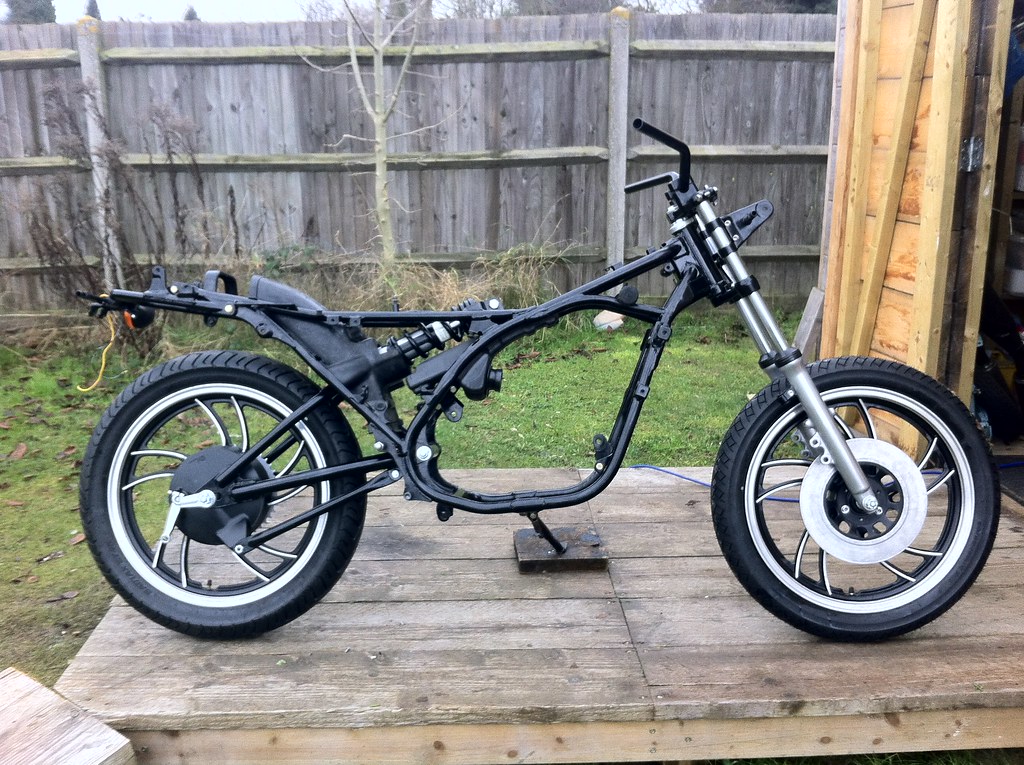
Got the bike up to a suspended chassis...
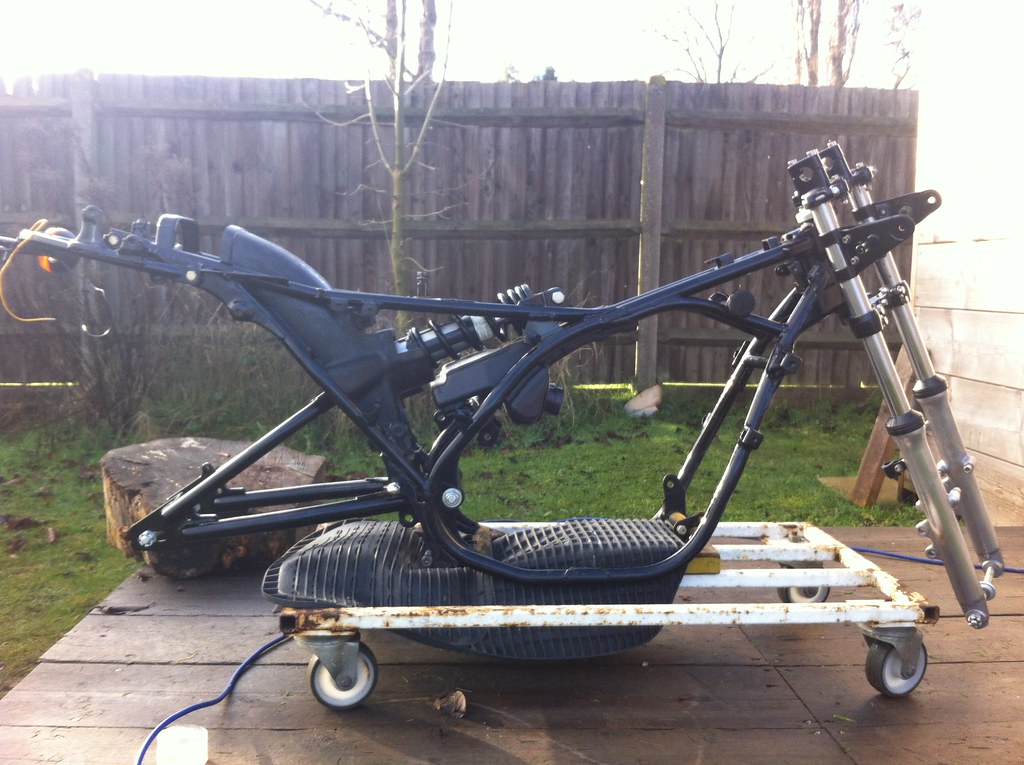
IMG_1704 by tunneruk, on Flickr
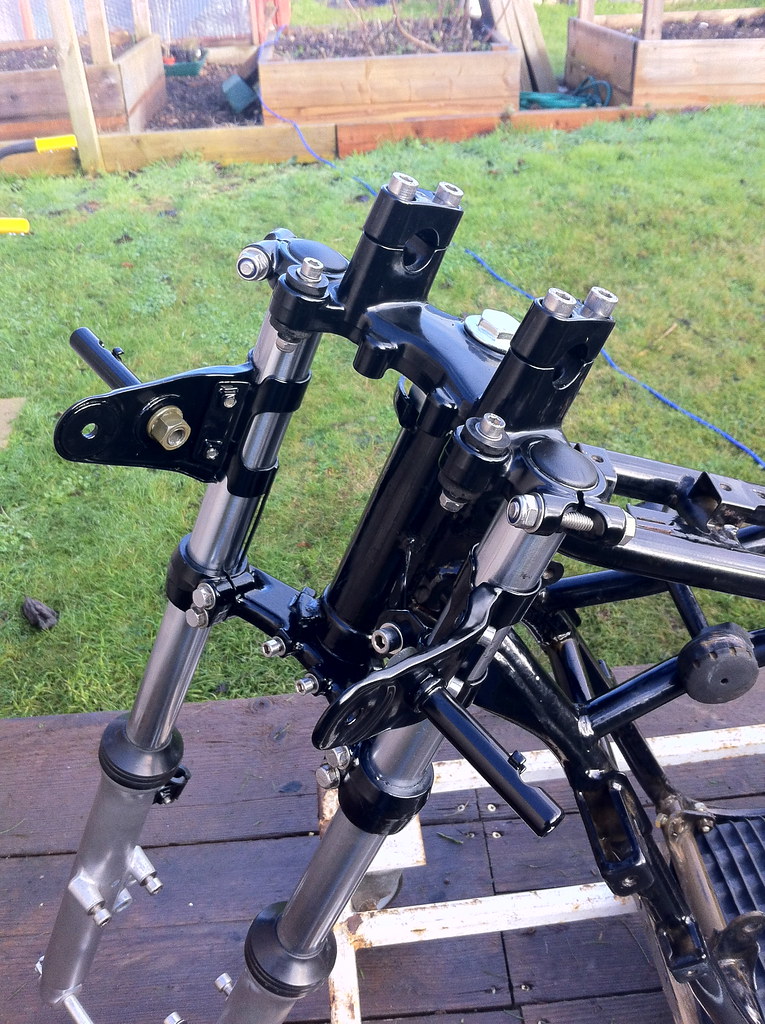
IMG_1711 by tunneruk, on Flickr
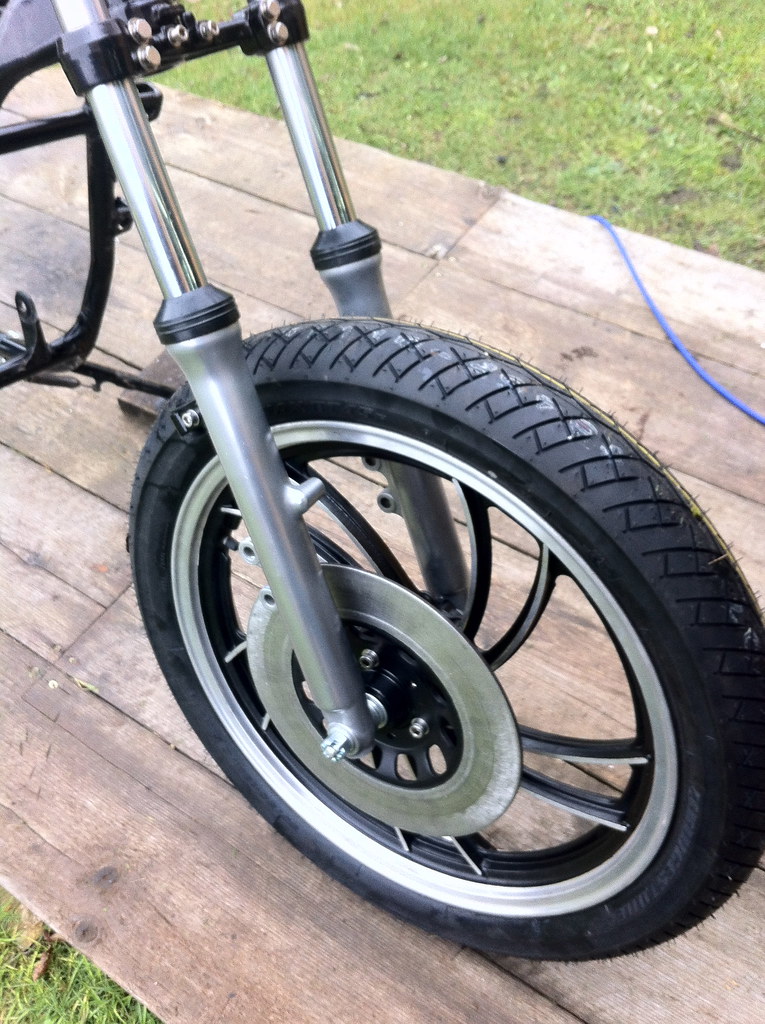
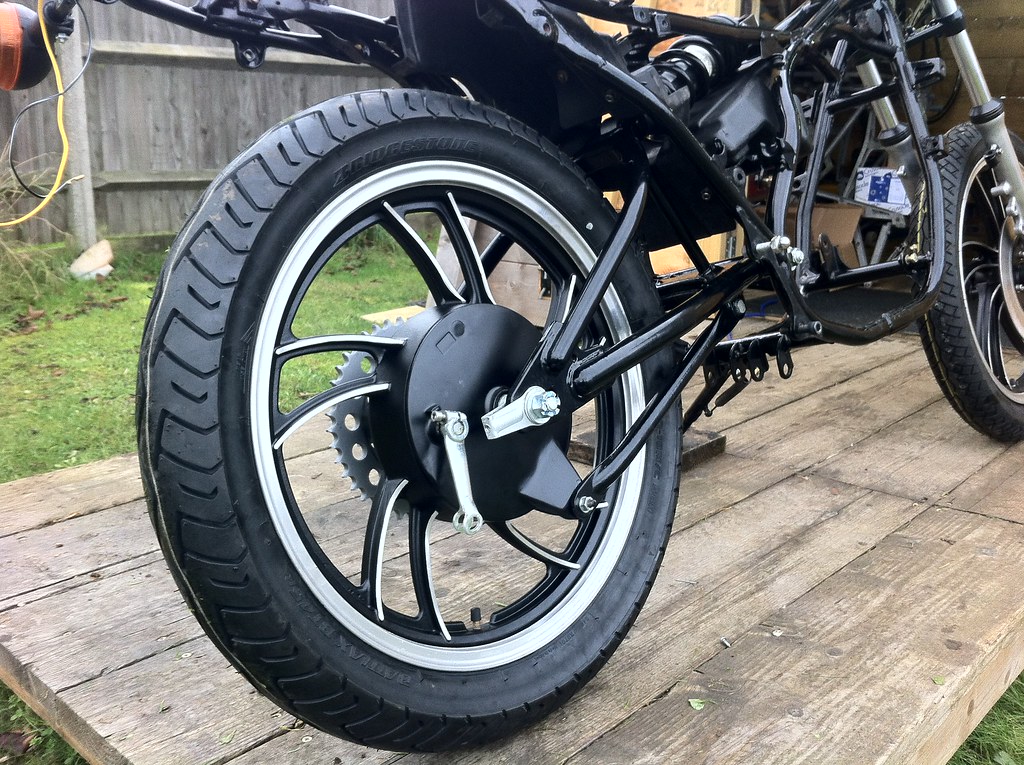
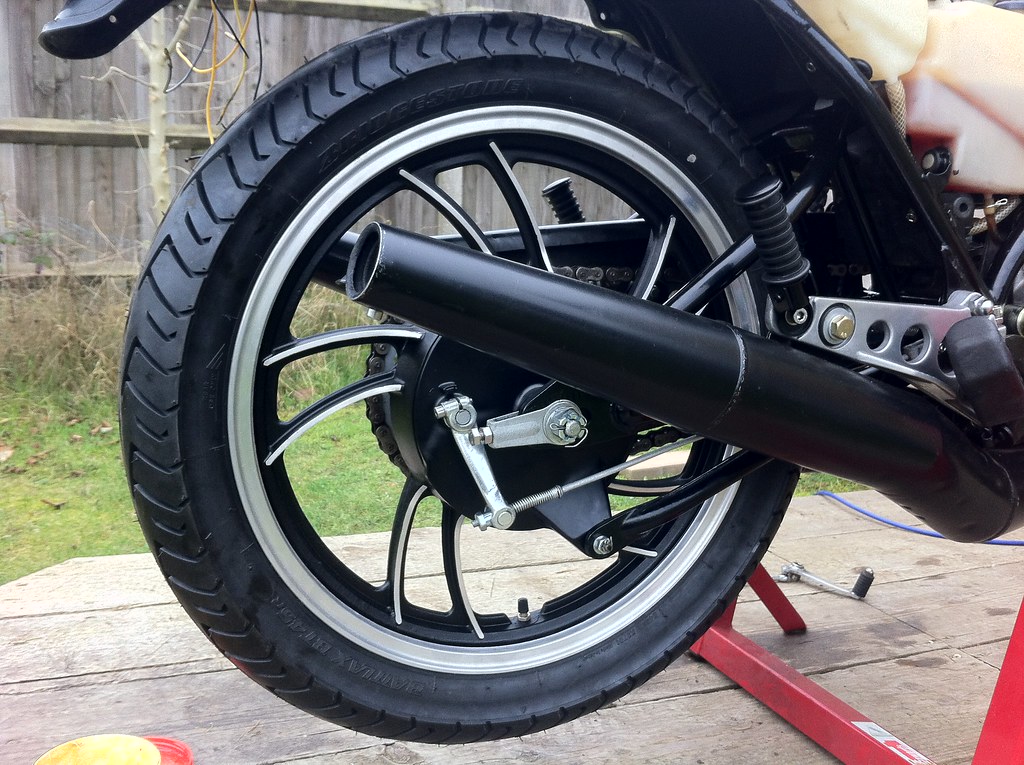
I repeated the processes involved in the refurbishment of the front wheel on the rear, got the tyres fitted and hey presto!
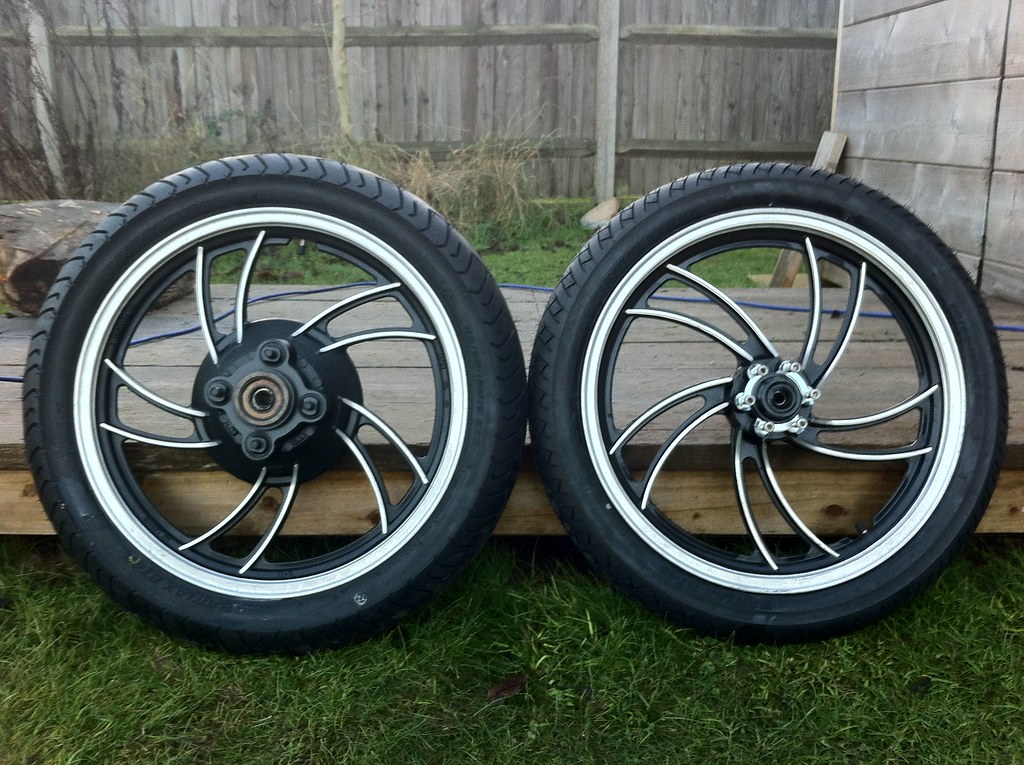
IMG_1713 by tunneruk, on Flickr
IMG_1729 by tunneruk, on Flickr
IMG_1727 by tunneruk, on Flickr
IMG_1731 by tunneruk, on Flickr
IMG_1723 by tunneruk, on Flickr
IMG_1721 by tunneruk, on Flickr
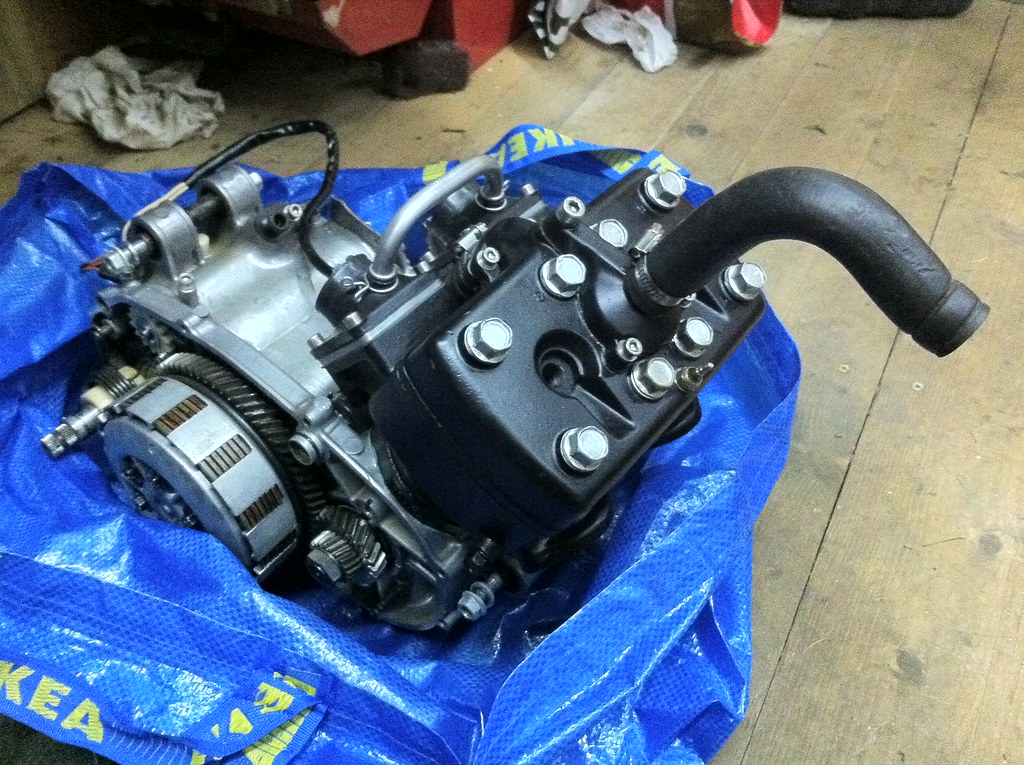
It's amazing what you can buy in Ikea these days ..........
IMG_1715 by tunneruk, on Flickr
IMG_1738 by tunneruk, on Flickr
IMG_1740 by tunneruk, on Flickr
IMG_1747 by tunneruk, on Flickr
IMG_1745 by tunneruk, on Flickr
I've been very lucky in finding an absolutely gorgeous set of standard pipes, so nice in fact that I think I'll probably leave them in their original paint.
IMG_1753 by tunneruk, on Flickr
IMG_1757 by tunneruk, on Flickr
IMG_1755 by tunneruk, on Flickr
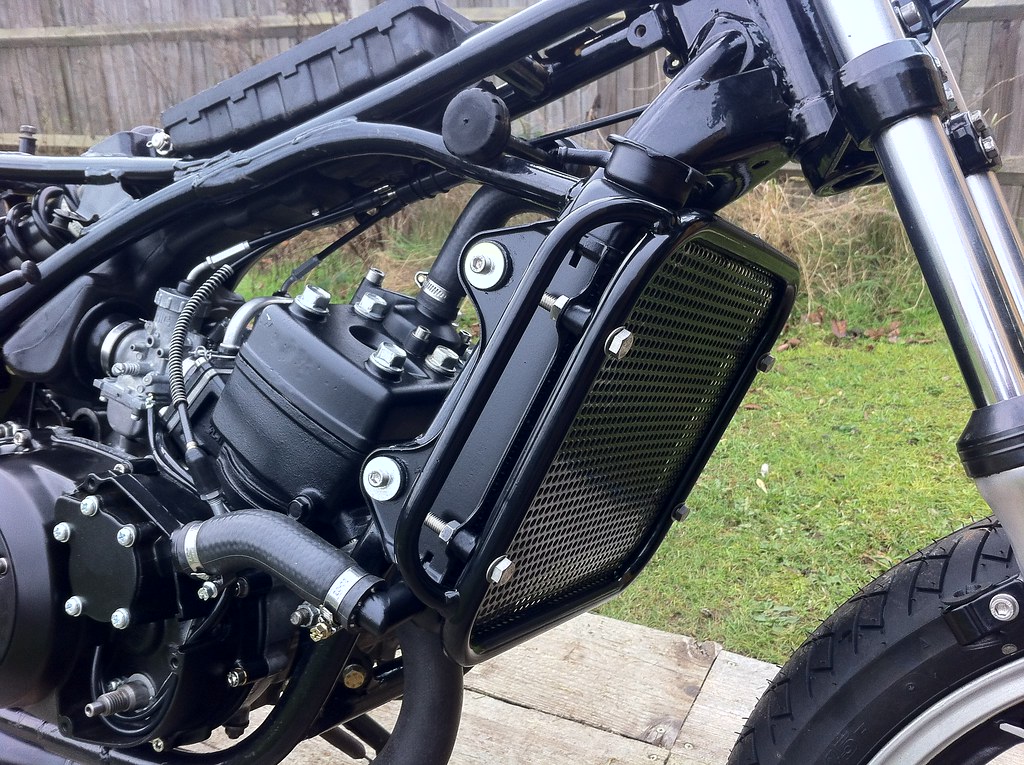
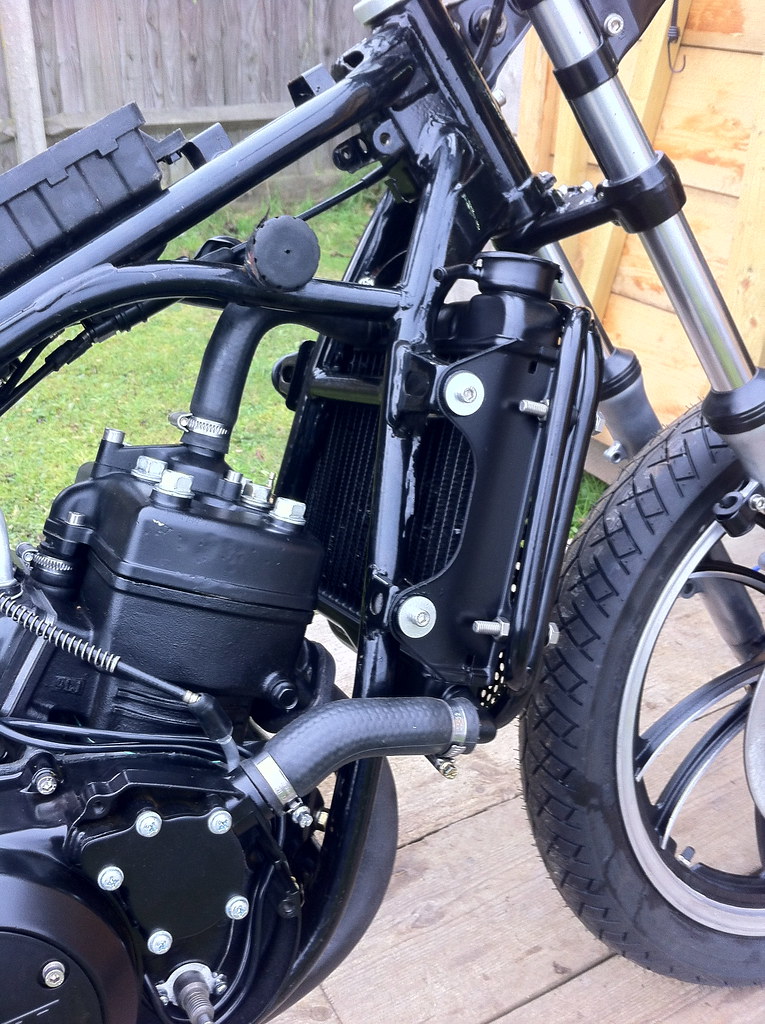
I found an excellent condition replacement radiator .......

IMG_1675 by tunneruk, on Flickr
IMG_1759 by tunneruk, on Flickr
IMG_1761 by tunneruk, on Flickr
IMG_1769 by tunneruk, on Flickr
IMG_1771 by tunneruk, on Flickr
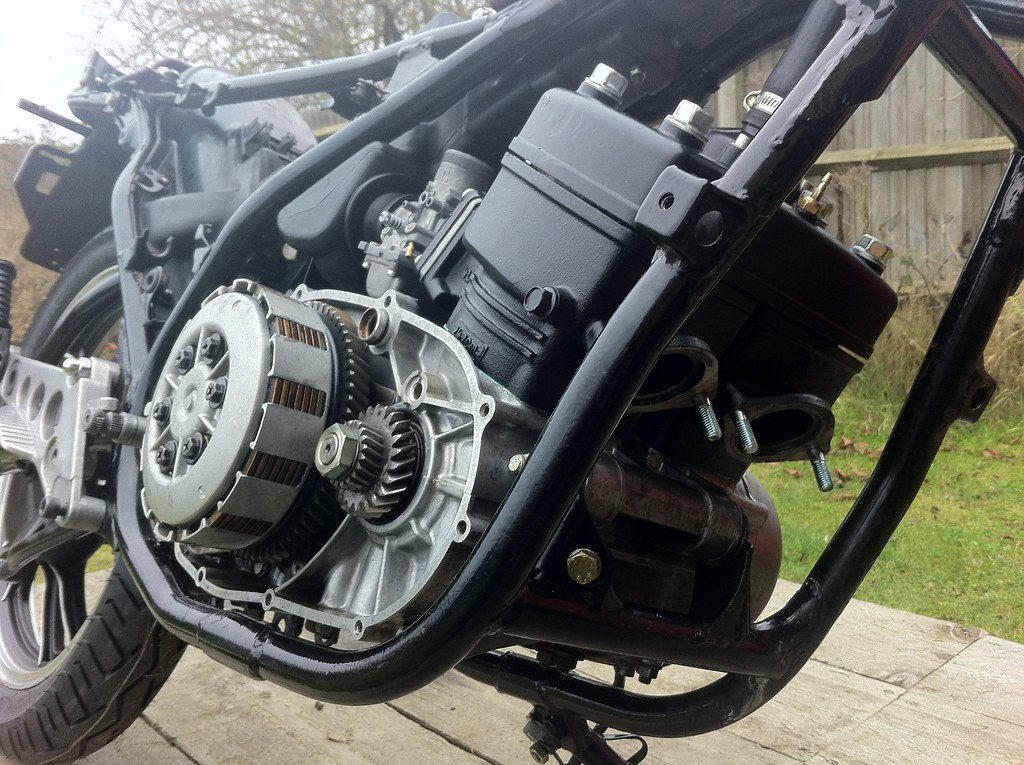
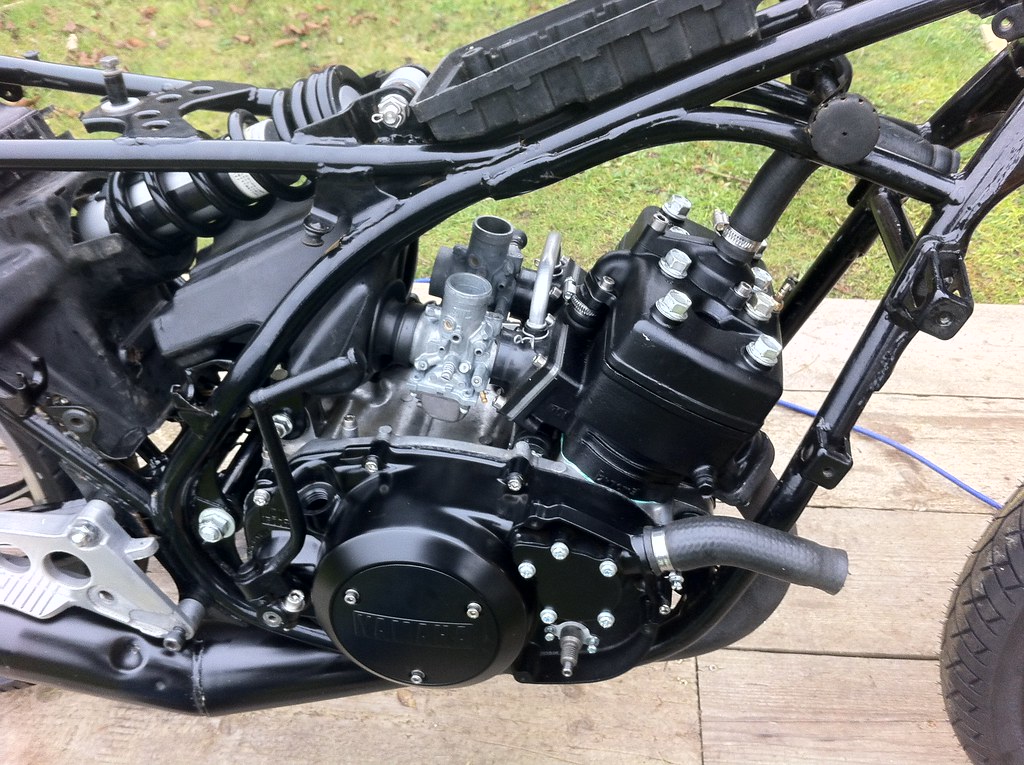
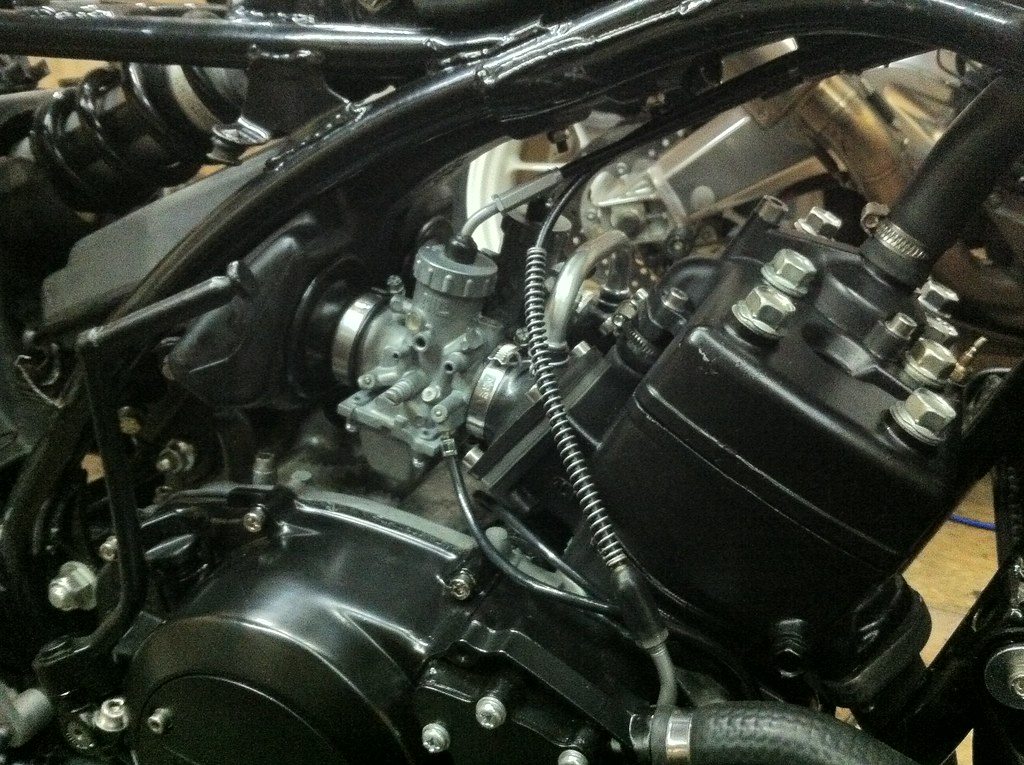
I got the Carbs all built up and cables fitted about an hour ago,
IMG_1765 by tunneruk, on Flickr
I suppose I'd better make a start on the front calliper eh ........
It was a bitter sweet moment to get all my powder coating back from work, this is one of only two jobs that I've not done myself (The Zinc plating being the other) so I can now start re-assembling some of the bike.
IMG_1701 by tunneruk, on Flickr
Got the shock all rebuilt
IMG_1703 by tunneruk, on Flickr
Got the bike up to a suspended chassis...
IMG_1704 by tunneruk, on Flickr
IMG_1711 by tunneruk, on Flickr
I repeated the processes involved in the refurbishment of the front wheel on the rear, got the tyres fitted and hey presto!
IMG_1713 by tunneruk, on Flickr
IMG_1729 by tunneruk, on Flickr
IMG_1727 by tunneruk, on Flickr
IMG_1731 by tunneruk, on Flickr
IMG_1723 by tunneruk, on Flickr
IMG_1721 by tunneruk, on Flickr
It's amazing what you can buy in Ikea these days ..........
IMG_1715 by tunneruk, on Flickr
IMG_1738 by tunneruk, on Flickr
IMG_1740 by tunneruk, on Flickr
IMG_1747 by tunneruk, on Flickr
IMG_1745 by tunneruk, on Flickr
I've been very lucky in finding an absolutely gorgeous set of standard pipes, so nice in fact that I think I'll probably leave them in their original paint.
IMG_1753 by tunneruk, on Flickr
IMG_1757 by tunneruk, on Flickr
IMG_1755 by tunneruk, on Flickr
I found an excellent condition replacement radiator .......
IMG_1675 by tunneruk, on Flickr
IMG_1759 by tunneruk, on Flickr
IMG_1761 by tunneruk, on Flickr
IMG_1769 by tunneruk, on Flickr
IMG_1771 by tunneruk, on Flickr
I got the Carbs all built up and cables fitted about an hour ago,
IMG_1765 by tunneruk, on Flickr
I suppose I'd better make a start on the front calliper eh ........
That's looking absolutely brilliant - hope I can drop in on Friday for a closer look.
PG
PG
flytoolow
Registered user
Fantastic bit of work there!
SHE"S ALIVE!!
I've been busy doing about 850 small but important jobs, none of which really make a huge difference on their own but accumulated make a huge difference!
I'll just put a few pictures up .....................
.................. And then .................. the video
IMG_1797 by tunneruk, on Flickr
IMG_1808 by tunneruk, on Flickr
IMG_1810 by tunneruk, on Flickr
IMG_1813 by tunneruk, on Flickr
IMG_1815 by tunneruk, on Flickr
IMG_1817 by tunneruk, on Flickr
IMG_1820 by tunneruk, on Flickr
IMG_1819 by tunneruk, on Flickr
There's a lot of assembly lubricant in the system, there is two stroke oil in the petrol as well as the oil injector coming online so it's smoke central ................... Smells bloody lovely though!
<object width="853" height="480"><param name="movie" value="http://www.youtube.com/v/K0c-VtDUxtk?version=3&hl=en_US&rel=0&hd=1"></param><param name="allowFullScreen" value="true"></param><param name="allowscriptaccess" value="always"></param><embed src="http://www.youtube.com/v/K0c-VtDUxtk?version=3&hl=en_US&rel=0&hd=1" type="application/x-shockwave-flash" width="853" height="480" allowscriptaccess="always" allowfullscreen="true"></embed></object>


Similar threads
- Replies
- 75
- Views
- 3,417