2002 R1150GS - diary of an accidental full restoration

After seeking advice from the collective over the last couple of days, I’ve installed the clutch pushrod along with the new clutch slave cylinder.

IMG_4934.jpeg

Next up are the hoses. I’ve cleaned the bleed hose up, and refinished the banjo end in satin black. It wasn’t too bad, but not up to my standards.

IMG_4946.jpeg

My clutch and brake lines were really nasty, so I picked up some used stainless hoses on eBay a couple of months ago. They’re clean, but have unfortunately yellowed. Not sure there’s much I can do about this though - funds just won’t allow me to buy a new set!

IMG_4945.jpeg

I’m sure they’ll look fine when the bike is back together.

I’ve had a couple of glasses of whiskey in honor of Burns night, so have prudently decided to step away from the spanners until tomorrow now…. Guess I’ll have to put another! Cheers everyone!
 
Evening all!

I’ve just spent an hour or so cleaning the wiring harness and making a couple of small repairs to the sheathing this afternoon.

IMG_4971.jpeg

It was absolutely filthy - and as my Dad once taught me - “you get your hands dirty taking them apart, not when putting them back together”. Fear not brave reader - no plugs or connectors were harmed in the process 😉

I then decided to asses the powder coating I had done locally.

IMG_4982.jpeg

I have to say, it’s bloody mint. Satin black, and every thread had been bunged up (I know because one was left in…) Seeing this, one thing lead to another and I ended up taking a couple of hours putting the airbox, fuse box and wiring loom back onto the newly powder coated sub-frame.

IMG_4989.jpeg

IMG_4990.jpeg

IMG_4991.jpeg

I can’t lie - there were a couple of false starts - such as missing routing the wiring harness between the airbox and frame, but it went back together with minimum fuss.

After looking at the workshop manual, I think all the forward wiring goes inside and above the left hand frame rail - if I’ve got that wrong please let me know!

I know the sheathing still needs repair - I figured it was easier to do when I was sure where everything runs, so I I’ll do it as I go along.

Next job is to run the clutch line, then I can lift the subframe onto the engine. Just got to find some extra hands. Right, where are my kids…..?
 
It was all going so well…..

Lifted the subframe onto the engine with help from my family about a month ago - that wiring harness adds a huge amount of awkwardness to the job! It went on beautifully and looked amazing.

I was just admiring my work with a brew in hand when I noticed a mark on the gearbox paint, like a little chip. No worries, I thought, I’ll just polish it in.

What actually happened was I ended up chasing the entire layer of paint across the whole gearbox.

I know what I’d done - I’d given it one last coat whilst spraying something else. That coat hadn’t adhered, an literally flaked off. Bloody hammerite.

It gets better.

Over the next couple of weeks I sanded the whole gearbox down with 600 grit wet and dry, cleaned it all up, reapplied primer, let it cure then, one Saturday afternoon, resprayed it silver. Perfect!

The next morning I went back into the garage and put a second coat on.

Within seconds it reacted with the paint underneath, creating a cracked ‘pickled’ effect. Much swearing was undertaken. When I tried to wipe the paint off, it took it back to primer - including the paint from the previous day. A quick google later and it seems you absolutely have to apply all coats of hammerite within 4-6 hours of the previous coat due to the volatile nature of the paint. If you don’t you have to let it cure for - get this - a month!

I stripped the paint from the gearbox for a third time, reprimed it and spent two hours last weekend going back into the garage every 20 min to put another coat of silver on.

The end result?

IMG_5292.jpeg

I’m happy with that!

Lifted the subframe back onto the engine yesterday - no drama this time.

D7C31EFF-6BD0-4995-8373-D88BF14192D9.jpeg

Bolts are in place, but it’s not tightened down yet - I need to lift it to remove the swingarm once the front it back in.

Next up I gave the front frame a waft of satin black to make it prettier

IMG_5378.jpeg

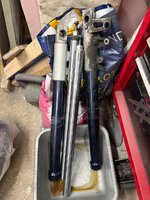
Then I set to prepping the top yoke by masking off the fork bushes then draining the oil out of the forks so I can get the bottoms rubbed down ready to paint

IMG_5374.jpeg

IMG_5375.jpeg

Finally, on a roll I decided to spray the wiring harness plug plate that goes on the front frame. I know it’s out of sight, but I couldn’t leave it as it was…

IMG_5386.jpeg

IMG_5392.jpeg

IMG_5395.jpeg
Also…the battery box has been resprayed too…

IMG_5279.jpeg

IMG_5281.jpeg

IMG_5284.jpeg

And that’s where I’m up to! About 6 weeks behind schedule, but I’m moving in the right direction at least.

Next up is to get the silver bits sprayed, the get the front engine cover back on. I need to replace the crankshaft seal in it - I have the seal ready to go. If anyone has any helpful hints please let me know!

Cheers
Mike
 

Attachments

  • IMG_5379.jpeg
    IMG_5379.jpeg
    361.1 KB · Views: 22
Good work Mike and well done with the patience and perseverance.
Looking forward to seeing the finish product
 
Damnit!

I’d tentatively poked at the engine cover crank seal over the last couple of weeks, then put the job off until the right moment, which was now!

It was bloody tight - used a large flat screwdriver levering against a block of wood, it popped out suddenly, causing me to crack my pinkie against the workbench.

Picked up the cover and noticed I’ve nicked the sealing edge - screwdriver must have slipped as the seal let go.

IMG_5580.jpeg

IMG_5578.jpeg

Question is…will it now weep with the new seal in place?

Do risk it, or am I looking for a new one to refurb and put on?

Any advice from the collective would be appreciated.

Cheers
Mike
 
Afternoon all,

I decided to replace the engine cover rather than run the risk of the seal leaking. Owing to time constraints (and the fact that I’ve just cleaned my garage following the last huge stripping/spraying period) I’ve picked one up and dropped it at my local powder coating firm to be stripped, inspected to any intervention I might need to do with regards to pitting and then painted.

In the meantime I’ve done a bunch of ‘quick’ jobs which put together added up to a good few hours in the garage. Cam chain tensioners cleaned and back in, oil pressure relief valve cap replaced, new oil sight glass put in.

IMG_5799.jpegIMG_5789.jpegIMG_5792.jpegIMG_5795.jpegIMG_5798.jpeg

Since the sun has come out I also decided to make use of the washing line…

IMG_5823.jpegIMG_5825.jpegIMG_5826.jpegIMG_5828.jpeg

I’ll put these away for now - hopefully not too long until I get them installed though.

I’ve still got two large black clouds looming though. One is the rear shock - mine has rust on the cylinder, so it’s goosed. I’ve got an APB out on the wanted section - please let me know if you have one I could use!

The second is the wheels. Again, mine are - cosmetically challenged. The cost of respoking them is prohibitively expensive, and even if I did, the rims are fairly badly pitted. Shame really. I’ve considered putting cast 1200gs wheels on, but that’s a rather involved job and I’d always be concerned that Mr Insurance might take exception to it (not standard on your bike sir….) Any suggestions for me to begin thinking about would be appreciated!

I’m off to enjoy the sunshine.

Cheers
Mike
 

Attachments

  • IMG_5827.jpeg
    IMG_5827.jpeg
    455.9 KB · Views: 6
Those rubber mounts just screw out.
Pour a whole kettle of boiling water slowly onto the engine/ gearbox case, this will expand the ally enough so you can grip them with mole grips and they come out quite easily. Go yo your local quick fit or car exhaust stockist and get " Bossal 255-049 " exhaust mounts they are the same.
Just wondering ... there are similar mounts screwed into the underside of the engine. They are there as mounts for the bash plate. Would they be the same mount?
 
I think the bossal mounts are the same for the bash plate. I can't remember, I replaced mine a long time ago.
There are other exhaust mounts with a 6mm thread both sides. One type has a hexagon base makes for easy fitting.


Back
Top Bottom