So on Thursday early afternoon I called Quasar Products to order a Big Blue Eazy Rizer stand. Spoke to a gentleman called Dave who was very knowledgeable and guided me through what I needed. Apparently for the 1150 range you definitely need the Big Blue rather than the smaller red stand, more to do with the reach of the stand underneath the bike as opposed to any difference in the lifting mechanism. Total cost with the bike mounts was £430.
The stand was delivered yesterday by UPS. It comes in two large heavy boxes. This is probably a delivery you want to be in for - I can imagine neighbours being a bit peeved having to temporarily store such cumbersome items and you don’t want to have to collect this from the delivery depot without another pair of hands to help lift into the car (which the boxes will fit into).
Tools I used to construct the lift:
- Torque wrench;
- 17mm socket and ratchet;
- 17mm spanner;
- 8mm spanner;
- 7mm socket or spanner;
- PZ2 screwdriver (no idea if this an exact match but it served my purpose);
- Pliers for removing split pin;
- 3mm Allen key (it needs to fit through a small aperture so a 3mm hex bit on a driver won’t work);
- Hammer;
- 22mm socket (this is for operating the lift, I think one is supposed to come with the pack but I didn’t get one - no biggie);
- 13mm spanner x 2 (or spanner and socket) for the nuts securing the floor peg mounts.
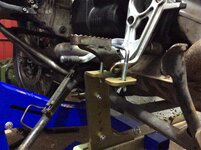
I took me nearly three hours to put together but (a) I was distracted with Line of Duty on in the background and (b) the working parts are heavy and because I was by myself it took a bit patience to get parts to line up correctly so that I could put the necessary bolts in place. It would be much quicker if you had someone help.
The instructions are comprehensive and it’s quite hard to go wrong. Two things the instructions mention when you’re half way through construction:
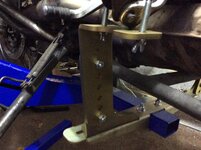
1. The threaded rod which acts as the lift mechanism needs to be greased (plenty of LM grease is supplied) but it’s exposed, less so with the included aluminium guard but you can go further by buying some 15mm copper pipe insulation to place around/over the threaded rod. Now that I’ve put the lift together I’m not going to bother with the copper pipe. I’ve greased the lift mechanism well enough for it to not be a concern in my garage.
2. Quasar Products advise you need to use a 2-speed power drill and advice these can be bought from the likes of eBay/B&Q/Wickes etc. But be sure to look for the “Rotary Dial Speed 1 & 2 machines”. Variable speed, I assume cordless, machines do not have enough torque and will suffer burnout. The instructions actually suggest buying a Parkside PNS 300 A1 -240v Drill from eBay, cost around £40. ***Note - this is taken straight from the instructions, not from my experience.***
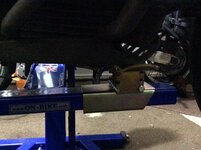
I guess the lift can be used without the drill, instead using a 22mm socket on a ratchet but quite honestly that would be a pain in the arse.
Some other points to note:
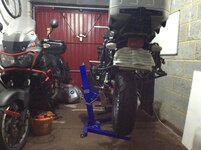
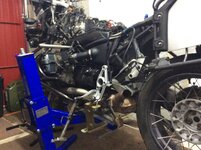
- Once built, the lift does take up a bit of space, a similar cubic area to a tumble dryer;
- It is not collapsible unless you start undoing bolts;
- The lift has reasonably robust castors for moving it around (my garage is carpeted, YMMV);
- Once built, the lift will raise to a height of 3ft max;
- You can use a padlock as a failsafe if you intend to leave your bike at height for any length of time but the padlock needs to purchased separately and I’m exactly sure which lock will fit, more investigation needed.
I’ve not used it on either of my bikes yet, need some downtime from the kids before I attempt that but I’ll post back later.
")