another great idea

yeah, but you need to remove that self amalgamating tape in the future for some reason, from around some electrical wires - good luck with that
 
The hidden part of the loom I wrapped with loom tape
798df49b87c8370658cb5f15c3e4137f.jpg

For the cables coming from the bars I bought this
732da571d6bc24464b45420c29b0ac8e.jpg

Then I saw this
0b12f40527b422a2a719074dadfe9b77.jpg

5a6011000034a297bb5a147a6e0628d3.jpg
56822e0cc7c90897f35e0924a6ea7fa2.jpg

On my computer screen it locked perfect on the bike.... less so. I am not sure how it will hold up to the dirt..but for the time being I am going to use it.
I might have over exaggerated my expert status with regard to bowden cables 😮I realise now that the cable routing is wrong and quite possibly the orientation of the box???
745b9d8ce9b57f95bd577210e688522c.jpg


Anybody able to confirm this?

Sent from my SM-A300FU using Tapatalk
 
yep, your bowden box is wrong.
I dont find it one of the easiest tasks.....

On the underside of the battery tray is a holder that the bowden box slides in to.

Install the battery tray / frame.
On the right hand side, there is access, you may need to hold a rubber pipe out of the way. Push the left side throttle body cable through (and the high speed idle cable) and then slide the box in.
The cable from the twist grip and the right side throttle body cable exit out of the right side.

When you ahve it in place, check and make sure that each of the cables enters and exits the bowden box to the throttle body with nice smooth curves and no kinks.

you can also put the bowden box in to the underside of the battery tray frame and then install it.
I dont know which way is easier.
It is fiddally and a bitch of a task, but do able, have done it a few times.

Whilst we are talking about throttle cables, DONT lube them DONT put any oil or other stuff down them. The PTFE liners will gum up if you do and make them worse.

Because its a bitch of a task and if you think that you need to replace the throttle cables, best to do it now rather than have to pull them again.
If you are going to change them, I would recomened you do all three, dont know about the fast idle, I dont use it where I live
 
http://www.maxbmwmotorcycles.com/fiche/DiagramsMain.aspx?vid=51759&rnd=07012015

IPC page from Max for the bowden box.
item 6 in the picture is the underside of the battery tray frame.

As I scrolled through I saw the note about the mod change.
I didnt read it.
there is a mod and you need to order some new parts for the twist grip end.
It makes it better, less wear and smoother action

easy to do, you just need to order ALL the parts they say
 
As usual you are a font of knowledge...when I was dripping PTFE lube down the cables.... Something in my head kept telling me DONT TO DO IT . I seem to think that I have read that they should be replaced at 50k (miles) too.. I might invest in some new ones, The budget is well and truly blown .. As you say doing it with everything else fitted would be a PITA.. I might leave the fast idle cable; even here in "Old South Wales" it doesn't often get cold enough to need it ... When it does the bike stays in the shed! I can cope with the cold but not the damage the salty roads does to a bike!
 
Finally all the remaining bits are in for paint,, I will keep anybody still reading guessing on the colour (I have changed my mind twice since they were collected!) hopefully I will get my rocker covers back this week so I can finally close the engine up against the damp, Then next weekend the project is on hold until the end of January :tears.
 
thanks, just have done all my own work on my 1150gs and so a it savy on some of the difficulties

when refitting the rocker covers, no oil on the seals and be carefull doing up the stud bolt things.
Many people have snapped them or stripped the threads, they just need to be nipped up.
There is a torque setting (will look it up later) but I just do them up and then a little bit.
If they do weep, remove it, clean the oil off both faces and the seal and then re-install
 
The bowden cable location is obvious. ..Once I was told😑 I should really start thinking for myself!

3523db0e2298126c152d2f1eebf0d4b0.jpg


Sent from my SM-A300FU using Tapatalk
 
dont stress about it too much
most things are obvious when its been pointed out. The people that make it frustrating are the ones who say something like "well, its common sense isn't it"

Dont let it get you down.
Your job, your project, your knowledge, YOUR learning experience
 
My learning experience continues. .I just love doing things twice! Today I fitted the injector pipes. .they come through the gaps I thought were for throttle cables 😕 they should have gone on before the wiring loom. What a nightmare job!
33bf8f6bede6f85ede2c27e596cdbbe9.jpg

9e36f25341ccef9e1840ce416120bada.jpg

I also fitted my brake pipes
4a260612f10033e39ce65c3d803a1b9e.jpg
I need to source a clamp for the right hand side
50533c5b515b39f7360ff1dc085713cf.jpg
I feel the land pipe could have been longer I don't have the length to cross this bracket
49faf6342bce5faf6e76a3ec95061a8a.jpg
I would be happyer being able to route one either side
I picked my rocker covers up and popped them on.
0e5a4e5ca46d908035cb7a4dec298d0c.jpg

So at least it looks like I have done something
Tomorrow I hope to work out what cables? ?? Go under this clamp
86b774882f3261d362e4d2607ea94508.jpg
83049d419d696720bb00ffddd82f7e25.jpg


Sent from my SM-A300FU using Tapatalk
 
That "clamp" is the wrong way up. The loom with ABS cables, fuel pump & sender and so on lies on top and cable ties to it.


Sent from my iPad using Tapatalk
 
Oh dear I am getting good at making a fool of myself!.. so my clamp is in fact a tray! thanks i will turn it around tomorrow :blast
 
No shame there, easily done. The number of times I took things off and put them on again in my build ....


Sent from my iPad using Tapatalk
 
Two years ago, I stripped my Deauville down the the frame and rebuilt it. I took photos of every nut, bolt, clamp etc I removed. I took about 850 photos in total. It's very obvious which way something goes when you're taking it off, because you're looking at it, but when you go to put it back on again, it's nowhere near as obvious. I had to put the photos on my iPad because I was sick of walking in and out to the PC to look at photos. If I hadn't taken the photos, it would probably still be in boxes now.

Keep up the good work - I'm still enjoying this thread. :)
 
I did take pictures but in hindsight not enough! And foolishly expected the "makeover " only to take a few weeks and surely I would remember how things went together. .. generally I have and my clymer manual is a help it explains in detail how the engine internals go together. . But when you are trying to figure out how to neatly re install a wiring loom. .. you are on your own😓
The wiring was always the thing I feared, not so much getting it all to work but getting it back on the bike without it looking like it has been done by a carpenter 😲 
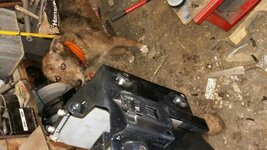
I have had the battery tray on and off about 5 times this evening but I think I am getting somewhere I am sure some of my routing is wrong so I am holding off actually fully cable tying until I am happy. ... and I don't have any spare plugs
96c4e20ba154ecd43489ffc0627acc39.jpg

a191a4c43b8a5b55565521a9a258dfb5.jpg
623565c3096f0904b68da8ae96ad298a.jpg
aafe91104d3a4bc93b2fa31098b167fa.jpg
cd94c317ce120a812653ccbbfd63d64f.jpg


Sent from my SM-A300FU using Tapatalk
 
The online versions of the workshop manual have some excellent schematics showing cable layout and routing. I printed them off and spent a happy day with a bag of zip ties sorting it all out...


Sent from my iPad using Tapatalk
 
What's the knife for ? Just in case!!
 

Attachments

  • IMG_1068.jpg
    IMG_1068.jpg
    65.7 KB · Views: 679


Back
Top Bottom