

You are using an out of date browser. It may not display this or other websites correctly.
You should upgrade or use an alternative browser.
You should upgrade or use an alternative browser.
Ball Joint Removal
- Thread starter Miz
- Start date
dancata
Registered user
As per the title really, I am getting the slider tube bridge cleaned up and re-painted, and want to remove the ball joint, does anyone have any tips/tricks to help?
a 1 meter long lever helped me remove it.
How did you hold the bridge down?a 1 meter long lever helped me remove it.
Best tip I can offer is not to remove the balljoint unless you're replacing it with a new one. It's done up stupidly tight. Just mask it up and work around it.
If you have to remove it, do it while the bridge is still attached to the forks. Put a long lever between the forks (with padding in between so as not to mark the forks) and stand on it, then use another long lever to undo the balljoint. Heating the bridge with a blowtorch or heat gun (from underneath so you don't melt the rubber gaiter on the balljoint) might help.
There's a special factory tool for holding the bridge while you undo the balljoint, but it's no good without a suitably heavy-duty vise mounted to an equally heavy-duty solid object.
dancata
Registered user
How did you hold the bridge down?
I have inserted 2 screws in opposite one to each other and held them into a vice.
like 2 and 7 o'clock.
it required 3 people to undo that f***ing screw...
I did not heat it or anything, and the threads were in perfect shape after the job was done.
the new ball joint had something on it's threads, green stuff like loctite?
Ideally you'll need heat to remove it:
http://www.loctite401.com/template/ying/pdf/docs/2701-EN.PDF
The green stuff will be the remains of loctite 2701 which is a super strong thread lock (the same stuff is specified for paralever pinions). Getting this 2701 to release without heat is very difficult and in threads into alloy, you can actually strip the threads out of the alloy component before it releases. Loctite specify 250 C in order to dissasemble (BMW usually say 120 C) - in a real world situation it depends on how easily you can get heat onto the component without damaging adjacent stuff / paint finishes. When removing my paralever pinions, after faffing around with hot air guns and gas torches I settled on a 25w soldering iron with the bit removed - this fitted nicely into the hex socket on the pinion and allowed me to get it good and hot without worrying about burning the surrounding bits and pieces (I just left it in there until the pinion was 'licked finger' sizzling hot).
dancata
Registered user
Ideally you'll need heat to remove it:
http://www.loctite401.com/template/ying/pdf/docs/2701-EN.PDF
The green stuff will be the remains of loctite 2701 which is a super strong thread lock (the same stuff is specified for paralever pinions). Getting this stuff to release without heat is very difficult and in threads into alloy, you can actually strip the threads out of the alloy component before it releases. Loctite specify 250 C in order to dissasemble - in a real world situation it depends on how easily you can get heat onto the component without damaging adjacent stuff / paint finishes. When removing my paralever pinions, after faffing around with hot air guns and gas torches I settled on a 25w soldering iron with the bit removed - this fitted nicely into the hex socket on the pinion and allowed me to get it good and hot without worrying about burning the surrounding bits and pieces (I just left it in there until the pinion was 'licked finger' sizzling hot).
Like I said, I did not use heat and I have not destroyed the threads on the old joint nor the thing it screws in.
But it's best to check with the manual, and if there is mentioned to use heat, use it
")
Like I said, I did not use heat and I have not destroyed the threads on the old joint nor the thing it screws in.
But it's best to check with the manual, and if there is mentioned to use heat, use it
So this will be the manual that says use heat? - anyone can be lucky

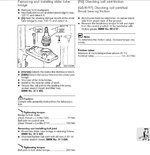
Attachments
dancata
Registered user
So, it's 120 Celsius grades... Thanks for posting that
The reason I replaced mine was a crash that the front of the bike had with a car (his fault, not mine) and the ball had some play in it; also, the rubber thingy that keeps the grease in was going bad and had broken; there was still some grease in, but because of the play I decided to replace it.
The reason I replaced mine was a crash that the front of the bike had with a car (his fault, not mine) and the ball had some play in it; also, the rubber thingy that keeps the grease in was going bad and had broken; there was still some grease in, but because of the play I decided to replace it.
Grey Sickle
Guest
http://65.213.72.112/tds5/docs/2701-EN.PDF
This should get the Henkle website info on 2701 which informs that 250 C will aid disassembly.
Their is also a graph that shows that at 100c the product is at 50% of its nominal strenght, so the hotter, the easier...
This should get the Henkle website info on 2701 which informs that 250 C will aid disassembly.
Their is also a graph that shows that at 100c the product is at 50% of its nominal strenght, so the hotter, the easier...
http://65.213.72.112/tds5/docs/2701-EN.PDF
This should get the Henkle website info on 2701 which informs that 250 C will aid disassembly.
Their is also a graph that shows that at 100c the product is at 50% of its nominal strenght, so the hotter, the easier...
Ahem
:http://www.ukgser.com/forums/showpost.php?p=2209766&postcount=6
Heat, a big compressor and an air impact gun rated up to 770 Ib .
A very satisfying job as you feel the nut fail in it's feeble attempt to stay attached. .
One of the benefits of having a mate just down the road who's a dustcart hydraulic specialist.
Where everything is big and tight, he laughs at the little nuts and bolts and the baby torques i pop along with.
A very satisfying job as you feel the nut fail in it's feeble attempt to stay attached. .
One of the benefits of having a mate just down the road who's a dustcart hydraulic specialist.
Where everything is big and tight, he laughs at the little nuts and bolts and the baby torques i pop along with.


Similar threads