New Screen for the GS

AJJCornish

Registered user
Joined
Oct 27, 2024
Messages
121
Reaction score
70
Location
Cornwall
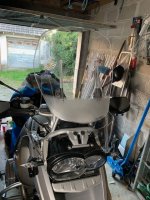
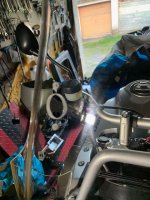
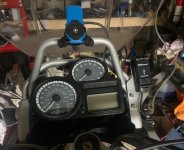
When I bought the bike back in early Oct, I knew that the screen was broken at the bottom on the left hand side...although the screen was pretty much ok apart from that, it wobbles like crazy at any speed above 60mph, but works incredibly well considering!
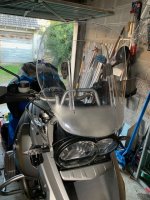
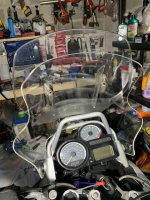
The screen that is fitted is a Givi 330AF which I'm quite impressed with, I don't experience any buffering or excessive wind issues with it.
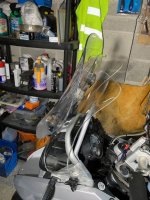
The replacement screen I have purchased is from Slipscreens for the bargain price of £58 delivered. It's a standard height screen, which I will be fixing the top sliding part of the Givi Air Flow to. After emailing Givi, asking them if they will sell the lower screen, they advised me that they only could supply the top screen as a separate part and the lower part was not available to purchase alone. So, I thought this would be a way of keeping the top screen and the advantage of a fully adjustable function.
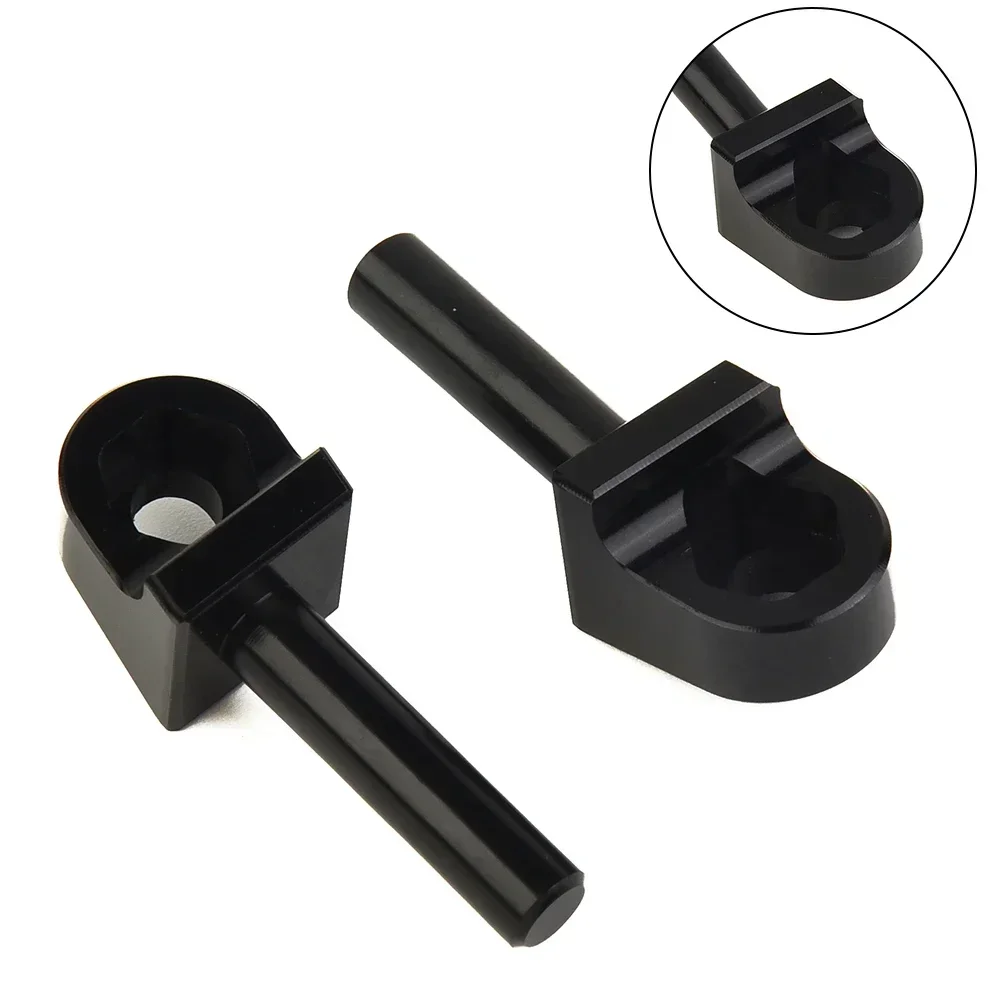
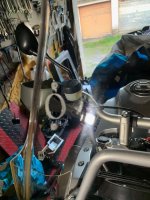
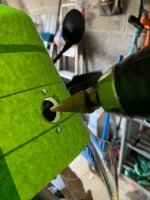
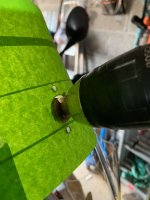
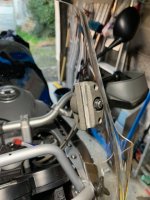
So off comes the old screen, to find that the Pivot Pins that hold the lower mid part of the screen were totally seized and one had snaped adding to the wobbling screen. After soaking with Plus Gas and applying heat via a heat gun the pins were out. I cleaned the pin housing holes and applied a generous amount of Tef Gel and fitted two new Pin mounts from Motorworks at a price of £24.70 inc shipping.
I will take photos and let you know how it all pans out!
Cheers for now!
 
Motor works are making some good money off them.the missus broke one on her GSA and they were unavailable 12 years ago so I repaired it.
Cheaper here if you can wait for them.
I just found this on AliExpress:
£6.05 | 2pcs For BMW R1200GS ADV 2004 2005 2006 2007 2008 2009 2010 2011 2012 Motorcycle Windshield Mounting Fixed Bolts
 
Just clicked on your link…they’re now 80p!!!! I will order some and keep hold of them 😀
 
My two TL’s…a while ago now but still remember the fun!
Sweet. I've still got 3 TLs's in my garage. Love them. Owned one from new 1998. Bought one off the ex missus when we split. Bought another that had been off the road for 15 years as a project.
Lots of fun from a 26-27 year old bike.
 
Sweet. I've still got 3 TLs's in my garage. Love them. Owned one from new 1998. Bought one off the ex missus when we split. Bought another that had been off the road for 15 years as a project.
Lots of fun from a 26-27 year old bike.
Yea totally agree...but I'm tooooo old now! got a neck issue, so have to be careful now! but GREAT memories haha
 
Sweet. I've still got 3 TLs's in my garage. Love them. Owned one from new 1998. Bought one off the ex missus when we split. Bought another that had been off the road for 15 years as a project.
Lots of fun from a 26-27 year old bike.
May as well add a couple of photos
Red one with renthals
My 1998 original with 93.000 miles on her
And the project one
IMG20220418172742.jpgIMG_20190323_171614.jpgIMG_20201206_153740.jpg
 
O....you are a BAD person!!! now you got me thinking about the TL's...great bikes!!
You're a man with impeccable taste! a lovely envious collection!
Thanks for sharing TLSgazza brilliant :love:
 
The new screen from Slipscreens Ltd arrived today (2pm)
I fitted the screen to the GS using new bolts for the locking ones and the originals for the pivot points.
I then applied masking tape to the areas that needed marking out and drilling. I marked a centre line first to give me a datum to work from.
I made a card template from the old lower screen, then taped it to the screen lining up the centre lines on the template and the new screen, then marked through the drill points on to the masking tape. You should double check the dimensions after removing the template, which checked out.
Now comes the brave bit! I drilled a small pilot for each hole, then I drilled the smaller holes, being careful not to push too hard and supporting the rear with a soft wood block. For the larger holes I used a step drill which is great for larger holes especially in plastic.
I removed the masking tape and checked the holes for any cracks or sharp edges which can be dealt with if needed.
After fitting the upper screen clamps, I offered the upper screen to the clamps and adjusted the clamping force via the locknut and tried the function.
The only thing I haven't fitted are the additional side stays which I will find a solution for in the coming days.
By doing the above I have saved £120 due to Givi not prepared to sell me the lower screen as a separate item, which I think is a little short sighted to be honest...their loss!
I chose to do the drilling on the bike, as it became a "Third hand", but some may prefer to do the drilling off the bike.
The whole job took around 1 1/2hrs.
A few photos below.
 

Attachments

  • IMG_1340.jpeg
    IMG_1340.jpeg
    79.7 KB · Views: 23
  • IMG_1335.jpeg
    IMG_1335.jpeg
    64.7 KB · Views: 24
  • IMG_1334.jpeg
    IMG_1334.jpeg
    58.2 KB · Views: 23
  • IMG_1333.jpeg
    IMG_1333.jpeg
    48.5 KB · Views: 25
  • IMG_1332.jpeg
    IMG_1332.jpeg
    48.3 KB · Views: 23
  • IMG_1339.jpeg
    IMG_1339.jpeg
    76.3 KB · Views: 25
  • IMG_1338.jpeg
    IMG_1338.jpeg
    78.6 KB · Views: 24
  • IMG_1337.jpeg
    IMG_1337.jpeg
    53.7 KB · Views: 24
  • IMG_1336.jpeg
    IMG_1336.jpeg
    65.4 KB · Views: 24
  • IMG_1341.jpeg
    IMG_1341.jpeg
    75 KB · Views: 25
  • IMG_1342.jpeg
    IMG_1342.jpeg
    84.4 KB · Views: 24
  • IMG_1343.jpeg
    IMG_1343.jpeg
    73.9 KB · Views: 22
  • IMG_1330.jpeg
    IMG_1330.jpeg
    68.2 KB · Views: 25
Well...I tried out the new set up and I had different results when trying the screen in different positions. I ended up with the lower screen set at "Mid position" and the upper screen also around half way up which is around 75mm rise. This gives me good vision and a very quiet ride at 70mph. so very pleased.
I also fitted a "waterproof while in use" USB socket. these are used in the marine industry, and can supply power via 2 x usb sockets and remain waterproof! Not many sockets like this out there.
I'm going to refit the "Winglets" and try those.
 

Attachments

  • IMG_1373.jpeg
    IMG_1373.jpeg
    100 KB · Views: 14
  • IMG_1366 (1).jpeg
    IMG_1366 (1).jpeg
    61.7 KB · Views: 14


Back
Top Bottom