Bullitproof
Guest
Hi all,
This may seem like my first post but its not. I have had to re-register cause I was away so long, doing my bit for HM.
Anyway here I am back to reality. Bike is now paid in full and I have some pennies to spare so I turn to TT for some farkles n things......
I decided to get the Desierto 3 Fairing (way cool) , some locks for my boxes (common sense)
 a cross bar for the Handle bars (for GPS) and the Looks cool but not practical to instal TT rear LED Brake light!
So, Cross bar on. 10 mins
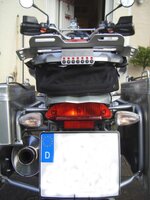
Then I thought to do the rear light.
Firstly, the instruction sheet is not. Its a picture on how to wire the plug, but thats it. Nowhere is the mention of where to put said plug, or the fact that if you (I mean me) didn't know how to take off your standard rear light and ended up taking half my bike to bits and it starts raining and you start to rush therefore skinnning your knuckle on some friggin sharp something and your wife comes home to find all your bits sitting on the kitchen counter.....WHERE do you put the plug???
So yea, WTF. Surely TT could produce a better explanation sheet other than the pathetic one they made.
Can anyone help? I need it, so I will patiently wait here picking my fresh scab til someone replies.
Cheers-
This may seem like my first post but its not. I have had to re-register cause I was away so long, doing my bit for HM.
Anyway here I am back to reality. Bike is now paid in full and I have some pennies to spare so I turn to TT for some farkles n things......
I decided to get the Desierto 3 Fairing (way cool)
, some locks for my boxes (common sense) a cross bar for the Handle bars (for GPS) and the Looks cool but not practical to instal TT rear LED Brake light!So, Cross bar on. 10 mins
Then I thought to do the rear light.
Firstly, the instruction sheet is not. Its a picture on how to wire the plug, but thats it. Nowhere is the mention of where to put said plug, or the fact that if you (I mean me) didn't know how to take off your standard rear light and ended up taking half my bike to bits and it starts raining and you start to rush therefore skinnning your knuckle on some friggin sharp something and your wife comes home to find all your bits sitting on the kitchen counter.....WHERE do you put the plug???
So yea, WTF. Surely TT could produce a better explanation sheet other than the pathetic one they made.
Can anyone help? I need it, so I will patiently wait here picking my fresh scab til someone replies.
Cheers-