WindyChuffer, I think that this will be more complex than you think.
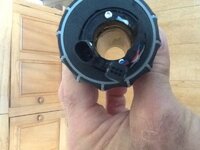
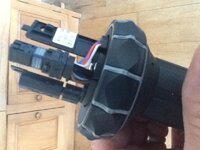
There are 8 wires from the left hand grip.
Heated grip.
2 wires- Brown and Black with 2 white stripes ( or could be white with a black stripe) these go to a 2 pin plug.
Wheel switch.
6 wires.
White red blue brown grey black. These go to a 6 pin plug
Brown is BM earth.
I guess that the wheel has multiple switches that connect a coloured wire to earth. 5 (?) switches, though I expected only 4 - rotate up / down & left / right.
I like your idea on making the wheel the indicator switch, however I feel that cutting the wire is the wrong way.
IF you can identify the wires in question that you need to cut and join! why not find the multi connection plug where the wires join the main wiring loom. The plugs can be taken apart, each wire removed from the plug and repositioned into the plug to make the connections that you require. Obviously some would have to remain not connected (ie taped up).
If when you sell the bike, the plug can be rebuilt back to original spec
Or
Find where the cable from the left hand switch gear goes under the tank.
Cut into it.
Identify the wheel wires. Cut and plug into a multplug, so the wires connection can remain as standard. Do the same for the indicator switch. Then make a bridge for connecting the wheel switch to the indicator lead. Tape up the unconnected plugs.
When you sell the bike, remove the bridge. So back to square one with just some extra plugs under the tank.
.