1988 R80RT -> R80 Part 1

daveg

Well-known member
UKGSer Subscriber
Joined
Aug 7, 2005
Messages
2,325
Reaction score
70
Location
Reading, England
Hi Folks, thought this might be of interest and also it's a heads up in case I need any advice :D

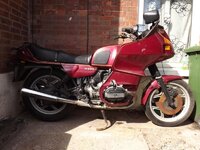
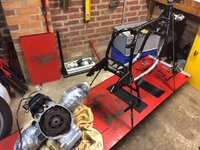
I bought a slightly 'used' RT earlier in the year as a bit of a project to keep me sane while I was looking after my wife through her illness.

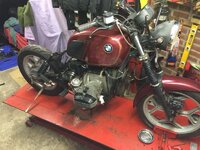
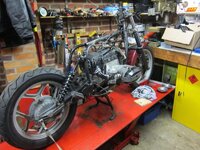
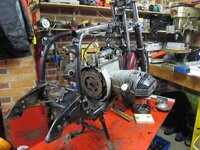
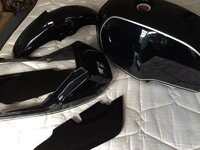
As it happens it's turned into a complete rebuild and I've dumped the fairing as it was quite tatty......
 

Attachments

  • motorcyle and parts 008.jpg
    motorcyle and parts 008.jpg
    77.3 KB · Views: 1,044
  • IMG_1458.jpg
    IMG_1458.jpg
    80.7 KB · Views: 1,027
  • IMG_1496.jpg
    IMG_1496.jpg
    104.8 KB · Views: 1,327
  • IMG_4465.jpg
    IMG_4465.jpg
    83.2 KB · Views: 1,020
  • IMG_4474.jpg
    IMG_4474.jpg
    48.2 KB · Views: 1,056
Looking forward to watching this. I resurrected my RT earlier this year, but all that was needed was a couple of seals, battery and an Italian tune up.
 
..some more pics..
 

Attachments

  • IMG_4488.jpg
    IMG_4488.jpg
    86 KB · Views: 934
  • IMG_1789.jpg
    IMG_1789.jpg
    87.8 KB · Views: 1,034
  • IMG_1792.jpg
    IMG_1792.jpg
    82.7 KB · Views: 1,056
  • IMG_1820.jpg
    IMG_1820.jpg
    53.2 KB · Views: 1,047
Ah, a rebuild thread. I do love a good rebuild thread and this looks to be a good one to follow.

Keep it going, this is looking good. :thumb
 
Well, the decks are cleared and I'm ready to start assembling!

Any tips on getting the engine back in the frame...apart from a helper! Is it best to go in from the left or right? Is it necessary to take the starter cover off to manoeuvre it in? When I took it out - on my own - I'd more or less stripped it down.

I'm sure I'll manage but it would be good to avoid lots of paint scratching and swearing so all advice appreciated.
 

Attachments

  • IMG_2247.jpg
    IMG_2247.jpg
    70.8 KB · Views: 918
Any tips on getting the engine back in the frame...apart from a helper! Is it best to go in from the left or right? Is it necessary to take the starter cover off to manoeuvre it in? When I took it out - on my own - I'd more or less stripped it down.

I've read that it's easier to lift the frame onto the engine, being that it's a bit lighter. Information here:

http://www.bmbikes.org.uk/Forum/viewtopic.php?f=15&t=22318
 
Wrap some tape and bubble wrap over the lower frame rails and lift her in ,it's not that hard ,but a bit of help would be good as it's a bit of a lump.
Also check your clutch before you put it in I gave mine a look and thought it would be OK ,I now have too put a new on in ,bugger.
Who did the paint work ?its looking dandy
 
Ah, I like the idea of laying the engine on its side and dropping the bare frame over it. Thanks!

Chris, the clutch is new but good thinking! The frame and bits and pieces were painted by the local shot blaster R D Cox. The tank, mudguard etc. by Revolution Custom Paint.
 
Well, my son turned up to stay the night and it was a doddle with two pairs of hands. And not a scratch on the paintwork :thumb2
 

Attachments

  • IMG_2250.jpg
    IMG_2250.jpg
    68.5 KB · Views: 741
  • IMG_2249.jpg
    IMG_2249.jpg
    70.8 KB · Views: 858
Paint looks good.

What did you do, if anything, about this bit of what looks like abortionate (did I just invent that word?) butchery.

attachment.php
 
If you havent touched it yet I would just test to see if it holds 23 ft lbs of torque, and if it does just fit a gasket and 3 Bond .
My GS had a couple of loose wire inserts, probably from new, you could wobble the studs, but I just assembled it and they have held for 100,000 km with 9.5 pistons and 60 thou squish.
 
Paint looks good.

What did you do, if anything, about this bit of what looks like abortionate (did I just invent that word?) butchery.

attachment.php

Good word and I think you did invent it!

Once I saw the state of this and one of the other studs (it came out at a wonky angle due to shit heli-coiling) I knew I had to sort it out properly. This wasn't going to be a quick fix :blast
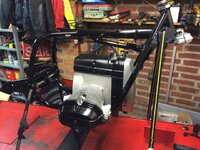
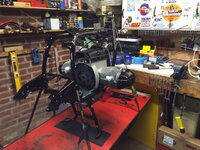
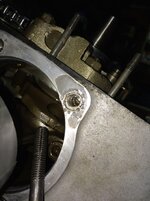
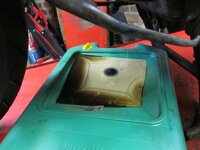
.....luckily I found a nice pristine crankcase for £55! :D

I had newly vapour blasted barrels, heads and front cover plus shot blasted and painted covers ready to start building. That's when I came up with the cunning plan to drop it off with Steve Scriminger when I was passing on my way up to Scotland on a three week trip and pick it up all nicely buttoned up on my way back. Expensive but nothing like peace of mind knowing it was built by one of the best. Glad I did as it happens as he picked up on a couple of things I may well have missed.
 
If you havent touched it yet I would just test to see if it holds 23 ft lbs of torque, and if it does just fit a gasket and 3 Bond .
My GS had a couple of loose wire inserts, probably from new, you could wobble the studs, but I just assembled it and they have held for 100,000 km with 9.5 pistons and 60 thou squish.

These were butchered and one of the oilways damaged not just loose! Sorted now anyway but thanks for the advice.


Back
Top Bottom