

You are using an out of date browser. It may not display this or other websites correctly.
You should upgrade or use an alternative browser.
You should upgrade or use an alternative browser.
Airhead 80-100 G/S Adventure Build
- Thread starter Nin
- Start date
Just thinking ahead, how do folk get a signal for an electronic Rev counter off these?
I've no actual idea, but I would imagine it's off the spinney bit of metal at the front of the engine when the cover is off. You can guess who did mine.

I was rather impressed when I set it up on the unit and it worked.
I have the speedo cable like the original. You have to set up the measurement of the back tyre X some maths.
- Joined
- Jul 14, 2010
- Messages
- 10,477
- Reaction score
- 3,817
Off the coil trigger
Iirc blue feed to coil,black wire to trigger,spur off this one
Iirc blue feed to coil,black wire to trigger,spur off this one
Nice one, thanks Mike
Is the engine front cover painted?
Looks a bit shiney.
I would expect that to get gravel rash from the front wheel fairly soon. Can you put 'helicopter' tape on it, or somthing similar?
Looks a bit shiney.
I would expect that to get gravel rash from the front wheel fairly soon. Can you put 'helicopter' tape on it, or somthing similar?
I have a couple! I’m trying out a clear satin powder coat on this one to see how it lasts. I have another “show” version in plain vapour blast finish.
I also have different rocker covers depending on whether I’m heading to Starbucks (fancy peanut jobs) or the Ridgeway (black powder coated jobs)
I also have different rocker covers depending on whether I’m heading to Starbucks (fancy peanut jobs) or the Ridgeway (black powder coated jobs)
I have the speedo cable like the original. You have to set up the measurement of the back tyre X some maths.
Thanks Tufty, I’ve got hold of an IMO unit so will use that (runs off a front wheel magnet trigger) with some bespoke idiot lights and a Rev counter.
Time for a quick fettle, the camshaft carrier bearing arrived in the post so I can fit the timing chest and high capacity alternator.
The bean can has turned into a tuna can. One of the most expensive single units on the bike.
I’ve got to cut down a couple of bolts to fit.

The bean can has turned into a tuna can. One of the most expensive single units on the bike.
I’ve got to cut down a couple of bolts to fit.
- Joined
- Jul 14, 2010
- Messages
- 10,477
- Reaction score
- 3,817
Looking good
There's not a lot of adjustment on that Tuna Can - is there ") .
.
Bob.
.Bob.
There's not a lot of adjustment on that Tuna Can - is there
Bob.
Not as bad as it looks in the photo - I took this from slightly above horizontal.
- Joined
- Jul 14, 2010
- Messages
- 10,477
- Reaction score
- 3,817
There's not a lot of adjustment on that Tuna Can - is there
Bob.
How much do you need?
,if you can’t time it up within the slots there’s summat amiss

Back from a morning errand (nice meet you Chris) to find postie had dropped this off.

Time to get cracking on the rear end, then we can get wheels on.
Time to get cracking on the rear end, then we can get wheels on.
Well I thought that would be a nice and simple day, but that drive shaft and swing arm clearly hate me. But we got there in the end, not helped by the fact that it’s over 40 degrees in the workshop.
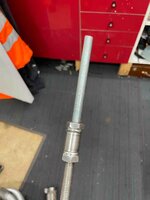
First off, now why’s that too short? Eh?

Cos my swing arm is 10 cm longer than normal, that’s why. So a quick job to extend my tool (ooer).
First off, now why’s that too short? Eh?
Cos my swing arm is 10 cm longer than normal, that’s why. So a quick job to extend my tool (ooer).
Attachments
Then wind it all up and pop the spring clip in like so

Jobs a good un.
Except I cut myself on one of the threaded bars and spent an hour getting that glued back up.
Bollox
Jobs a good un.
Except I cut myself on one of the threaded bars and spent an hour getting that glued back up.
Bollox
Anyway back at it and let’s get the drive shaft connected to the gearbox.
First make sure the gaiter goes on the right way round/up. And grease those splines! Or not, depending on how you feel. I put a light film of moly on them.

Then get the wee bolts in

Tighten with a 12mm ring spanner.

And spend the next hour and a half fighting the gaiter into place.
First make sure the gaiter goes on the right way round/up. And grease those splines! Or not, depending on how you feel. I put a light film of moly on them.
Then get the wee bolts in
Tighten with a 12mm ring spanner.
And spend the next hour and a half fighting the gaiter into place.
So now we have the swing arm, bevel, shock and rear brake on. Not sure I’m happy with that cable run though.


I agree with you about the cable. It needs to be as straight as you can get it without it being stretched due the swing arm movement. You’ll lose a lot of braking efficiency with a curve like that.
Looks a bit better now

Back wheel on just to get the dimensions right

This needs to be bigger!

This needs to be bigger!

Similar threads
- Replies
- 5
- Views
- 1,745