Camille's big rebuild

been soda blasting, had a few issues with the bicarb clogging but just meant i had to be less like a bull in a china shop:blast, anyway the done bits look loads better and my skin feels refreshed and well exfoliated:eek:
anyway heres a few photos, look at the pick at the beginning of this thread to remind yourselves what state the engine was in. tomorrow its the turn of the gearbox:thumb

Glass bead blasting will give you a better finish on the motor, diff, gearbox and any textured alloy part. For any part that you want more of a sheen on (carbs) soda blasting will finish them off. It's the same principle as working through the grades of sand paper.

A cheap sand blasting gun, a bag of glass beads and plenty of space and your away. :thumb

Love to see a photo of the operator after your soda blasting job :D

I've done it -it gets in :eek: :eek: :eek:
 
the only issue i have with that is

Glass bead blasting will give you a better finish on the motor, diff, gearbox and any textured alloy part. For any part that you want more of a sheen on (carbs) soda blasting will finish them off. It's the same principle as working through the grades of sand paper.

A cheap sand blasting gun, a bag of glass beads and plenty of space and your away. :thumb

Love to see a photo of the operator after your soda blasting job :D

I've done it -it gets in :eek: :eek: :eek:

if a bit of baking soda gets into the working parts its not going to effect things where as ally fillings/glass beads will cause huge issue and massive costs. The finish thats come up looks good without that brand new look, after all she's 26years old. maybe if i do another i'll go for a complete strip and clean.
 
Yeah, you've got to be careful with glass beads and do a lot of masking up beforehand. I use Bluetak (might be something else over there?) to plug holes.

Ideally you would disassemble everything and blast it. Hubs and fork legs are OK though.

Takes a bloody long ti,me in the shower to get rid of the glass beads too :eek:
 
today i've been mostly

soda blasting again:blast oh my face stings. anyway today i've done the wheels, rear bevel box,airbox covers and remaining carb. i've also cleaned up the wp shocks so thay now look like brand new ones.
so far so good, by tuesday i'll get the frame back from the stripper:eek then it can go for coating, i should get the forks off this weekend for new springs and seals then i can start prepping the bodywork for paint.:clap
 
righto i've decided

:rob 
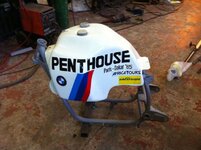
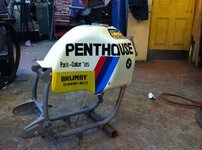
as money is a major issue at present and the special replica tank isnt going to happen just yet i'm going to re-do Camille in the Marlboro paint job. my reasons for this are simple. She been this way for nearly 20 years and thats most of her life, its a cool paint job if done well and i just happen to have been able to get the right colour:D so thats what i'm going to do, i'll post pics as we go along so you guys can see how its done and with any luck the finished jobbie will look the dogs do-dahs:thumb2
 
thats the best bit

Seems the right thing to do, cover your bike with playboy logos when your a tosser
 
i think the correct red is called 'rocket red' :thumb ....or it was at MCL

not sure of the code tho


make sure you use the 'authentic' Marlboro colour and not just any old paint
 
well from what i've discovered

i think the correct red is called 'rocket red' :thumb ....or it was at MCL

not sure of the code tho


make sure you use the 'authentic' Marlboro colour and not just any old paint

its called rosso luminesso and its nearer to a dayglo orange. its one shade darker than the dynorod orange.
 
well here we go.

The Tank has been stripped of all the stickers, the new marlboro and playboy ones have been ordered and now its just a question of do i paint on the others or do i get the originals copied and just laquer over then when they've been applied. I'd prefere to do them in paint but its a fiddly job but i think the finished job would look the dogs do-dahs. all i've got to do now is get the colour match right:eek. I've sorted the removal of the old paint with an orbital sander which is one headache sorted. The frame and other bits of metal work will be back with me on tuesday which means i can get them over to my mate for a bit of "special work" so all in all its all coming together. In the mean time i shall be breaking down the headlight cowl and getting that over to Kev for some of his very special metal bashing skills which with any luck will get rid of that cobbled together look and get it looking like a pukka bit of kit.
All i need now is a good auto electrician who can make a propper loom to replace the tangled heap of scrap i've currently got:confused: when done i recon she'll look the biz:thumb2
 
cockpit stripdown

spent 3 hours stripping the cockpit down today, bloody thing had some 40+nuts and bolts holding it together:blast anyway the interesting thing is underneath the twin headlight arrangment is the original single light unit :nenau 
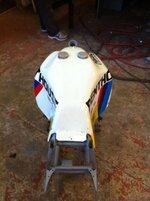
unfortunatly its been hacked and bodged so cant use it. Anyway i'm in two minds now, i can either get a replacment one from hpn or i can get my mate kev to use his awesome metal bashing skills to remake the twin light unit. i dunno, i'll show him what i've got and we'll take it fron there.
 
oh i'm a super happy chap

as some of you may have gathered i've had a change of plan with Camilles rebuild. I've decided as it something i'd always wanted to do to return her to her original penthouse scheme. now the big issue in doing this in the past was the fact that many moons ago the last owner had flogged the big old ally tank and swapped it for a hpn jobbie:blast. Now that tank was special but as hard as i tried we couldn't track it down and all hope was lost. I spoke with a number of tank builders about making a replica, some didn't want to know, some said that a 42ltr tank in ally wouldn't be strong enough and some just wanted way too much dosh. So i decided to paint the hpn tank in the 85 marlboro scheme.

role on 6 months.

Last week i got a pm from Rob Farmer to say "call this bloke he's got a tank that sound like it may be the one" (thanks Rob:thumb) anyway to cut a long story short i called the bloke and it turned out to be Camilles original tank:eek: he'd decided to sell it on ebay:eek::eek::eek: so i haggled with him and explained it was going back home and the deal was done. the spooky thing was as proff pointed out to me, on the ebay add where its got the sellers info his number of transactions were, yep you've guessed it 101. call it fate or destany but i shit you not. so last night we drove down to northamptonshire to meet the seller and collect this piece of history:clap
I have to say it took some convincing the wife that it was a worth while purchase as she just see's an old petrol tank but i think she's coming round to it:mmmm
Anywat today i let the tank and frame meet for the first time in ages and it was a moving moment, so here you go folks a few photos:D
 

Attachments

  • 057.JPG
    057.JPG
    85.3 KB · Views: 665
  • 059.JPG
    059.JPG
    90.7 KB · Views: 856
  • 060.JPG
    060.JPG
    78.3 KB · Views: 841
fits like a glove

if you look at the last photo you'll see it fits round the frame perfectly, and all the mounting holes line up:thumb2


Back
Top Bottom