Fitting swing arm to gearbox rubber gaiter - how?

nud1e

Registered user
Joined
Aug 12, 2003
Messages
1,868
Reaction score
1
Location
Crumlin, Co Antrim, Northern Ireland
I've found a hole in the gaiter and sealed it with some silicone sealant.
I have new gaiter, what is the easiest way to fit this?
Do I need to remove the swing arm or can I unbolt the drive shaft and work the old gaiter off and the new one on?
The acquired wisdom is requested.
 
Having recently done this job I can't imagine you could possibly fit the gaiter without at least pulling the swingarm back away from the gearbox, and it's a good opportunity to check the driveshaft joints and grease the splines while you're in there.

BTW when my gaiter first split I glued a piece of Landrover inner tube over the split, smothered it with silicone and it held for several months until I finally got around to doing it properly. It's not a horrible job at all.
 
I think you're both basically asking/saying the same thing. You don't have to completely strip the rear end and fully remove the swingarm. It's just a case of unbolting and moving it back slighty. The Clymer manual has a good write up (better than Haynes IMHO).
 
Getting a new gaiter over the sleeves on the swingarm and the gearbox can be a right bitch if you are doing it on your own.

I found it necessary to remove the exhaust collector box so that I could get all around the gaiter.

If you have a 'Y' piece you might be OK.

Hopefully someone can explain a simple method of stretching the gaiter and fitting it from one side. :thumb

Best of luck.

Bob.
 
paralever?

IME the easiest way is to remove the shock and bevel box, then the swing arm back to clear the shaft. no need to remove the shaft.

put the new gaitor on, noting it is square. get it wrong and the UJ will soon put another hole in the gaitor DAMHIK :blast

refit the swing arm.

now i can't remember if it's easier to fix the shaft or the gearbox jubillee clip first. anyway, the second one needs a tool to get it on easily. whatever, i use a spoke with a 90º bend near the flanged end to hook the rubber into place.

don't dick around with fingers/screwdrivers through the pivot bearings trying to align the splines when refitting the bevel box. rest the lower UJ in th eswing arm, but angle the splines up a bit. offer up the bevel box to the shaft from a 30ºish angle (pointing down) and it will go straight on. refit pivot bolts and shock.

i tried this way & the traditional way (removing the complete swing arm assembly and shaft bolts) back to back once. this way is way quicker and easier :)
 
Getting a new gaiter over the sleeves on the swingarm and the gearbox can be a right bitch if you are doing it on your own.

I soaked the gaiter in hot water before fitting it, and kept a hot air gun to hand to keep it warm and hopefully more flexible during the operation - dunno if this made any difference but I certainly didn't find the job the PITA I'd been led to believe.

I had the swing arm off, so gaiter onto the swing arm first (you can get that end on by hand) and do up the jubilee clip. Swing arm back into bike - centralise it and bolt it up, replace driveshaft bolts next, then the gaiter onto the gearbox. Working from the right hand side I pulled it over the top of the boss and down as far around as I could, then from the left hand side used a pair of fine nosed pliers to hold the edge of it and gently ease the remaining section into position.

I've got a 'Y' piece and there is plenty of room to get at the gaiter.
 
I've got a 'Y' piece and there is plenty of room to get at the gaiter.

I think that's the secret.

Once I decided to remove the collector box and could get all around the gaiter it went on OK. Before that, the side I couldn't get at (which I fitted first) kept popping off.

It would probably be OK with the collector box on if there was another pair of hands helping.

All part of the learning process.

Bob.
 
Take out the swing arm pivots, Non setting silicone grease round the back of the gearbox flange, get the far side on first, hold it with your finger and then work the rest on with a bent tool like Cookies spoke. The grease makes a huge difference as does putting the seal on the right way round.
 
Like Rob Farmer sez:

Secure the boot on the paralever first. Clamp it tightly.

I used a home-made tool fabricated from stiff wire (handle from an old house paint can). I made a loop about a half-inch wide and twisted the rest of the wire to make a handle of about five inches long. I wrapped this handle in duct tape. I bent the looped portion 90 degrees from the handle.

Like Farmer, I urged the boot on the inner part of the transmission flange. I used no grease. With my tool, I gently hooked the boot from around the back and was able to stretch the boot over the flange. Took me only a couple tries, and I was able to secure the clamp.

Tom in Salem, OR USA
 
Bike on centerstand,with the shock disconnected from the rear drive/swing arm,position the swing arm in a more horizontal position.
This will allow a better fitting of the boot,...kinda gives a bit more material to work with,...and lowers the 'boot pulling away effect" from the top of the trans flange where the boot clamps on.

I also would be lost without these tools.
Top one is used for radiator hose removal/install and the bottom is for pulling 'cotter keys".
Both work great for several job's requiring extra fingers to get into places non-reachable!!
100_1346.jpg
 
Driveshaft Gaiter Replacement

Well I wish I had read this thread before I started this very same job, although it is not the sole reason for havng to do so. My bike had developed an oil leak that seamed to be coming from I thought, either the crankshaft end seal behind the clutch or from the gearbox input shaft seal. The tell tale sign was what looked like gearbox oil running down the tale end of the sump pan and dripping onto the mat the bike stands on.

Read the Clymer manual and the Haines to see what could be gleaned and was cracking on without any troubles. Left the engine tilted to the rear and the gearbox up ended on the bench to trace the leak. Nothing (nada) after a week.....!!

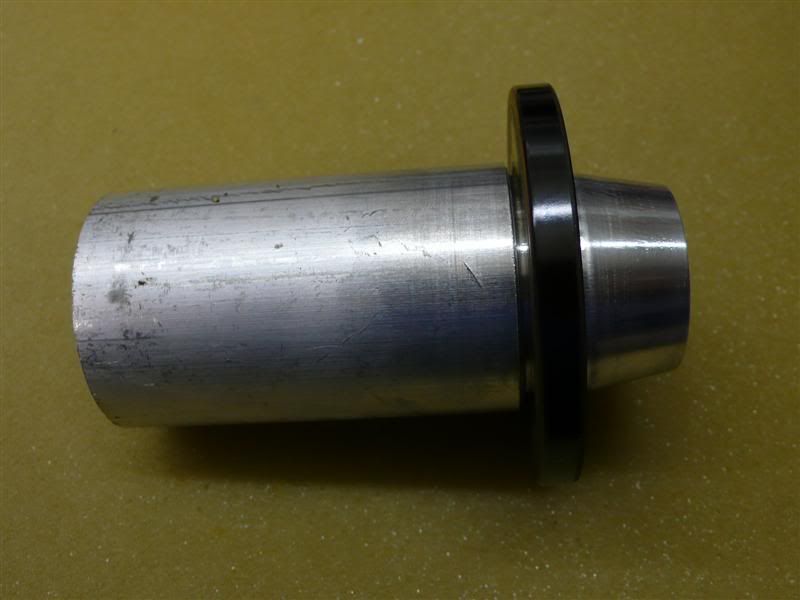
Ordered a new gaiter and some other bits from Motobins and set to rebuilding it all. Finally got to doing up the drive shaft flange and didn't really give any thought to alingment of the paralever. Fitted the drive shaft bolts and proceded to tighten and rotate the shaft to do up the 4 bolts. Only to notice that I was actually destroying the new gaiter due to the angle. Sh1t says I and after a bit of defamatory language I thought to myself oh well... put it down to experience. Re-ordered another gaiter from Motobins thinking to myself Rob will be thinking I'm a real dickhead I thought it too:blast Anway another new gaiter is received and today I set about separating the box from the engine again, new gaiter in place front end first and then I spent the rest of this afternoon struggle like f**k to get the rear end on. :comfort Thinking there must be an easy way to do this or so I thought:confused: 
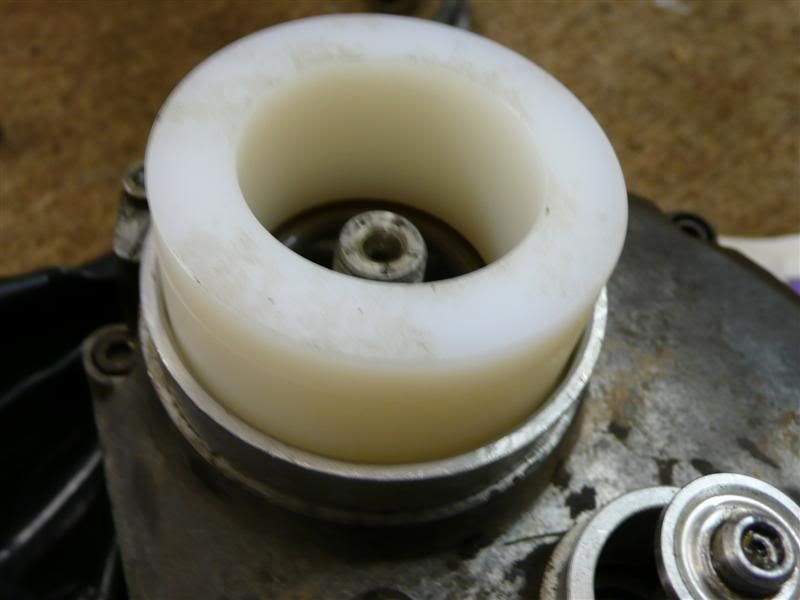
Anyway like someone here suggested I had tried the hot air gun a few times to soften the rubber and allow it to stretch more easily and that seemed to help a bit. Not enough to get the damn thing on all the way round so I'm giving it a bit more hot air and by this time sweating buckets oh and it's snowing outside here in Belgium. Next thing I'm holding the tool I was using to elongate and stretch the gaiter in the air as it flew up being releived of the force of me pulling. The gaiter has separated along the mouldng line from the mould tooling it was formed in. Damn, damn, and a thousand damns more.... :tears I couldn't believe it.

By this time I'm pretty pissed of with myself..... :augie 
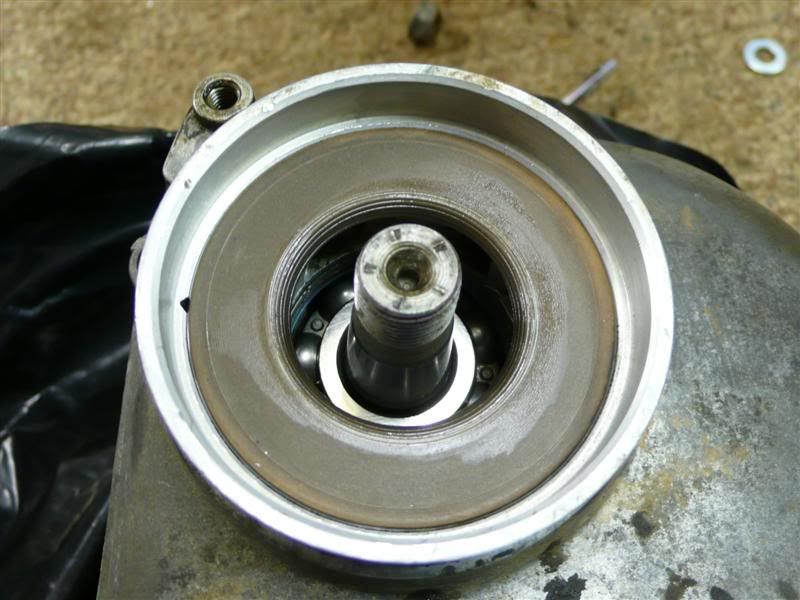
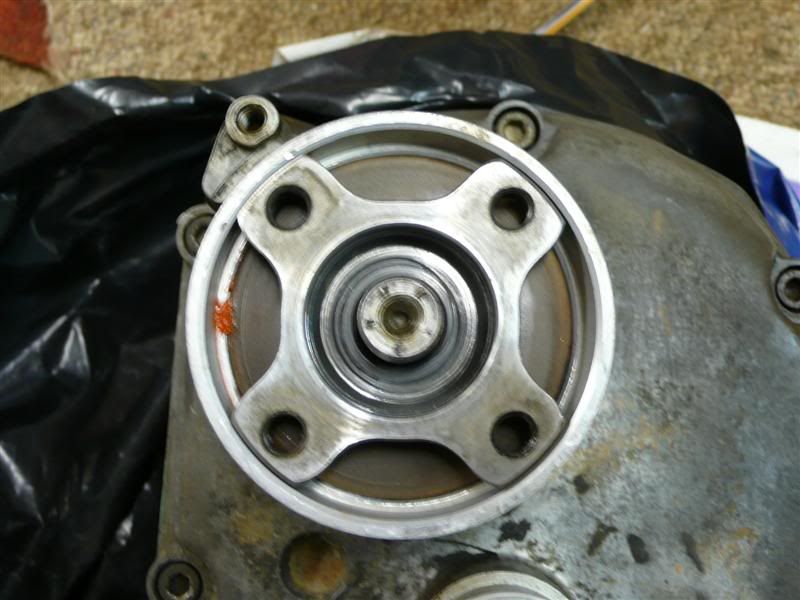
not that I've got anything better to be doing with myself on a miserable Saturday afternoon, so I pull the old gaiter out of the box and have a good look at it. Would you believe it is marked to show what side should go the the gearox 'Getriebe Seite' So out comes the magnifyng glass to look for such markings on the new gaiter. Nothing... so this suggests to me that the were sided at some point in the past and are no longer as they are probably pattern parts and only show the part number on the part now.

Well by the time you finish reading this you will probably have guessed I'm toying with the idea of refitting the old one as it is already preformed having ben in sutu for a long time and it only had a very small hole just under where the jubilee strap would be tensioned. Sod that I don't like being defeated so I will order another gaiter and have it sent over to Belgium to try again next weekend. On the bright side of things I am getting to know how it all works pretty well, I even made up a socket and ring tool so that I could more accurately guage to Lbs ft using the torque wrench. Aka Snowbums wee jobby..... Thanks Bob.

Now if anyone would like to add to the posts already on here on the subject I would more than welcome any advice from the venerable spanner men on this vault of information.

Thanks for your time to those who have already posted their knowledge I will try and follow the instructions.

Aye

Archie
 
Funny thing there are many ways to skin a cat...
This is how i do them on a paralever
I don't remove the bevel box cuz there's no point disturbing the locktited bolts IMHO
I remove the front swingarm screws cuz there easy
Then the driveshaft bolts and pull the whole lot back...you might aswell take the whole thing out so you can give the driveshaft a proper check IMHO
I then put the boot on the driveshaft and secure it
Then put the swingarm back in...and Replace the bolts
I never put any lubricant on the boot because i recon it just makes it a slimey slippy thing to handle...
Then i use my fingers to fit it...If it's cold warm the boot up a bit it makes a big difference... But they can be a bit of a pig....If so i use a bent spoke....


Paralever rear oil seal in the gearbox can cause some people a lot of trouble too :blast

This is how i do them seems to work a treat...

Tools i have made to do the job

P1010845Medium.jpg


Cover the seal with engine oil...Then preform the seal for at least 2 hours

P1010841Medium.jpg


P1010840Medium.jpg


Tap the seal in with the nylon driver

P1010842Medium.jpg


P1010843Medium.jpg


Then fit the drive flange....Clean the oil off the seal and fill the breather hole with silicone

P1010844Medium.jpg


Job done :thumb
 
Thanks

Thanks for the input and knowledge I have ordered another seal and will perservere.

Archie
 
Thanks for the input and knowledge I have ordered another seal and will perservere.

Archie

GarryH has some very nice tools there.

For those of us that don't have such things . . I use sockets from my 3/4" drive set.

I think a 26mm pre-forms the lip seal and a 50mm (plus a 2.5 Lb hammer, used gently) is ideal for drifting in the seal.

When I get my lathe up and running I must make a pukka seal former and drift - they look ideal :thumb2


Bob.
 
GarryH . .

Why aren't you using a sealed bearing on the rear of the output shaft ??

I thought it was supposed to be the last line of defence against dirt ingress ?

:confused:


Bob.
 
GarryH . .

Why aren't you using a sealed bearing on the rear of the output shaft ??

I thought it was supposed to be the last line of defence against dirt ingress ?

:confused:


Bob.

Some of the bearings in the box have seals on the one end
The output shaft bearing is not one of them....
If shite gets past the flange oilseal it will trash the seal in no time...
Plus the gearbox breathes through the speedo cable and bolt
A lot of seal failures are caused by incorrect fitting ( so ive heard )
 
Some of the bearings in the box have seals on the one end
The output shaft bearing is not one of them....


Hmmmmm . . I hate to disagree, but every box I've stripped and everything I've read shows that the rear face of the rear output shaft bearing is sealed.

I always put a sealed bearing there.


Anyway, let's not turn this into a gearbox rebuild thread :D


I am but a Noviciate to you gearbox Gurus :bow :bow :bow


Bob.


Back
Top Bottom