More on cat code plugs etc...

  • Thread starter Thread starter bazzjazz
  • Start date Start date

bazzjazz

Guest
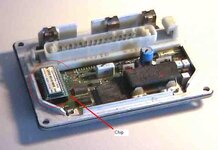
I've learnt a lot from the last thread on cat code plugs and have discovered I have a co potentiometer fitted, which I didn't know!

The last owner of my US import '95 R1100GS got the exhaust changed and put on a Remus Viper end can. Everything else is original, I think.

So it has no cat code plug and no jumper wire and it does have a co potentiometer. The last time it was in a dealer, they said it was running in the default mode because the wire coming from the Lamda sensor, which plugs into the collector box under the engine, was burnt through.

So, should I?

1. Put in a Beige cat code plug or jumper wire and bring it to my dealer, get them to set the co potentiometer and confirm that it is not running in default mode any more? Also ignore that the Lamda sensor wire is burnt through as it is no longer relevant?

2. Do the above but replace the lamda sensor as it is still used?

Hope this makes sense, but I'm a bit confused :confused:

Any advice appreciated.

cheers,

Barry
95 R1100GS
 
coding plugs

if you can remove the lamda sensor & fit a blanking plug then do that.if not just unplug it from the wiring harness.very strange in that it has a co pot as well as a lamda sensor its usually one or the other not both.r u looking in the right area?? ie under the rear mudguard (right hand side as ur sat on it) access hole is visible underneath. Install correct coding plug pull out motronic fuse to reset the fault memory. When you take it in to the dealers to get set up make sure they check everything like throttle pot setting and also when setting up the co value (2 to 2.5%) get them to spray the rubber inlet manifolds with wd40 (if the co value goes up then they're leaking) very common - causes a lot of the so called surging prob, usualy l/h side is more common. they'll need replacing if faulty - resealing them with silicon sealant doesn't work.
 
Yeah, I'm sure I have a co potentiometer. After viewing Fergus's photos from the other cat thread I checked and saw it there.

Maybe the dealer left the lamda sensor in place as with the faulty wiring it wasn't functioning anyway??

I assume the correct cat code plug is the beige one?

Thanks for the tips..

cheers

Barry
 
Bazjazz

What chip do you have installed ?. The reason I ask is because of what Leigh said - it is not normal to see both a lambda probe and a CO potentiometer. My guess is that the previous owner fitted an aftermarket chip and had to install the CO pot to get it to run right. My friend here in Cork had to do this with a Laser chip that he bought (his bike had a lambda probe but this did not work with the new chip). If you feel confident enough, remove the motronic unit from under the tank, open it up and have a look at the main chip inside. If it is not a BMW chip then this would explain your set-up.

Unplug the lambda probe at the harness, plug the hole in your exhaust with a suitable bolt and take the bike to a garage and get the CO measured.

Ferg
 
Bazjazz

Here is something I poached from another site (2ridetheworld.com). Use this to guide you through inspecting your chip. No need to remove it though.
By the way, where in Ireland are you located ?

Ferg


Fitting Instructions:

Tune-Up EPROM Installation Notes.

BMW Motronik R 1100 R/GS

1. Make sure that the ignition is switched off! Start by removing the Motronik housing (under the tank before the ABS). You will need to remove the tank first. Once you have found the housing (square aluminum box with rounded corners) undo the small screws holding the unit in place. The tie clips you undo also seal the housing shut, so don't lose them.

2. To open the two sides of the housing use a Torx screwdriver, no 30, if you don't have one don't worry. Tubing pliers and little screwdriver work just as well. There is a seal of silicone (all the way round) connecting the front and back of the housing. It often sticks very strongly. Lever the front and back apart careful by inserting a flat head screwdriver or similar. Work you're away around the edges gently prizing the edges apart. Don't try to open a side in one go; by working your way round the housing the silicone seal will split evenly and easily. If the silicone sealing is a little damaged, don't worry it is absolutely no problem. Don't use new silicon for sealing again.

3. Locate the socketed chip on the printed circuit board. This can be readily identified by the white plastic "H" shaped retaining clip, which holds the chip securely in place. Remove the H-clip with a small screwdriver, inserted into one of the two small slots opposite each other, in the center of the clip. ' Each Eprom has a marking (notches on the side) to prevent inadvertent rotating of the chip. The base version on the circuit board is soldered (cannot be removed) and has notch's matching that of the Eprom.

4. Remove original chip from the socket by inserting a screwdriver between the short end of the chip and the socket. Pry up gently, work slowly and gently pry from alternating ends of the chip. Do not try to pull the chip out by hand. Do not pry the socket away from the printed circuit board! The BBPower Eprom uses the same socket to attach it to the circuit board (the green base under the Chip).

Assemble.

5. Once the new chip is locked onto the circuit board (using the above mentioned socket) close the housing (do not reseal with new silicone). The locking clips should click audibly. Gently Re-bend the clip if necessary!

6. Important! - before you complete: Before putting everything back in place perform this quick test. Turn on the ignition and listen to the fuel pump, it should stop after a few seconds. If it does not the program has not kicked in. In which case switch off immediately. If this happens its best to call Motorworks ad get some advice. You've either got a faulty chip (un-likely) or you installed the chip incorrectly. However, their advice should be sought.
 
Chip location

This is the chip you need to check..
If you notice, this chip (a BB Power chip) sits on a little piggy-back board that then plugs into the original chip's socket on the PCB board. All of the aftermarket chips that I have seen so far for GS's have this piggy-back configuration. The BMW chip just plugs directly onto the main board.
 

Attachments

  • motronic chip.jpg
    motronic chip.jpg
    28.4 KB · Views: 1,688
Many thanks for the reply, Fergus.

I've no idea what chip was installed. The previous owner told me it was a Remus chip, but someone else said that Remus don't produce chips????

So, I'll open the box and find out, thanks for the detailed instructions. I'll keep you posted.


Based in Dublin btw....

cheers,

Barry
 
Just opened up the motronic and found that it looks like I have an aftermarket chip installed alright as it seems to piggyback like Fergus suggested.

I have attached a photo. Maybe someone will recognise it from the picture???

So I'm going to unplug the lambda probe, reset the motronic and get the CO adjusted.

I've also ordered a beige non-cat code plug to tell the motronic there is no cat installed and just taken delivery of a Twinmax.

I feel a service coming on :)

IMG_2722.JPG
 
Barry

Looks like a generic texas instruments eprom to me that somebody has formatted to suit. Impossible for me to tell what make it is. If there is no motronic cat code plug in your bike, then I suggest leaving it out. (The chip that comes with the laser pipes does not want a cat code plug installed. All that needs to see is a CO potentiometer.)
When setting your CO, aim for somewhere between 1.5 and 2.0 as your setpoint. As I mentioned earlier, the bike needs to be warm ( 5 bars on the RID) when you do this. It takes time to do it correctly as a small adjustment with a screwdriver can cause the CO value to fluctuate a bit, and there is a 15 or 20 second delay between adjusting the pot and seeing a change on the CO readout. Take your time doing this properly. Be careful not to let the bike overheat either. (I was let play with one by a friendly mechanic for about 20 minutes. I was charged 10 Euro for the privilege but its a lot cheaper than a holed piston :D )

When done, take the bike for a spin and come back to double check. Again let the bike settle before taking your reading.

Enjoy !!

PS One more thing : be sure to check/set your valve clearances first before balancing the throttle bodies with the twinmax.
 
Thanks for the advice, Fergus.

I'm looking forward to getting the bike running to its full potential. I'll let you know how it all works out.

cheers,

Barry
 
Its missing....

have just had my fuse box open thinking, yet again about fitting Rob Farmers relay box, first thing I noticed was this big hole where something was missing, did a check, its the cat code plug.
I am sure there was one there before, when I removed the lid it hit me straight away...if it had been removed during the last service would I have noticed it in the engine respnse etc.....the only thing I have noticed is the slight increase in fuel consumption, keep a record of my fuel/mileage etc

Have read all the other threads ref this item..

Mick..


:beerjug:
 
Mick, I'm not 100% sure of the purpose of the cat code plug other than to tell the motronic whether or not a cat is present.

I have no plug and haven't since I purchased the bike a few years ago. I am assuming it was taken out when the previous owner changed the exhaust and lost the cat (US import).

I think it is also used for fuel mapping and that if it is not present it will run in 'default' or 'get you home' mode, i.e. overly rich to compensate for any problems. This would account for your increased fuel consumption.

My fuel consumption is definitely higher than it should be (max 175 miles on a tank, fully loaded, 2up motorway driving) but I haven't checked it accurately yet, but plan on doing so.

Sorry I can't be more helpful, but no doubt someone will shed some light on the subject for you.

cheers,

Barry
 
Y'Pipe

I have read the threads but still I am confused, (DOH ME).

All I want to know is, if I fit a Y' pipe to my GS1150 Adven is there anything I have to disconect??

I'm a bricklayer so anything to do with cars and bikes is over my head so, please try and explain it in English, Thank.

Regards Joe
 
Re: Y'Pipe

Joe said:
All I want to know is, if I fit a Y' pipe to my GS1150 Adven is there anything I have to disconect??

No. Just screw the lambda probe from the cat into the hole in the Y piece, and away you go.
 
Re: Y'Pipe

Joe said:
I have read the threads but still I am confused, (DOH ME).

All I want to know is, if I fit a Y' pipe to my GS1150 Adven is there anything I have to disconect??

I'm a bricklayer so anything to do with cars and bikes is over my head so, please try and explain it in English, Thank.

Regards Joe

so long as you watch the bricks "over your head"... as steve says - also watch the head on the lamda sensor - can be damn tight and easy to round.


Back
Top Bottom