Power Socket

FERRET

Well-known member
UKGSer Subscriber
Joined
Sep 15, 2007
Messages
1,974
Reaction score
283
Location
shropshire
Yes i know, another silly question, especially if you know the answer, but i dont so here goes,:blast

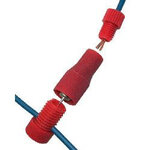
I am fitting an autocom , intercom system to my 1200 adv, having put a post up regarding where to hard wire this, i have, with the help of fellow tossers, decided to take the power from the accesory socket left hand side of the seat, now i dont realy want to cut into the origional wiring loom for obvious reasons, does anyone know if BMW sell a peice of loom which i can piggy back of this socket which i can then cut and solder my intercom power supply to? , if i purchased a second accesory socket to fit the bike would it piggy back of the standard fitted socket?

Thanks in advance:thumb2
 
Yes BMW do a loom which will do the job perfectly, can be bought with or without and additional accessory socket for mounting on the beak. In fact I have piggy backed two, the first to power the Autocom and teh second to run to the beak for extra power. Cant remember the part numbers but the dealer will have them I am sure.
 
Thanks Brian i will contact my dealer tommorow:thumb
 
powersocket

Hi there,

Don't use the power socket under the seat for wiring your Autocom. I tried also this socket but its not the right one. Use the accessoire socket at the right hand front side of the bike, this is the right one and will shut of the power of the Autocom, the other does not and will draw yor battery flat. Ask your dealer there is special socket with three wire, you only need to of them.


Good luck.

bruno

I disagree totally with this as I know for a fact that the underseat power socket on my 2009 GSA definitely turns off the power after a few minutes. This has been well documented in the past on various threads I am sure. The same was true on my 2006 GS.

Just to check I have just been out to my bike and attached a lamp to the power socket and watched it stay illuminated for approx 3 minutes after switching off the ignition then extinguish, I have also checked the Autocom and unsurprisingly the same happens given it is attached in the same manner.

Likewise the power to my Sat Nav which is attached to the plug located on the headstock swithches off after a few minutes. You could of course ask the dealer.
Regards Brian.
 
I disagree totally with this as I know for a fact that the underseat power socket on my 2009 GSA definitely turns off the power after a few minutes. This has been well documented in the past on various threads I am sure. The same was true on my 2006 GS.

Is the correct answer - mu autocom is wired into the back of the underseat accessory socket and switches off fine after about 90 seconds.
 
There is also 12v ignition switchable power from one of the cores to the diagnostics plug under the seat.

Spoilt for choice really.

1. Accessory socket on left side of bike.

2. Satnav socket on headstock or by oil cooler (depending on age of bike.

3. Diagnostics socket.

They ALL cut out a short while after turning off ignition.

You don't need to order expensive plugs either. Just use a posi-tap. These little beauties tap into the side of a wire but unlike the Scotch type blocks they only make a small hole in the wire rather than cut through the insulation. they don't need tools and loads of space to fit and when you remove them its a couple of seconds to seal the hole (if you need to) with a smear of silicone seal.

Nippy Norman recommends their use but they don't sell them. Get them from here http://www.performancemotorcare.com...__6_Pieces___Medium___Approx_1_0_2_5_mm2.html
 

Attachments

  • Posi-TAP_function_p.jpg
    Posi-TAP_function_p.jpg
    17.1 KB · Views: 321
I am in the process of adding a comm and sat nav system to my 2010 GS. After researching I thought that this might be the best way to go installing a fuzeblock from fuzeblocks.com. I like this solution because I only have to tap into the CAN BUS once and with this unit you can the choice of powered on all the time or switched with the ignition. It also looks like the unit will shut down all ignition linked items in order to give max power to the starter. Any thoughts and experience of those who have gone this route?
 
I am in the process of adding a comm and sat nav system to my 2010 GS. After researching I thought that this might be the best way to go installing a fuzeblock from fuzeblocks.com. I like this solution because I only have to tap into the CAN BUS once and with this unit you can the choice of powered on all the time or switched with the ignition. It also looks like the unit will shut down all ignition linked items in order to give max power to the starter. Any thoughts and experience of those who have gone this route?

Thats what im using, it's brilliant and idiot proof :augie
 
Thanks everyone for the advice, ordered my socket extension form BMW today, should get it Wednesday, thanks again:thumb
 
Just one more question, when i get the extension socket lead , does the earth from the autocom go to an earth on the bike? , that being the case the live is then soldered to one of the wires on the new lead, but which one? if both autocom (live and earth) go to the lead , which goes to where, I have looked on the diferent threads but cant seem to see the answer (probably cant see the woods for the trees):eek:
 
I wired my zumo and autocom to the power socket and it kept switching itself off while riding.. Wired it direct to the battery and it was fine. I thought it might have been a bad connection so I soldered the wires properly. Ill let you know how this goes when i get back out on it. Man flu is stopping me gettin out at the min.

I also read on advrider that what was happening to me was because of where i wired it. The preferred option is to wire it to the 3 wire socket up the side of the bike.

This is all internet talk so dont take my word for it, im far from an expert:aidan
 
My last GS and my current GSA plus my wife's 650GS all use the accessory socket for power for both Autocom and Zumo. Never had a problem with any of them over 5 years use.

Don't try to solder onto the back of the socket, it's messy and permanently damages the cable. I use posi-taps which are vastly better than Scotch clips, don't tend to cut the wire like Scotch clips and are easy to remove when no longer needed. It just leaves a tiny hole in the insulation which just needs a smear of silicone to seal.

Just screw one end onto the cable, push the satnav cable in the other end and tighten thread. No tools, takes seconds.

I have just bought a new supply from http://www.performancemotorcare.com/ because it's something useful to keep in tool box.
 

Attachments

  • Posi-TAP_function_p.jpg
    Posi-TAP_function_p.jpg
    17.1 KB · Views: 104
Here's the extract from Wapping's post, pretty sure he suggests soldering direct to the lead for both live and neutral. It also points out which is which. Easier to do the soldering before fitting the cable to the bike of course. Here's the link again that Charlie posted http://www.ukgser.com/forums/showthr...hed+power+easy

METHOD

(1) Unclip the power lead plug from the rear of the auxiliary plug. The catch is disengaged by pressing the sides of the plug.

(2) Clip the splitter into the rear of the auxiliary socket.

(3) Clip the power lead into one of the two sockets of the splitter.

BINGO! Power is flowing back into the auxiliary socket, via the splitter. You have now have one spare power outlet available and you know how it slots together.

NOW THE DIY BIT.

(a) Unclip the splitter.

(b) Like the splitter in the picture, ChasMill's splitter came with the leads bound together with tape. Free them. Also remove BuMW's labels, they only get in the way.

(b) Neatly cut off one of the spare sockets, right against the plug, leaving yourself plenty of wire. You can undo the plug itself by simply levering the retaining lugs away with a fine blade screwdriver, if you want to.

(c) Strip back about 3/4 of an inch of the plastic sheath, exposing the bare wires.

(d) The red and white wire is positive (+). The brown wire is negative (-).

(e) Solder suitable lengths of wire to extend the leads. Shrink wrap for good measure.

(f) Here is an excellent guide how to solder wires neatly:

Soldering

And an excellent guide on joining wires and heatshrinking:

Join and heatshrink

(g) Connect the extended power lead to whatever device you wish to power. In ChasMill's case it was a Centec fuse box.

(h) Reinstall the splitter (see 1, 2 and 3 above).

(i) Job done. The splitter is a BuMW part, so it fits together perfectly. No need to worry about upsetting the Canbus. No need to cut into any of the bike's wires at all. No need for nasty clips, joins and sticky tape. Very easy to remove or replace if you have a problem, returning the bike to standard takes two minutes.


TINTS AND HIPS:

As the splitter simply taps into the bike's switched auxiliary socket it will still be limited to a maximum draw of 5 amps.

Make the length of the extended leads longer than you will need them. It is definitely easier to cut wire off later, than to desolder and start again.

Regards Brian.
 
Clip the splitter into the rear of the auxiliary socket

If you use the posi-taps you don't need a splitter or long instructions.

1 - Remove plug from rear of accessory socket (optional)

2 - At the rear of the plug where you can see two wires before they are covered with tape clip a posi-tap to each wire by placing the split end over the wire and screwing the body to it.

3. Check which wire is positive using a lamp or meter.

4. Push the two wires from the satnav into the holes in the posi-tap and tighten.

No cables are cut, no sticky tape is needed and if you take the satnav off you can either leave the posi-taps in place or remove them and smear a spot of silicone seal in the tiny hole where they pierce the insulation.

Job done. Takes about 3 minutes. No tools required other than a bulb and a bit of wire to confirm which wire is positive.


Back
Top Bottom