

You are using an out of date browser. It may not display this or other websites correctly.
You should upgrade or use an alternative browser.
You should upgrade or use an alternative browser.
Project Christine. (GS1000s)
- Thread starter sycomoto
- Start date

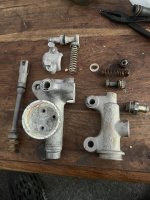
Holy shit, that's amazing.Some jobs are best farmed out to the experts. The carbs although clean were looking tired in places. The gold nickel had turned to rust steel and the aluminium of the carb bodies looked dark and stained.
Well a week in the hands of Mr Wilkes and they’ve come back like this.
Better than brand new.
Loving this thread. Thank you.

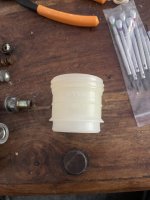
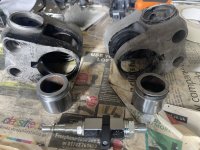
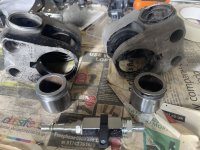
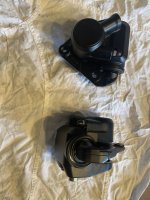
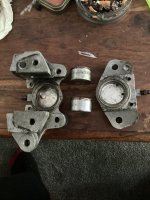
Surely those master cylinders are beyond refurbishment?While all this carb art was being assembled I’ve been taking master cylinders apart. Who’d have thought 30+ year old brake fluid turns into something that resembles copper slip.
depends what the bores are like.
Lovely job!!Some jobs are best farmed out to the experts. The carbs although clean were looking tired in places. The gold nickel had turned to rust steel and the aluminium of the carb bodies looked dark and stained.
Well a week in the hands of Mr Wilkes and they’ve come back like this.
Better than brand new.
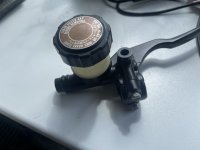
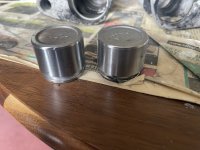
Luckily the bores are unmarked. The internals are still available so after a lick of paint they should look brand new.Surely those master cylinders are beyond refurbishment?
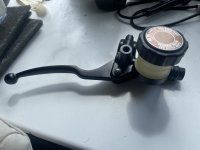
Another small part of Christine has been refurbished and looking brand new. Just a spot of repeating on the nuts n bolts to do. It’s taken over a week to track down the right internal parts for the master cylinder. Scoured the globe only to find out the identical part was available from Yamaha. Go figure.lol
Attachments

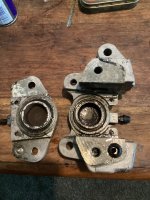
Well that worked better than I expected. Getting pistons out of brake calipers is a nightmare. Getting them out without damage ever worse. So after some thinking I came up with the idea of pushing them out with compressed air. Quick rummage about for some bits and hey presto a TOOL….. just tried it ( being careful to use some rag around the area of the piston) and they popped straight out, all be with quite a pop. No damage and again I’m amazed at how good the condition of the pistons is after 33 years standing in the open.
Attachments
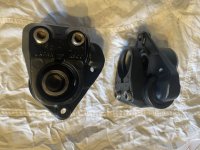
Lots of rubbing down and spraying today. Fitted all new seals and rubber bits and now the calipers look brand new. Just got to replace the bolts but that’ll have to be one my plating setup is finished. Happy with the results though.
Attachments
Tanks back from being repaired. Once it was stripped I noticed some corrosion on the back of the tank. A guy up the road who builds chopper frames has silver soldered it and it’s now leak free. Overall the tanks in great shape but the next job is to put a tank liner in to stop any future rust.
Attachments

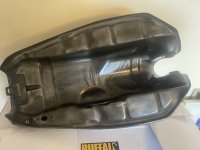
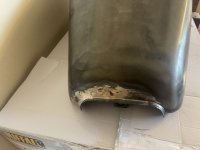
I've repaired three or four tanks using lead loading , you can get an excellent finish and lasting repairTanks back from being repaired. Once it was stripped I noticed some corrosion on the back of the tank. A guy up the road who builds chopper frames has silver soldered it and it’s now leak free. Overall the tanks in great shape but the next job is to put a tank liner in to stop any future rust.
Wow, had to use every trick in the book to get this bugger apart. Pistons were well and truly seized in. First I soaked inside n out with WD40. Then pressurised to 150psi with no joy. Then I heated the bugger up on the stove, then while hot repressurised. Got some movement on one piston so split the calipers and using a few sockets and an Allen key I got it rotating back and to. Bolt back together and repressurise and the piston popped out. The other piston though wouldn’t budge. So split the calipers again, more heat on the stuck half then using two of my biggest flat blade screw drivers I managed to pry the piston up about 1mm. Hoping that let a little WD40 past the seals I bolted both halves back together blocking the transfere port with a rubber washer the back on the airline and it just popped out. Glad it did cos I was running out of ideas.lol
Attachments
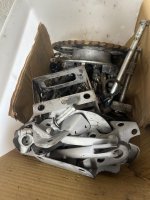
Big box of bits all degreased. Some bits I’ve sandblasted today so I can paint them over the weekend and then it’s onto the hundreds of nuts n bolts that need cleaning up and putting through my new nickle plating rig.
A few weeks of therapy man style.lol
A few weeks of therapy man style.lol
Attachments
Deleted account 251024001
Registered user
- Joined
- Oct 6, 2022
- Messages
- 136
- Reaction score
- 82
Polishing is very rewarding when you see the results. What do you use to protect the finish after you have polished?
I’m going to clear in 2Pac lacquerPolishing is very rewarding when you see the results. What do you use to protect the finish after you have polished?
Deleted account 251024001
Registered user
- Joined
- Oct 6, 2022
- Messages
- 136
- Reaction score
- 82
Sounds like a good plan that. Can you post some pictures of the results please.
Will do when I’ve got it all set upnew nickle plating rig.…..
Can you show me what’s involved, been reading about and would like to try myself….
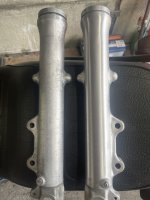
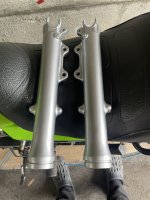
Did abit this morning. Unfortunately the fork bottoms are not going to polish out. One wasn’t bad but the other was too Badly pitted to polish to a good finish. I thought I’d have a bash at painting them to see if I could get a finish that would pass muster. I’ve somehow managed to get a lovely professional looking finish with a rattle can.
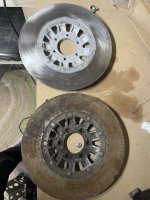
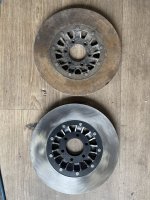
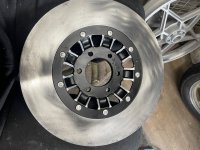
The next bit was doing a disk and get the right finish with the polished fins. Talk about labour intensive, jeez. Anyway the one finished disc looks bang on and pretty close to factory so in happy with that.
The next bit was doing a disk and get the right finish with the polished fins. Talk about labour intensive, jeez. Anyway the one finished disc looks bang on and pretty close to factory so in happy with that.
Attachments

Similar threads
- Replies
- 5
- Views
- 454
- Replies
- 33
- Views
- 1,115
- Replies
- 20
- Views
- 1,515