R69

Sid's Wheels
07855 566713
He's Between Stoke and Eccleshall, ST21 6RP

 
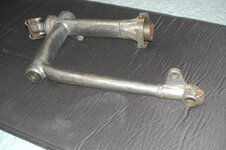
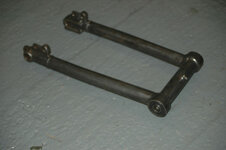
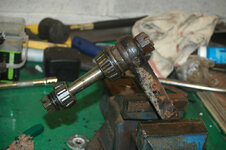
Cleaning and painting both swinging arms myself, as they both have their bearings and rubber oil seals in place, plus grease, the powder coating man understandably was a little reluctant to do them. Not a problem.
Started to clean the one up today, and am amazed at the quality of the metal used in their construction in the 1950s. considering the overall condition of the bike, the rust hasn't scratched the surface of the metal, no pitting or flaking at all. This photo doesn't do it justice, and after a first clean with the wire brush on my angle grinder, the arm is as smooth as a smooth thing (yes I know I haven't got into the corners yet).
Well, I'm impressed anyway.
 

Attachments

  • rear swing clean.jpg
    rear swing clean.jpg
    117.3 KB · Views: 271
Collected carbs and leading link, replete with it's new bearings and oil seals. I drilled and tapped for a grease nipple.
While I was in Derby, I told them I was fitting a grease nipple, and was advised to use heavy gear oil instead of grease, 140 grade. Better coverage over the bearings I'm told.
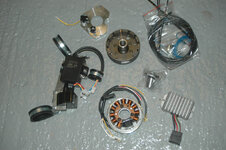
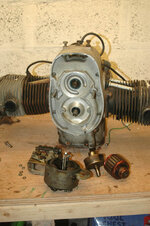
Parcel arrived from Germany with the new 150w generator and 12 v electronic ignition inside.
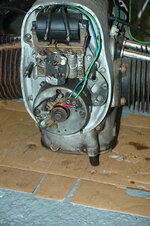
The bike had been converted to 12v some time in it's past (middle pic), but I thought I'd bring the electrics a little more up to date.
 

Attachments

  • leading link grease nipple.jpg
    leading link grease nipple.jpg
    66 KB · Views: 263
  • old gennie and points.jpg
    old gennie and points.jpg
    113.5 KB · Views: 264
  • new gennie and ignition.jpg
    new gennie and ignition.jpg
    100.7 KB · Views: 261
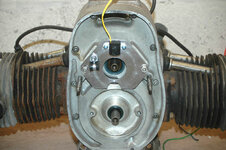
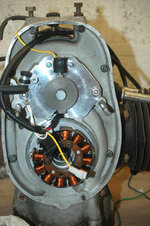
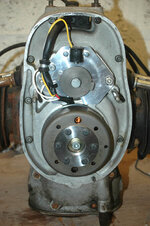
Installed the new electrics under the front cover today.
The instructions are in English thankfully !
Straightforward job, and didn't need the 'special tools' as per the manual.
Dynamo and timing gear are both mounted on the front of the crankshaft and camshaft and are fitted on a taper. As both Dynamo and timing gear have a threaded hole in the outer end, I screwed a bolt into each, and using a wooden block against the engine and a large crowbar, it was quite easy to remove them both.
New gubbins went straight in.

Sprayed the first coat of paint on the parts I'm not having powder coated.
Partly because it helps to keep my costs reasonable, and partly because I wanted to have more of an input than just taking it apart and putting it back together.
Had a PM off Straypuss, with a couple of links to Craven panniers, and it looks very like the panniers which would fit in the frames would have been made by them. That's one mystery solved, and I appreciate the input, cheers !
All contributions and incite welcome as my knowledge of the bike is somewhat limited.
 

Attachments

  • gennie and coils off.jpg
    gennie and coils off.jpg
    105.9 KB · Views: 247
  • new ignition plate.jpg
    new ignition plate.jpg
    103 KB · Views: 250
  • ignition and new gennie.jpg
    ignition and new gennie.jpg
    109.9 KB · Views: 253
  • new bean can installed.jpg
    new bean can installed.jpg
    103.3 KB · Views: 247
  • parts painting.jpg
    parts painting.jpg
    112 KB · Views: 244
Looking good Bill..


glad to see you aren't "over-restoring" it:augie


way to go mate:thumb


hm
 
Had a PM off Straypuss, with a couple of links to Craven panniers, and it looks very like the panniers which would fit in the frames would have been made by them. That's one mystery solved, and I appreciate the input, cheers !
All contributions and incite welcome as my knowledge of the bike is somewhat limited.


Bill, I can corroborate Straypuss's thoughts on the pannier mountings as being those of Ken Cravens. My Fathers Velocettes had Cravens fitted, except he didn't have the nice quick release fixings.

The panniers are fitted to the pins via rubber bushes inside small chromed cups. Not very strong by todays standards, but back then they didn't expect to carry much weight and the panniers are quite small when compared with todays offerings. They are also very durable, so it shouldn't be difficult to find a pair in good serviceable order.


Val.
 
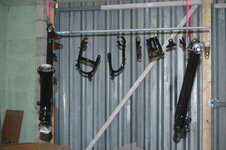
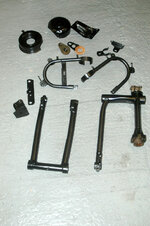
5 coats of hamerite smooth satin to the parts in the first photo, came out well.
I did think of having the frame powder coated a bright day-glo colour, pink for example, just for a laugh, but thought better of it, and it's being done black satin as well.
The component with the brown ring is part of the steering damper, and is made out of a brake pad type material, and was masked prior to painting as were bearings and grease nipples.

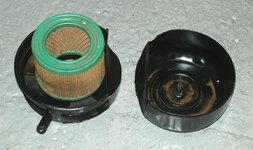
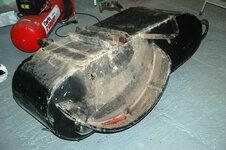
The airbox in the second photo, as already mentioned has had a section cut out to facilitate the exhaust. As can be seen a smaller air filter has had to be fitted. It's marked as 'Crosland no 012' and I can find no cross-reference to it :( It's 100mm overall diameter, 60mm inner and 70mm high.)
Any one know of a site where I can look up using size rather than make and model ?


(had an important visitor from the land of cream and clots today, so didn't get much done.)

and no , the brown bits in the second photo aren't rust, it's a trick of the light
 

Attachments

  • painted parts finished.jpg
    painted parts finished.jpg
    120.9 KB · Views: 213
  • old filter in situ.jpg
    old filter in situ.jpg
    82.7 KB · Views: 217
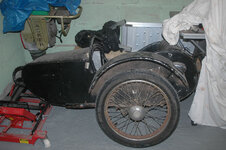
This may not be of interest to many, but took the sidecar wheel off this evening, as you can see, the rim is a bit manky to say the least.
The suspension is an old rubber torsion bar type setup, with roller bearings to the wheel hub.
The chair it's self is tubular steel framed with a single skin pop-riveted aluminium body on it, and very light.
I'll get some paint on the suspension unit but leave the body as it is I think.
Will be a few days before my frame comes back from the powder coating.
 

Attachments

  • sidecar.jpg
    sidecar.jpg
    120.2 KB · Views: 356
  • upsidedown wheel off.jpg
    upsidedown wheel off.jpg
    113.2 KB · Views: 358
  • wheel bearings.jpg
    wheel bearings.jpg
    104.2 KB · Views: 358
Took the sidecar wheel in to Sid's Wheels today, and he's got a 2nd hand 3.25 x 19 rim hung up waiting for a punter at £35 and not a mark on it. Good enough for my, and stainless spokes and hub clean and paint while he's at it please.
I've little I can do now until the frame comes back from powder coating. May be next week before it's done as the main painter man's away this week.
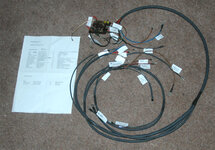
Armed with a cheap bottle of Rioja, a multimeter and a German translation book, I deceided to pre-label all the wires on the new loom, I'm glad it wasn't any more complex.
 

Attachments

  • wiring labeled.jpg
    wiring labeled.jpg
    103.6 KB · Views: 321
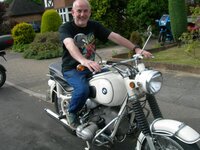
I like the R69 bikes - My mate has a large collection.

This white one, another white one with a matching stieb sidecar.

Oh, and he has the same again, only in black :D
 

Attachments

  • R69.jpg
    R69.jpg
    93.9 KB · Views: 303
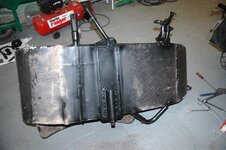
Didn't have much to do today, cleaned around the steel chassis parts of the sidecar and sprayed a few coats of paint on them.


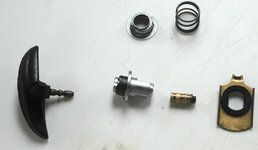
The ignition switch works by pushing the key into the barrel, which pushes a brass pin into a contact breaker on the switch plate making the ignition live.
The lights are switched on by turning the key which rotates the barrel to which is attached the brass plate (on the right of 2nd picture)
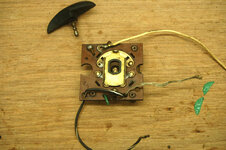
rotating this brass plate engages it over pairs of raised brass contacts on the main plate (in 3rd picture), switching on the lights.
 

Attachments

  • underneath painted.jpg
    underneath painted.jpg
    106.1 KB · Views: 279
  • key barrel apart.jpg
    key barrel apart.jpg
    74.7 KB · Views: 276
  • switch top.jpg
    switch top.jpg
    91.5 KB · Views: 276
Still waiting for the frame to be powdercoated :mad:

Straypuss gave me a lead on the air filter, and I found a site in the UK which lists air filters by BMW part number.
New horn arrived and the warning light bulb holder came as well.

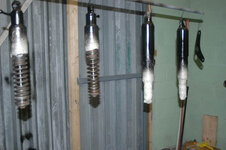
Cleaned, masked up and sprayed all four shock absorbers.

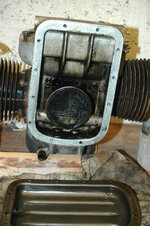
There was a slight leak around the sump gasket, so fitted a new one.
There is no replaceable oil filter, only the round one inside the sump, the mesh is about as fine as my tea-strainer. No wonder that the manual says change the oil (30w before you ask) every 2000 miles, unless you ride a lot in traffic, in which case change it every 1000 miles.
The Clymer manual says "If the sump plate becomes distorted due to over-tightening the bolts, remove it and bash it flat with a hammer".
It goes on to say "put the old oil into plastic bottles and place them in with your trash". Did we have an environment to worry about in 1951?
 

Attachments

  • shocks paint.jpg
    shocks paint.jpg
    75.7 KB · Views: 245
  • sump off.jpg
    sump off.jpg
    113.1 KB · Views: 256
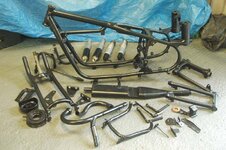
Fetched the powdercoated parts today, bit of dust on them , so they've been ready for a few days, but I got no phone call :nenau
Will start to fathom out how to put it all back together later today.
Headlight sprung a small hole while being blasted, so wasn't painted, I will get the glass matting and filler out, then hammerite it .
 

Attachments

  • parts sprayed.jpg
    parts sprayed.jpg
    108.5 KB · Views: 227
Thank heaven for some progress, I was missing my fix. I don't think the people doing the powdercoating realise how many people they were depriving of their entertainment.

Now then enough :beer: get on with it:D:D


Back
Top Bottom