electric_monk
Registered user
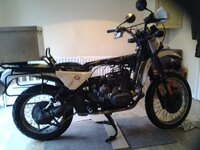
1989 R100 GS.
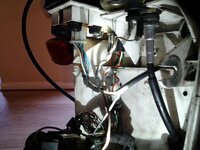
The charging light is not coming on at all. The bike was fitted with the 400W alternator from Motorworks a year and a half ago, but the regulator is an older high output item. I have been using Rick Jones' Classic boxer charging book as my guide, along with late night frustrated phonecalls with Dr Farkoff.
First test was the jumper wire across the terminals on the regulator plug....no change.
I then tried the charging light quick test by grounding the DF , again no change, I have already verified that the bulb is fine by swapping it around with the oil light that lives beside it in the light panel.
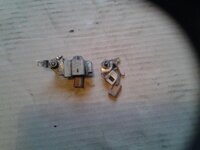
This pointed me towards the blue wire coming off the back of the diode board which can be a weak point. On inspection the cable was very stiff and had breaks in the insulation, so I took out the harness and very carefully replaced the damaged wire, refitted harness......no change. Cue frustrated light night call to the Dr........Farkoff.
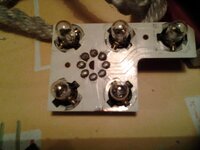
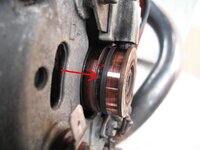
This morning was the first I have been able to look at the bike in daylight so I lifted the brushes(Replaced with alternator and still in good condition) and took an ohms reading of 4.5 across the slip rings. The fact that there is a reading would suggest the rotor has not gone open circuit, but the reading seems very high, can anyone tell me if this reading is correct for the rotor of a 400w alternator.
Any further helpful suggestions and advice would be greatly appreciated. It is looking like the patio door may be coming off after the wife heads back to waterford and the bike coming indoors.
The charging light is not coming on at all. The bike was fitted with the 400W alternator from Motorworks a year and a half ago, but the regulator is an older high output item. I have been using Rick Jones' Classic boxer charging book as my guide, along with late night frustrated phonecalls with Dr Farkoff.
First test was the jumper wire across the terminals on the regulator plug....no change.
I then tried the charging light quick test by grounding the DF , again no change, I have already verified that the bulb is fine by swapping it around with the oil light that lives beside it in the light panel.
This pointed me towards the blue wire coming off the back of the diode board which can be a weak point. On inspection the cable was very stiff and had breaks in the insulation, so I took out the harness and very carefully replaced the damaged wire, refitted harness......no change. Cue frustrated light night call to the Dr........Farkoff.
This morning was the first I have been able to look at the bike in daylight so I lifted the brushes(Replaced with alternator and still in good condition) and took an ohms reading of 4.5 across the slip rings. The fact that there is a reading would suggest the rotor has not gone open circuit, but the reading seems very high, can anyone tell me if this reading is correct for the rotor of a 400w alternator.
Any further helpful suggestions and advice would be greatly appreciated. It is looking like the patio door may be coming off after the wife heads back to waterford and the bike coming indoors.
 They complicate matters
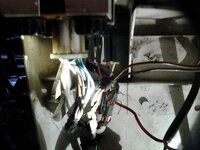


 Who are you and what have you done with our Electric Monk!?
 and every bit of my spare time is going into them - i need them out of the house and the money in! ...Hey - you KNOW i'm crap with electrics anyhow - But feel free to phone and rant at me if it helps.