R69

Bill-H

Di-di-dah-dit di-di-dah
UKGSer Subscriber
Joined
Dec 15, 2007
Messages
7,362
Reaction score
1,182
Location
Norf Staffs
Finally finished my building, and now have room to work on bikes in relative comfort.
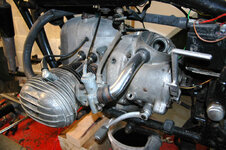
So, now's the time to do some work on my old R69.
It's a bit of a mish-mash of bikes, R69 frame, and all the running gear except the engine which comes out of a 1951 R67.
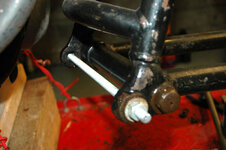
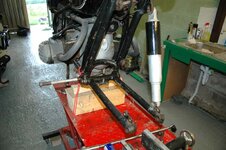
First thing to try and sort is the front swinging arm. The bearings sounded like a coffee grinder when I first dropped the front shock absorbers off, and the through-bolt which holds the swinging arm to fork is resisting all attempts to remove it. It's threaded into one side of the fork, and when I eventually managed to loosen the bolt, instead of screwing out, it is just forcing the fork apart.
As there are two sets of holes through the fork, to allow the swinging arm to be repositioned for solo or sidecar operation, I have locked tight a length of threaded bar though the empty rear pair of holes to try to keep the fork from spreading.
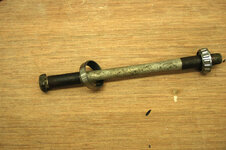
I have managed to buy a new (only in storage for 50years) through-bolt, and a new set of bearings, so if heat, swearing and brute force don't shift it, I have the option of cutting it out and replacing it.
 

Attachments

  • earles-1.jpg
    earles-1.jpg
    101 KB · Views: 895
  • threaded bar.jpg
    threaded bar.jpg
    91.5 KB · Views: 792
  • earles bolt new.jpg
    earles bolt new.jpg
    101.4 KB · Views: 834
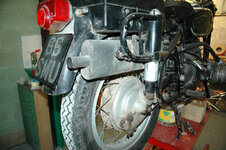
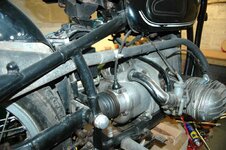
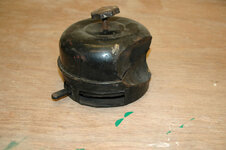
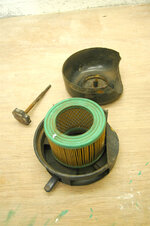
The home-made exhaust it quite unique, as can be seen from the pictures, it mounts inside the frame, and the airbox has been cut and scolloped to accommodate it.
My first thoughts were to have it chromed, but it might look better in black.
 

Attachments

  • exhaust- rear.jpg
    exhaust- rear.jpg
    113.7 KB · Views: 814
  • exhaust-side.jpg
    exhaust-side.jpg
    108.4 KB · Views: 817
  • airbox.jpg
    airbox.jpg
    95.9 KB · Views: 778
  • airbox open.jpg
    airbox open.jpg
    86.6 KB · Views: 813
such a pretty bike..:drool And that lovely slow tickover :)

If it were mine.. I'd not over restore it.. It's more beautiful because of it's "original" nature.
 
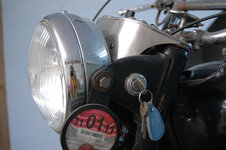
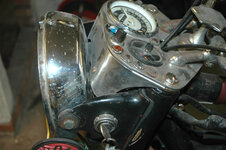
I'm slowly getting a few bits for it together, the correct headlight instead of the '80s Jap chrome thing, and a new wiring loom is on it's way as the existing spaghetti is imposable to work on.
 

Attachments

  • wrong headlight.jpg
    wrong headlight.jpg
    79.6 KB · Views: 899
  • headlight.jpg
    headlight.jpg
    88.1 KB · Views: 886
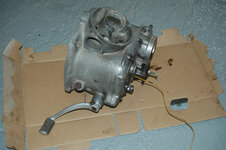
I'll be taking the gearbox out next, the kick-start doesn't return properly, catching on some internal gearing unless you pull the clutch.
Who might be the best person to overhaul it for me?
 

Attachments

  • gearbox side.jpg
    gearbox side.jpg
    115.1 KB · Views: 883
such a pretty bike..:drool And that lovely slow tickover :)

If it were mine.. I'd not over restore it.. It's more beautiful because of it's "original" nature.


My thoughts exactly !

Sidecar is er.. unique as well, got to get a wheel rebuild on it as the rim has more rust than chrome.

A complete restoration would cost a bomb, and as the engine is not the original a bit of a waste.
The rear topbox is fibreglass and molded into the rear mudguard, possibly an ex-police bike?
The rear mudguard has had a section cut from it to allow the exhaust to fit.
Although a mudguard and correct silencers are still available, they are £800 each !!!
 
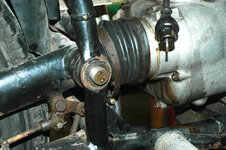
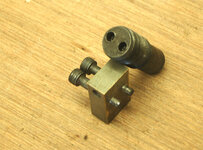
Rear trailing (swinging) arm will have to be moved backwards to allow the gearbox to come out. Removed the alloy covering nuts to find that the arm is retained by two screw in studs, with two holes in the end for a 'special tool' to be used to remove them. Looks a simple tool. and I will try to make one. Flat piece of bar with two short bolts through it might work.
BMW love their 'special tools' don't they !
 

Attachments

  • rear swinging arm bolt.jpg
    rear swinging arm bolt.jpg
    116.9 KB · Views: 827
When I loosened the rubber concertina to get to the bolts holding the driveshaft to the gearbox, some brownish oil ran out, gearbox rear oil seal gone then, another reason to get the box overhauled.
 
made the tool to undo the rear swinging arm pivot bolts.
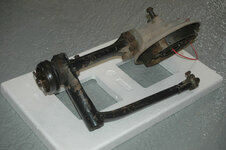
Removed the rear wheel, disconnected the rear brake rod and unbolted a section of the rear mudguard to allow removal of the swinging arm.
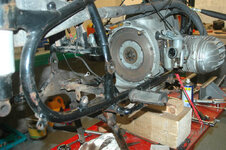
Removed the four bolts holding the driveshaft UJ to the gearbox, and took swinging arm out.
 

Attachments

  • swingarm pivot bolt tool.jpg
    swingarm pivot bolt tool.jpg
    76.8 KB · Views: 713
  • rear swing arm out.jpg
    rear swing arm out.jpg
    90.5 KB · Views: 776
There are only four bolts holding the gearbox in :eek:
and it looks like a dab of paint wouldn't come amiss either :mmmm
 

Attachments

  • gearbox out.jpg
    gearbox out.jpg
    95.6 KB · Views: 766
  • swingarm gearbox out view of frame and clutch.jpg
    swingarm gearbox out view of frame and clutch.jpg
    118.5 KB · Views: 696
Phone call to Derby, and I'm on my way with the gearbox chucked in the van.
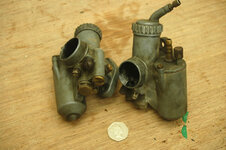
The carbs which are fitted are the wrong ones, 22mm instead of 24mm and are not a pair, the main jets are different sizes. So asked about a refurb on them, so will be nipping back to Derby later this week.

The 50p in the picture would not fit down the throat of those carbs :eek:
 

Attachments

  • carbs.jpg
    carbs.jpg
    107.9 KB · Views: 737
Blimey Bill

didn't realise you were taking it that far down....


seems a shame not to pull the motor out and have the frame powder coated:thumb


hm
 
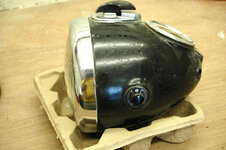
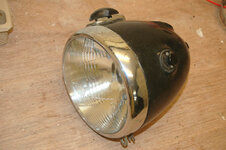
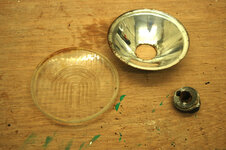
The correct headlight which I bought a few weeks ago, although being the the proper fitment case, came off an older and smaller BMW (R27), and the bulb holder is for a single element bulb with no dip, so was looking for the proper fitment. After a bit of fiddling I found that the Lucas unit already on the bike could be made to fit into the BMW case - Result (pic 2), I can now use decent bulbs ! and replace the home-made instrument cluster and headlight (pic 1).
 

Attachments

  • old dash.jpg
    old dash.jpg
    121.7 KB · Views: 623
  • headlight with new glass.jpg
    headlight with new glass.jpg
    78.6 KB · Views: 738
The R27 reflector was a bit manky, but the Lucas unit is clean.
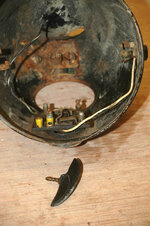
The picture inside the case shows much surface rust, and you can see the two raised sockets near the back, which take charging light and the neutral light, the big hole is for the speedo, which fortunately is still with the bike.
Time for a sand blast I think, and yet another dab of paint.
The board with the yellow connectors and wires is the ignition and light switch. The 'key' at the front is the ignition key, push it in to turn on the ignition and turn it for the lights.
 

Attachments

  • old glass and reflector.jpg
    old glass and reflector.jpg
    109.8 KB · Views: 301
  • inside headlight rust.jpg
    inside headlight rust.jpg
    90.1 KB · Views: 302
Blimey Bill

didn't realise you were taking it that far down....


seems a shame not to pull the motor out and have the frame powder coated:thumb


hm


now now !
don't let your aspirations run away with my capabilities.
After a close look, I think I can get the Hammerite spray can all round the frame without removing the lump, does Hammerite stick over dried-on grease?
 
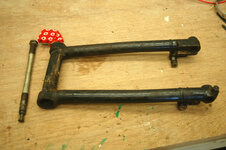
3 days of alternately heating and soaking in WD40, I've got the swinging arm bolt out, complete with pile of black rust and roller bearings.
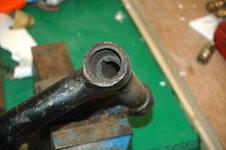
Still got to get the inner races out. Don't think I can knock them out from the inside using a long drift and a medium-sized lump hammer as the races are quite thin and frayed at the bottom.
I have read that a line of weld carefully applied to the race will see them drop out when they cool down, and I've also read that they cane be carefully drilled out using a Dremel or other small drill.
AS most of my welding looks like bird poo, I may be following the Dremel route.
The swinging arm has no means of being greased, so I shall drill and tap a grease nipple into the middle of the tube between the bearings.
 

Attachments

  • front swinging arm and bolt.jpg
    front swinging arm and bolt.jpg
    117.9 KB · Views: 290
  • earles old bearing race.jpg
    earles old bearing race.jpg
    80.8 KB · Views: 291
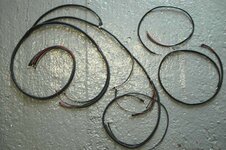
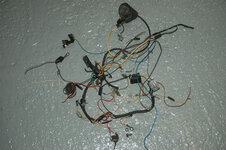
new wiring harness came today, there's only 8 or 9 wires to it, still, I did get one of those 'can I put it back together' moments today.
The old harness was designed by Heath-Robbinson's colour blind sister.
 

Attachments

  • new harness.jpg
    new harness.jpg
    96.8 KB · Views: 289
  • old loom.jpg
    old loom.jpg
    114.5 KB · Views: 290


Back
Top Bottom