Vario decals fitting

They are wet application.

Here's a video guide.


Some tips.

* Ensure that the surfaces are scrupulously clear of all dust particles - even the most minor of particles will look like a pimple once covered

* Ensure your hands are always wet

* Use sufficient liquid but don't overdo it, otherwise you'll simply spend ages trying to squeeze out the bubbles

* Do not use more than the recommended amount of detergent, especially on clear decals, otherwise, it can have a detrimental effect. A gentle detergent as shown in the clip is better than a strong detergent like washing up liquid but you can use the latter at a lower strength.

* Sometimes it can be difficult to start the peel of the backing layer - use a razor blade to gently pick at the backing layer

* Start from the inside of the decal space to the outside

* Wherever possible, work the decal with your fingers rather than an implement - leads not only to better results but is less likely to damage the decals. Have a couple of clean microfibres to hand to not only clean your fingers occasionally (then rewet) but also helps as an implement. If you do use a plastic implement make sure it has a soft protective covering (as per clip). You can buy these with felt strips on.

* Don't rush. So long as you have the correct detergent strength and a good initial amount of liquid you have a surprisingly long amount of time to adjust the decal and remove bubbles

* When doing the move tricky bits, like folding around curves, just be patient in teasing and coaxing the water out - sometimes it seems that you'll never be able to get the decal to sit properly, but it will eventually - the decal will begin to set as you work around the piece and coax into position

* Only apply heat to finish off, once you are happy with what you have.

* Revisit your decal 10 mins after having applied - you may find the odd bubble has appeared, but you should still have time to work it out

* Can't stress this highly enough - don't try doing all varios in one go. Do one, take an hour over it, and then step back for a rest. Even per vario, if you've had a tricky time with one particular decal, just take a step back for a while! Treat it as a learning curve.

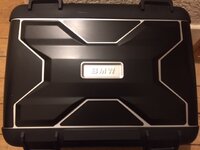
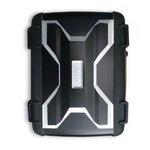
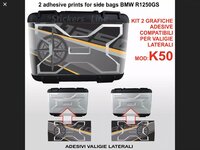
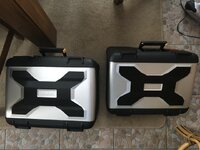
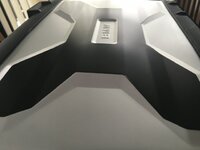
nb - photo is of the signature custom designs version of these.
 

Attachments

  • IMG_2106 (1).JPG
    IMG_2106 (1).JPG
    73.7 KB · Views: 551
Yofi - what a brilliant answer !
Thank you very much for all of the notes. I will have a go over he next few days and let you know how it goes.

Never been any good at this kind of thing, i tried doing some window tints a few years ago, got halfway through and it all went pear shaped. Everything ended up in the bin.��
 
Not always that brilliant myself - sometimes it works out, as it did with my varios, sometimes it doesn't - although doing this sort of thing in good light, off the bike, as you can here, helps. As more or less as per vid, the steps are as below.

The key thing to remember is that if you have been generous with the amount of detergent spray then you have a really good amount of time to execute the application. I find listening to radio 4 helps, as it just seems to relax me into it :-)

1. Ensure hands are clean

2. Clean surface with alcohol

3. Spray both sets of fingers with wet hands

4. Spray detergent of the surface

5. Start to peel off the backing paper, spraying detergent as you go

6. In one move, place the decal on the surface – the more you fart around with it the more opp it has to pick up a particle of dust

7. Then relax. So long as you are using a detergent mix rather than plain water, there is plenty of time to adjust the decal. In fact, you’ll likely find that it move a bit as you begin working out the water/bubbles from the centre (do into the centre ‘bmw’ first, then all-ways outward). Gently does it with the fingers and/or cloth, using a plastic tool simply to get your creases – but do use a tool that has felt of a cover on it – hard plastic will mark.

8. You’ll find that as you do it, some bubbles get left behind or part of the decal won't want to sit down, e.g. at the end over the creases. Simply keep working outwards, repeating what you have done – eventually bubbling will go and things will start sticking.

9. The decals over the sides are tricky, but if you line up with the front then start working out the water/detergent each way from where the decals goes over the sides, it will eventually come good – even though it might seem frustrating.

As said, don’t be overly ambitious. Doesn’t have to be done in one day
 
I think tomorrow is D day - i have had these decals 3 months now and cant put it off any longer :bow
Thanks for the extra notes :okay
 
Sorry to hijack this but do you know what the difference is between the RS vario sheets and the signature custom design ones in terms of material / Quality etc ?

There is a 65 euro price difference

Thanks
 
Sorry to hijack this but do you know what the difference is between the RS vario sheets and the signature custom design ones in terms of material / Quality etc ?

There is a 65 euro price difference

Thanks

I've only used the signature custom designs, as I think I prefer the design over the RS though that's a personal, subjective decision. So, can't comment on the RS Components, only the SCDs. For this particular set, the SCDs appear very nice quality in the way they apply and in their finish - they have a matt sheen to them and mould to the cases very well - though I'm not expecting them to hold up to abuse any better than other decals.

SCD's decals are ridiculously overpriced, with a high margin to discount, so they tend to do frequent sales (was 40% off in the black Friday sale). So, right now, for example, they are knocking 25 euro off the pannier set. But as shipping in 10 euro more than RS, they are still 50 euro more expensive. I very much doubt that material-wise, anything like that could justify the difference to the RS components - as I say, it was simply that I preferred the design, and waited for the right opp to buy. (Could sign up for notifications).

Thanks for that. The black infill design looks the same on both sites and I got a reply back from RS this morning that it is a wet application
 
Thanks for that. The black infill design looks the same on both sites

No, they're clearly not. I have posted what the scd's look like, and you can see from the RS site what they, in turn, look like.
 

Attachments

  • IMG_2106 (1).JPG
    IMG_2106 (1).JPG
    73.7 KB · Views: 373
  • aufkleber-vario-koffer-bmw-r-1200gs-lc-2013-2016.jpg
    aufkleber-vario-koffer-bmw-r-1200gs-lc-2013-2016.jpg
    11.7 KB · Views: 376
No, they're clearly not. I have posted what the scd's look like, and you can see from the RS site what they, in turn, look like.

That is true....I meant similar :D

Wait and see if SCD's do any sale type thing but for the amount of time the panniers are on the bike the 50 euro ones are looking favourite
 
That is true....I meant similar :D

Wait and see if SCD's do any sale type thing but for the amount of time the panniers are on the bike the 50 euro ones are looking favourite

Can't argue with that. I must assume that SCD's business model works for them, though I can't help but think they would do better by all year round sensible pricing that the flash sale model.
 
Noticed someone asked SCD on their comments page if they were doing a black friday sale to which they said yes 40% off
So I've emailed them to see if they are doing a New Year sale
See what they say
 
Just had a response from Tota Pappasave, relationship Manager at SCD
He says:

We will have next month our winder sales


Description: email-signature-logo


Tota Papasavva

Relationship Manager


So I will have a look end of the week
 
Ok, so i have the middle pieces on now.
Not too bad and no bubbles thanks to the instructions above (cheers :okay).

Anyway, she who knows best just came in and said it looks better without the other edge bits fitted ....
Any feedback before i put the rest on ??:nenau:nenau
 

Attachments

  • 4392BB2F-7AED-4C06-A7E2-95375C24075D.jpeg
    4392BB2F-7AED-4C06-A7E2-95375C24075D.jpeg
    80.5 KB · Views: 213
  • FE3D3AF8-9A5D-44C1-BC32-39E5EFB9945A.jpeg
    FE3D3AF8-9A5D-44C1-BC32-39E5EFB9945A.jpeg
    97 KB · Views: 192
  • CF0B7CCE-C32C-4AC4-8262-2C45431BC586.jpeg
    CF0B7CCE-C32C-4AC4-8262-2C45431BC586.jpeg
    46.2 KB · Views: 195
Ok, so i have the middle pieces on now.
Not too bad and no bubbles thanks to the instructions above (cheers :okay).

Anyway, she who knows best just came in and said it looks better without the other edge bits fitted ....
Any feedback before i put the rest on ??:nenau:nenau

Good job!:beerjug:

Fit the rest would strongly be my vote
 
Looks very :thumbgood

Can always take the edge bits off after if you prefer
 
I quite like the look of these for a 1250 Exclusive.
Good price, other than the shipping!

https://www.ebay.co.uk/itm/153240403921

Hi Neil,
I have just ordered a set of those for my 1200LC as i really like the look.
I emailed them and asked if they could print a set with 1200 and not the 1250.
Most accommodating and a pleasure to deal with. Planning to apply them this weekend,
Dan


Back
Top Bottom