

You are using an out of date browser. It may not display this or other websites correctly.
You should upgrade or use an alternative browser.
You should upgrade or use an alternative browser.
Comfy old boots bike service resto thread
- Thread starter Comfy Old Boots
- Start date


Thankyou. I’m feeling optimistic.Great work, keep it up, you'll get there in the end
I’m in two minds about tomorrow.
Bleed the brakes mindful of the fact I have to fit new pads when they arrive? This means I’ll have too much brake fluid and it could make a mess but if I push the pads back tomorrow and don’t pump the levers until I fit the new pads…. I’ll sleep on it

Weird heart sinking moment earlier. The right indi switch gear is in a plastic bag! Awaiting replacement parts from one of the saints of Tosser! Tried starting bike by shorting the starter motor. That didn’t work. Didn’t want to go get the bag inside the house
 Then attached the starter button switch unit back onto the loom. Was trying to start it by pressing the two buttons together. Got mental readings on the dash. Fuel gauge appearing a disappearing and all manner of worrisome oddness.
 My heart sank and I was worried I’d gotten water into a connector done where. Then added the face of the switch gear and used the button. It acted a bit odd but I turned off ignition a couple of time and then it roared into life. Very relieved. Stopped thinking spark/fuel - what’s up? So apparently it needs the button. Must investigate tomorrow.
I’ve torque wrenches arriving tomorrow - cheap ones - think it’s time to start putting the back end back together. New engine bars arriving Thursday. Just need to delivery from Motorworks so I can do the bits that actually are critical. Waiting until you see the fork seals. Very ashamed. The left rocker cover gasket looks awful and I haven’t even taken the rocker cover off yet


Soldered connections on a bike are not good. Too much vibration/heat.
Get yourself some of these: Waterproof Automotive Wire Connectors 2-Pin
Get yourself some of these: Waterproof Automotive Wire Connectors 2-Pin
Nice looking connectorsSoldered connections on a bike are not good. Too much vibration/heat.
Get yourself some of these: Waterproof Automotive Wire Connectors 2-Pin

BOUGHT an expensive white paint marker too , so when I[ve torqued down a bolt I know it's done. Top tip from Dr F.
I'm knackered. Off to bed after this glass of wine. I expect I'll be out there first thing tomorrow morning. really enjoying this part of the job. might open up the alternator cover and rocker covers tomorrow. I've a bad feeling the previous mechanic used some sort of sealant to seal the left gasket. Must find the inspection window and reacquaint myself with setting bike to top dead center...
I'm knackered. Off to bed after this glass of wine. I expect I'll be out there first thing tomorrow morning. really enjoying this part of the job. might open up the alternator cover and rocker covers tomorrow. I've a bad feeling the previous mechanic used some sort of sealant to seal the left gasket. Must find the inspection window and reacquaint myself with setting bike to top dead center...
Question regarding the valve adjustment. Watching a Max Bmw video here.
Do I need to change the inner gasket? They say I do and I believe them but didn't order any...
Another thing. Is there no inspection window on the 1200's? When I did this before I had to remove a rubber grommet to reveal where I could line up TDC? Going to go rooting here but a bit surprised videos using screwdrivers and lengths of aluminum rod?
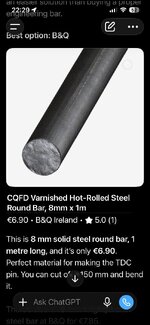
EDIT things have moved on with the hex heads! So I just need to get a round rod that is 8mm in diameter... that'll be a bit of a treasure hunt!
Edit edit : I have to go to b and q anyway to exchange a few bits for the utility room build that is 95% finished!
Do I need to change the inner gasket? They say I do and I believe them but didn't order any...
Another thing. Is there no inspection window on the 1200's? When I did this before I had to remove a rubber grommet to reveal where I could line up TDC? Going to go rooting here but a bit surprised videos using screwdrivers and lengths of aluminum rod?
EDIT things have moved on with the hex heads! So I just need to get a round rod that is 8mm in diameter... that'll be a bit of a treasure hunt!
Edit edit : I have to go to b and q anyway to exchange a few bits for the utility room build that is 95% finished!
Attachments
Last edited:
If you mean the valve cover seal around the spark plug tunnel, i would say unlikely unless it is damaged.
Yep that is the one. I seem to remember something about them deforming or something. Anyway happy to not change it!If you mean the valve cover seal around the spark plug tunnel, i would say unlikely unless it is damaged.
Up early. Took the head lamp assembly off. Need to fit a new spring.
The state of these fork seals. Put some penetration oil on hope I don’t find anything too awful in there .
.
It’s raining! Praise be!
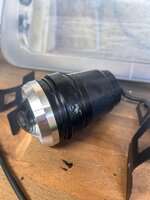
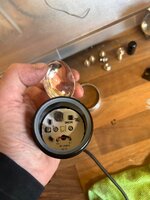
So taking apart my v cheap spots. Made of cheese! Soft cheese! Anyway, plan is to
put a smear of copper grease on all the threads and give them a coating of acf 50.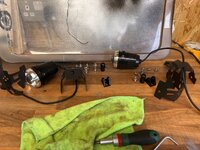
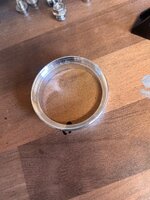
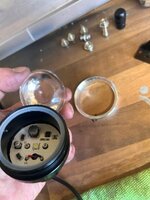
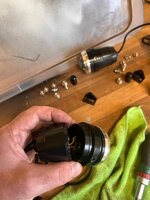
Decided the brakes can wait. Hoping to get the final drive loosened ready for new gaitor. I’ve the special spline lube in the order. I bought it for the splines at the wheel end. Must check if it goes on the engine end too…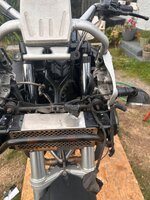
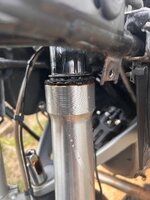
The state of these fork seals. Put some penetration oil on hope I don’t find anything too awful in there
.It’s raining! Praise be!
So taking apart my v cheap spots. Made of cheese! Soft cheese! Anyway, plan is to
put a smear of copper grease on all the threads and give them a coating of acf 50.
Decided the brakes can wait. Hoping to get the final drive loosened ready for new gaitor. I’ve the special spline lube in the order. I bought it for the splines at the wheel end. Must check if it goes on the engine end too…
I’ve treated as best as I can! What tat! Need some shorter bolts and I’ll attach them to the nice brackets the previous set were on.
They came with brackets to clip them onto the crash bars. I’ll see what I prefer when the times comes. Anyway, adding these to the ready to put back on pile.
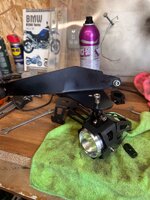
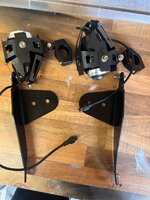
They came with brackets to clip them onto the crash bars. I’ll see what I prefer when the times comes. Anyway, adding these to the ready to put back on pile.
Last edited:
Ah crap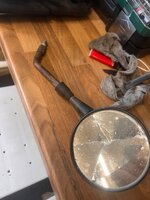

The boot looks in reasonable nick....
Help please. Blessing the brakes despite me saying I’d wait. The cheap vacume thingie is ok but I cannot get a seal at the nipple. I’ve tried plumbers tape to no avail.
Managed to get one hundred ml from the rear circuit. I’ve removed about 270 from the front circuit. The bleed nipple I was told was seized by previous mechanic was fine. Some heat, penetrating oil and a socket instead of a spanner and it cracked free. I’ve left room in master cylinder to push back pads at later date
Reading I need to put about three hundred through the front circuit and two through the rear? Thankyou.
Edit, I wonder if a small jubalie clip work? Also wondering now if the air was being sucked in from the threaded area where the spanner goes? Maybe I put the plumbers take in the wrong spot because it was holding vaccine until I opened the nipple… advice please
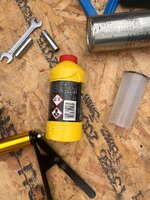
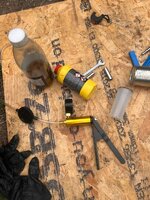
Managed to get one hundred ml from the rear circuit. I’ve removed about 270 from the front circuit. The bleed nipple I was told was seized by previous mechanic was fine. Some heat, penetrating oil and a socket instead of a spanner and it cracked free. I’ve left room in master cylinder to push back pads at later date
Reading I need to put about three hundred through the front circuit and two through the rear? Thankyou.
Edit, I wonder if a small jubalie clip work? Also wondering now if the air was being sucked in from the threaded area where the spanner goes? Maybe I put the plumbers take in the wrong spot because it was holding vaccine until I opened the nipple… advice please
Attachments
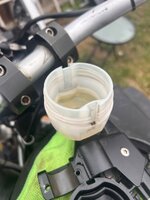
Last edited:
No both boots tore and are now in the bin. The glass. Guess I’ll go to the local glazerThe boot looks in reasonable nick....
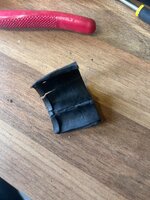
Last edited:
Brand new fresh out of the packet 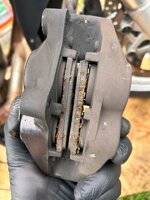
The local glazier will only have flat mirror, no good for automotive application.The glass. Guess I’ll go to the local glazer
The mirror will be convex and show wider field of vision. You may get a round replacement in Halfords and stick it over the top of existing with double sided tape as a temporary measure. Safety critical items are mirrors as you well know.
As an aside reminds me of a daft conversation in the local Halfords. I was looking for replacement glass for our Volvo V70 which had a mirror fitted from maybe a Volvo S60 , I wasn't sure, but it fitted and looked OK, only slightly different.
So I'm in there with a tape measure and going through all the mirrors when the helpful Halfords guy asks me what car is it for and I had to say "I don't know"

Last edited:
Never found the mirrors particularly good anyway
Every man reaches their limits. Trying to take off front wheel. Thought I had to remove the abs sensor. Bolt seized. Tried drilling it outs. No dice anyway, now that I’ve totally destroyed it I realise it stays in the forks. Great
Took the crash bobbins off. Fancy! Spent ten minutes looking at the front wheel axle with no idea how to take it off. I expect I need a massive new bit for that? Edit 22 mmhe. - Ffs. Had enough. Gonna wash and hang out with my missis. If I’m good I might get the ride. Only riding I’m doing any time soon… tomorrow is another day.
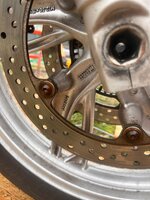
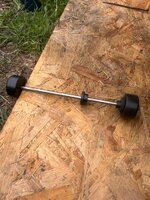
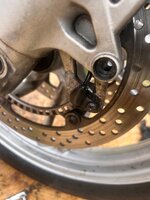
Edit edit
Bought an 1/2 22mm hex bit off Amazon. Here Tuesday. Enough is enough. Time for other stuff. I’ll finish the utility room tomorrow. Needs floor fixings for the toilet, kick boards and the self leveling concrete floor I poured a few weeks ago needs some floor paint.
Thanks for reading.
Every man reaches their limits. Trying to take off front wheel. Thought I had to remove the abs sensor. Bolt seized. Tried drilling it outs. No dice anyway, now that I’ve totally destroyed it I realise it stays in the forks. Great
Took the crash bobbins off. Fancy! Spent ten minutes looking at the front wheel axle with no idea how to take it off. I expect I need a massive new bit for that? Edit 22 mmhe. - Ffs. Had enough. Gonna wash and hang out with my missis. If I’m good I might get the ride. Only riding I’m doing any time soon… tomorrow is another day.
Edit edit
Bought an 1/2 22mm hex bit off Amazon. Here Tuesday. Enough is enough. Time for other stuff. I’ll finish the utility room tomorrow. Needs floor fixings for the toilet, kick boards and the self leveling concrete floor I poured a few weeks ago needs some floor paint.
Thanks for reading.
Last edited:
Good idea about temporary glass. Guess I’ll have to look further into this. Thanks John.The local glazier will only have flat mirror, no good for automotive application.
The mirror will be convex and show wider field of vision. You may get a round replacement in Halfords and stick it over the top of existing with double sided tape as a temporary measure. Safety critical items are mirrors as you well know.
As an aside reminds me of a daft conversation in the local Halfords. I was looking for replacement glass for our Volvo V70 which had a mirror fitted from maybe a Volvo S60 , I wasn't sure, but it fitted and looked OK, only slightly different.
So I'm in there with a tape measure and going through all the mirrors when the helpful Halfords guy asks me what car is it for and I had to say "I don't know"
Edit I’ll just buy replacement glass and use epoxy glue
Last edited:
That's normal when bleeding the brakes. You need to get someone with a GS911 to perform a brake bleed for you. This activates the abs pump. Alternatively you can pay Joe Duffy €450 for the pleasure.Help please. Blessing the brakes despite me saying I’d wait. The cheap vacume thingie is ok but I cannot get a seal at the nipple. I’ve tried plumbers tape to no avail.
Managed to get one hundred ml from the rear circuit. I’ve removed about 270 from the front circuit. The bleed nipple I was told was seized by previous mechanic was fine. Some heat, penetrating oil and a socket instead of a spanner and it cracked free. I’ve left room in master cylinder to push back pads at later date
Reading I need to put about three hundred through the front circuit and two through the rear? Thankyou.
Edit, I wonder if a small jubalie clip work? Also wondering now if the air was being sucked in from the threaded area where the spanner goes? Maybe I put the plumbers take in the wrong spot because it was holding vaccine until I opened the nipple… advice please
View attachment 530132View attachment 530133
Sorry I don’t get you. What is normal when bleeding brakes? Air escaping at the nipple? I’ll do the manual lever way next time. Much more efficient.That's normal when bleeding the brakes. You need to get someone with a GS911 to perform a brake bleed for you. This activates the abs pump. Alternatively you can pay Joe Duffy €450 for the pleasure.
Abs has been broken for years and mentioned earlier in the thread I’m hoping it’s fixed now I’ve repaired the rear abs sensor. As I understand it, I abs II has a straight through circuit that allows the whole system to be bled manually? It might not get all the fluid out of the unit itself but the brakes are hydraulically actuated and if the abs is dead so what!
As for Joe duffy, cheaper to buy a 911!
Last edited:

Similar threads

- Replies
- 75
- Views
- 27,396
