Project Katmandu: GS rebuild

Ignition Control Unit

bummer I think the ICU has gone on my bike.

Everything else checks out ok. I don't know how it could have broken. When I bought the bike a month ago we fired up the bike in the blokes shed and she ran. Since then all i have done is strip the bike and it sat outside under a plastic sheet for a couple of weeks.

Anyway i don't spose anyone out there has got a spare. I suppose its not too bad motorworks list one second hand for £25.
 
I hope these pictures work.
I have included one of the brake cable arrangement.
For reference the shock is 350mm eye centre to eye centre and the clearance of the tyre to mudgaurd is 220mm unloaded.

You may have noticed that I'm not much of a polisher.

Hiya - thanks for putting the pics up.

Interesting to see the rear brake cable arrangement - neat!
 
Pete,

If you aren't bothered about using the kickstart on your bike then a Lucas DAB400 or Intermotor 1500 ECU will work properly. I've got a brand new one sitting here that you can have for £15 including the postage if it's any good to you.
 
That is my old bike and it was originally like this

BikeinAction.jpg


airhead.jpg


frame_006.jpg


I didn't build it........................someone in Belgium did

Cost including original bike was 13000-14000 Euros, all in

Sweet thing..........................but not very rideable on the road...............it was/is very dirt orientated

I find my G650XChallenge....................beats it in so many ways - chassis/power/suspension/brakes/handling/price.....................but not charisma though

The picture with the tank bag was taken on the day I bought it of Johnny, it now looks like this.

I had the suspension sorted and I'd say it's fine on the road once yopu get into the swing of it - And I've got memories of a mad neck and neck dash with a 450 KTM through endless Spanish hairpins to know that it can deliver.

The KTM could out brake me but I had more grunt coiming out of the bends so it was side by side for a very long way :D

If you want some power bling for yours look here www.moorespeed.co.uk
 

Attachments

  • photo 1.JPG
    photo 1.JPG
    98.9 KB · Views: 1,158
  • photo 2.JPG
    photo 2.JPG
    82.7 KB · Views: 1,133
Pete,

If you aren't bothered about using the kickstart on your bike then a Lucas DAB400 or Intermotor 1500 ECU will work properly. I've got a brand new one sitting here that you can have for £15 including the postage if it's any good to you.

Hi Rob,

That would be very handy. Definitely the ECU as I switched the good one off my good bike at the weekend and that resolved the problem.

I'll email you off line

cheers

-Pete
 
weekend work update

I didn't get long to work on the bike at the weekend as we had to go to my wife's Mums but here's what I got up to.

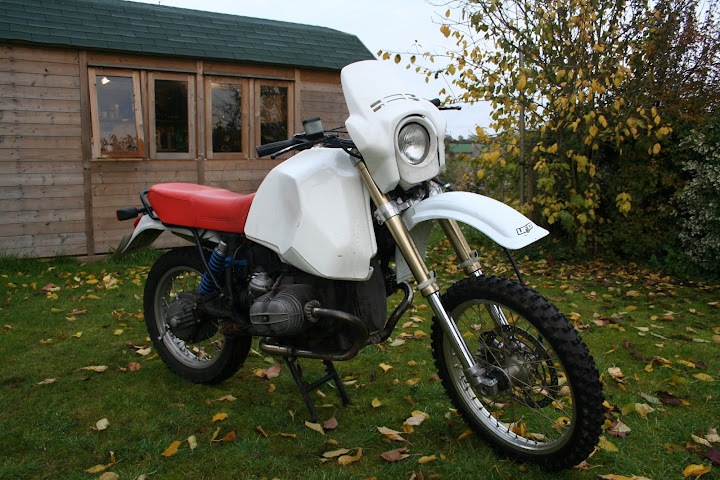
Fixed the insert int eh head light cowl. The inserts said push in and we a really good interference fit with the holes where the old ones had pulled out. I put a bold into the insert and hammered them into place. I recon they are as good as new now.

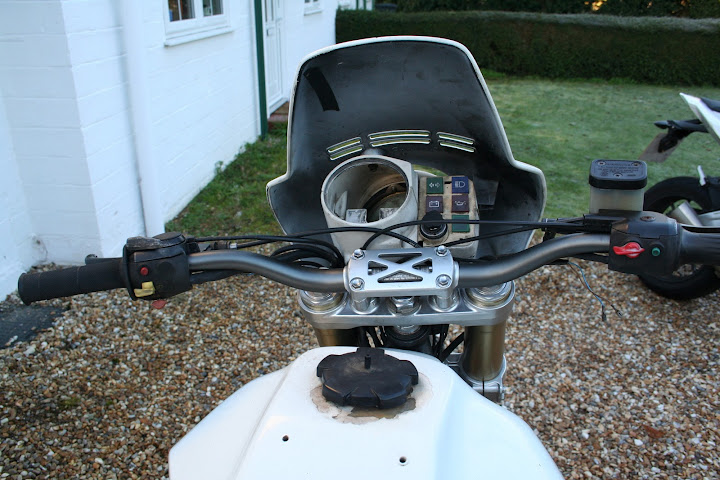
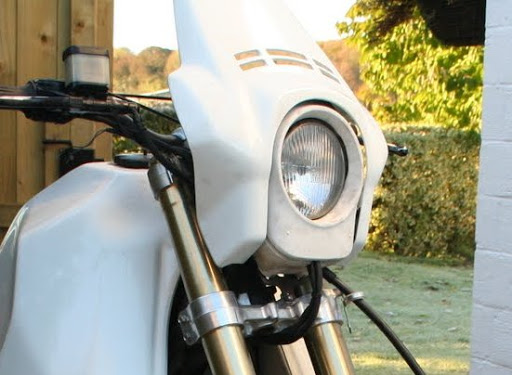
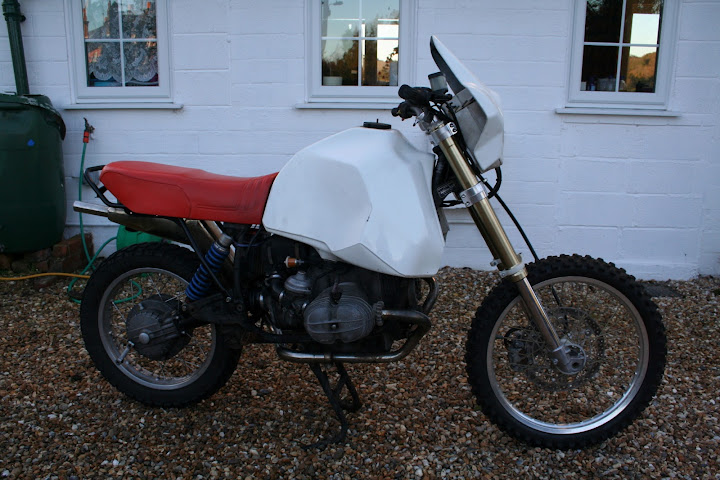
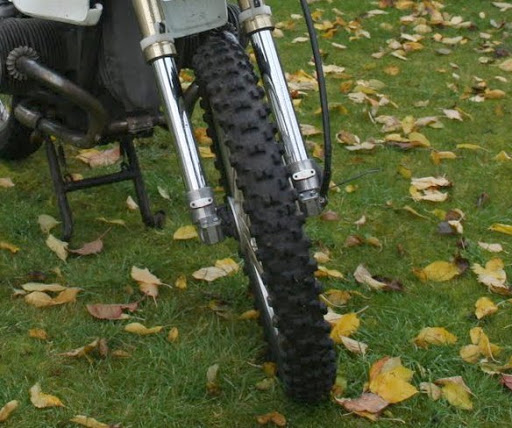
Fittet the headlight and the instrument cowl and screen to the drz forks. Its a 75% job and needs a little extra bracketary

IMG_4400.JPG


IMG_4393.JPG


Amazingly the standard gs brackets fit the lower mounting point and one of the upper mounting points - I just need to make a bracket or drill and tap the upper yolk for the left hand upper mounting point.

Swapped the electronic ignition module off my working g/s and got a sparc straight away so it was definately the problem.

Bike fired up straight away.

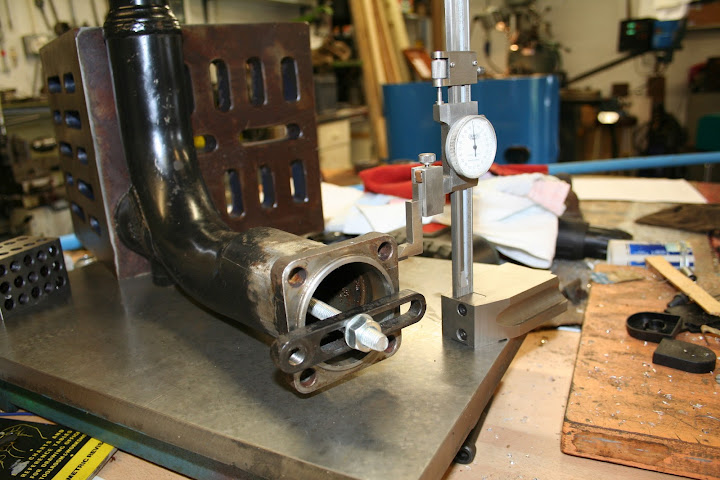
The y piece is leaking. The ID of the Y piece is about 2mm biger that the OD from the header pipes. I presume I'm missing some sort of seal from between the two. I'll have a look at the parts on-line today to check.

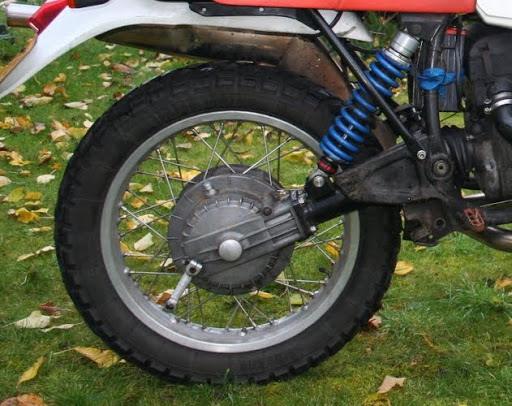
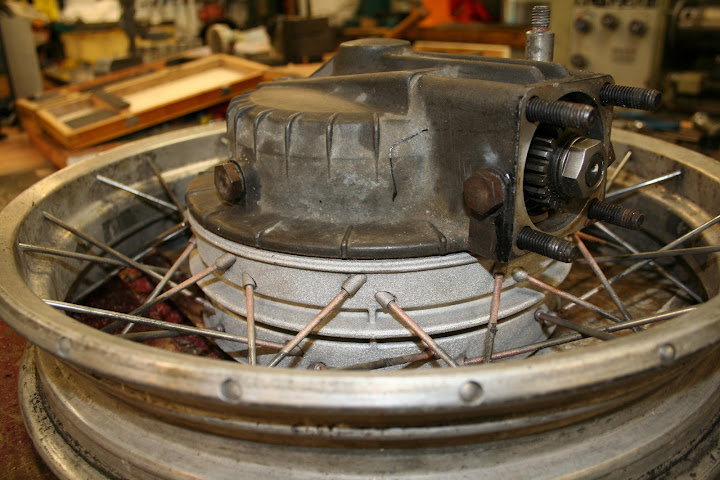
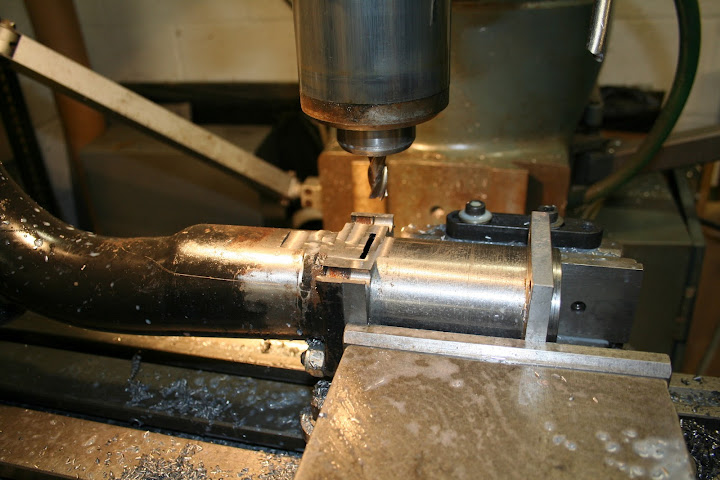
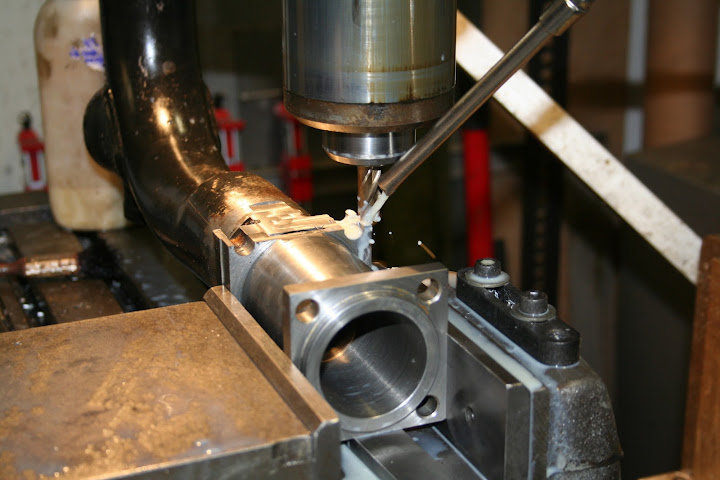
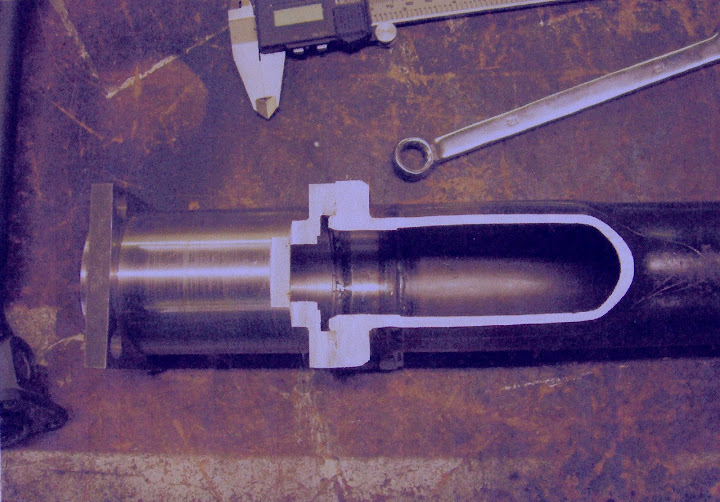
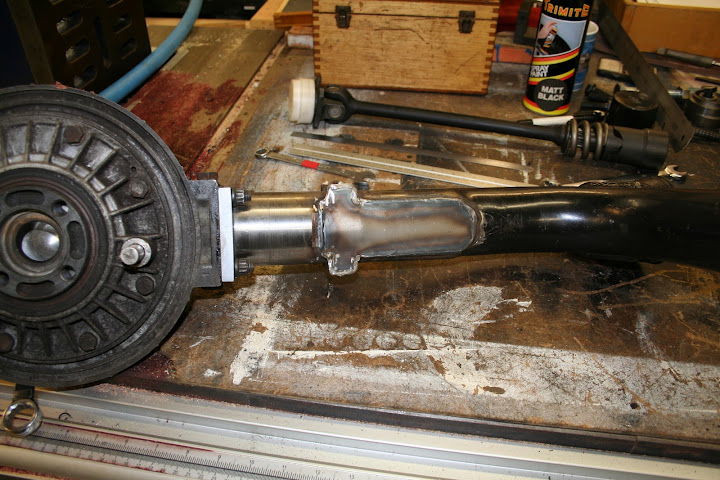
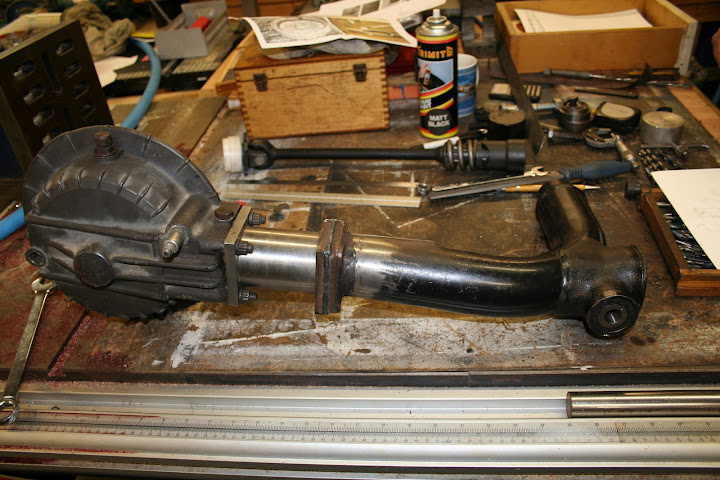
My machinist has examined the monolever to consider extending it the 100mm and has said it is quite complex and he'll have to build a set of jigs to do it properly. He won't have time to do it for a month. Extending the shaft is easy - its all the complex curves in the monolever that make it tricky as it is imperative to keep the 4 bolt face perpendicular.

Examining the monolever off the bike: it really is a well thought out work of art! So simple and effective. The 4 bolt plate looks like it is induction welded onto the tube.

I considered getting Richie to do the mono but he's too busy at the mo.

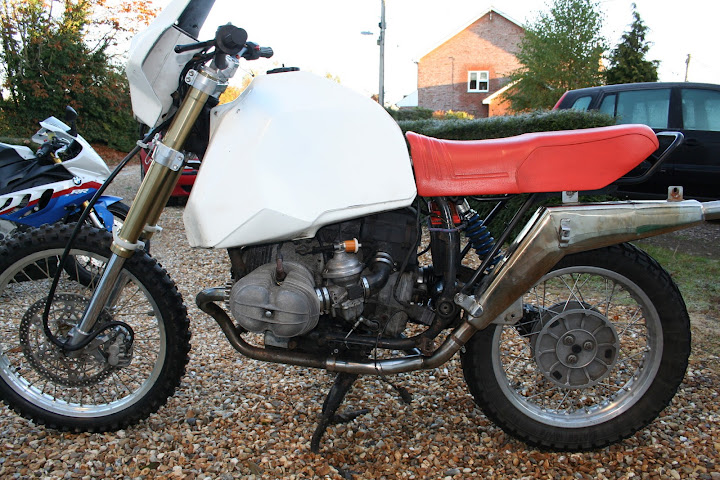
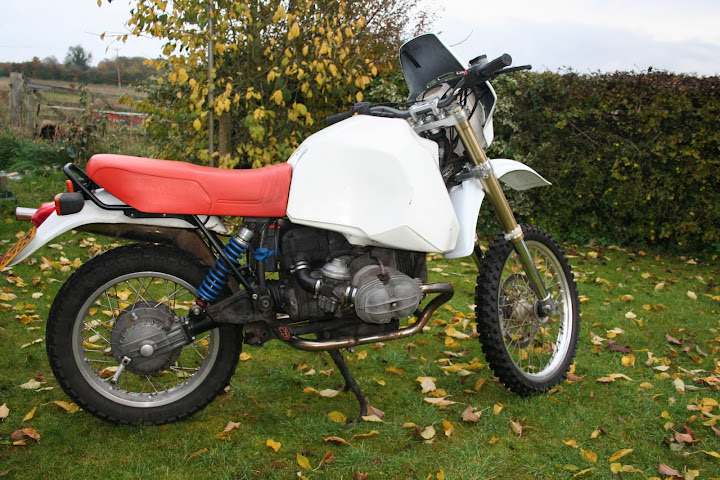
I have been really wanting to find out what these DRZ forks are like and to see how the bike sits/rides with them on. Very impatient that's me ... so thought I'd just get the bits off my existing bike to see what the height is like and how it rides.... so now I have 2 non working gs's.

With the mono on the bike, using the top GS mounting point the bike is tall. I was worried it might be too tall as I am only 5'8" but great - its high but just ok for me on tip toes.

This is good news: I probably wont worry about getting the front forks lowered now!

here's what it looks like:

IMG_4396.JPG


IMG_4395.JPG


IMG_4394.JPG


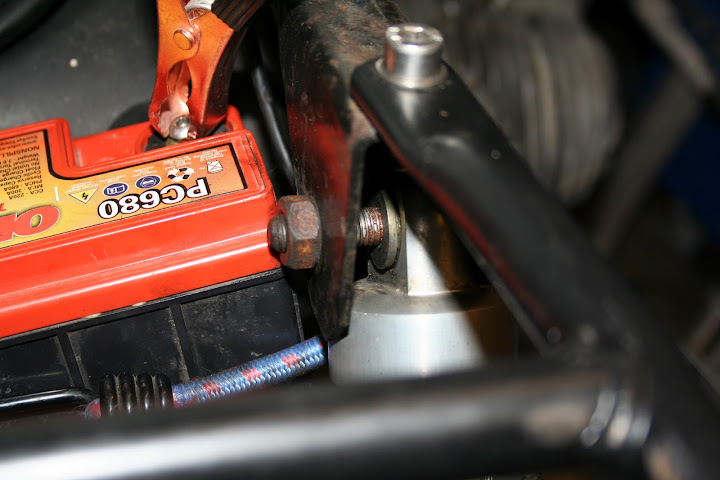
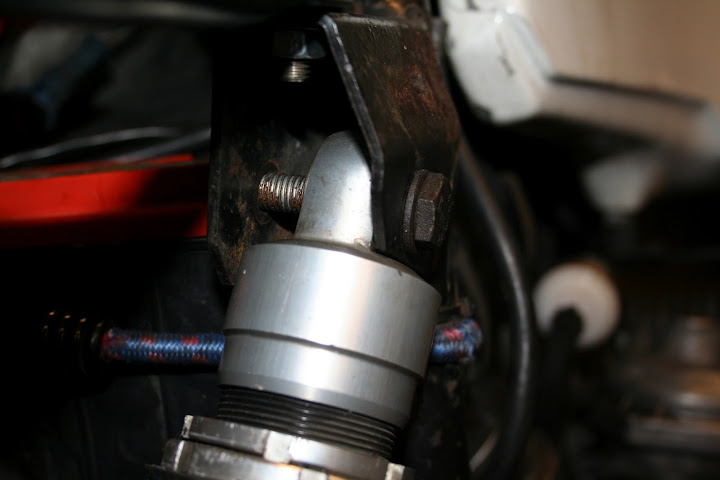
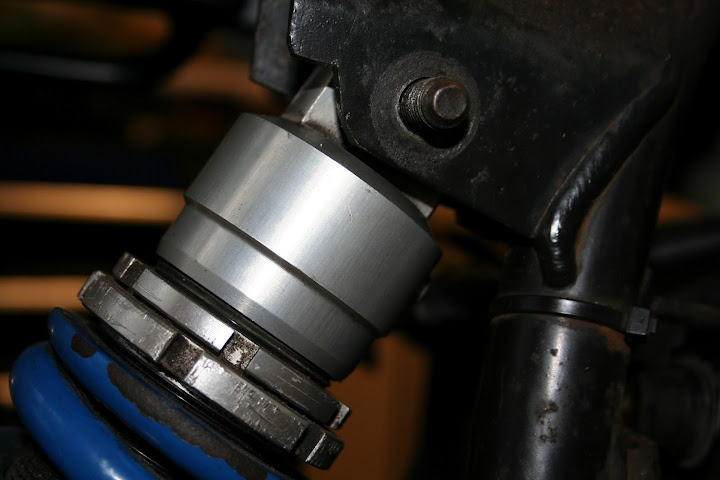
The angle of the rear mono is way to extreme to actually use for more than an experimental run.

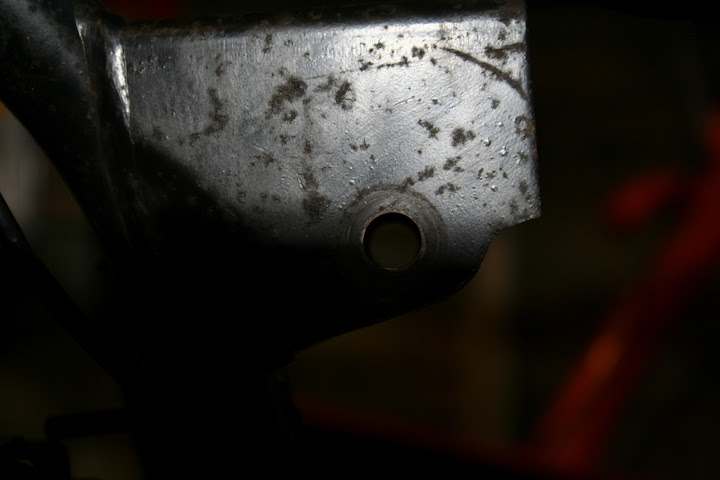
The top rear mount point has too much metal around the hole for the shock bolt so the bracket fouls the aluminium on the top of the shock.

IMG_4389.JPG


IMG_4390.JPG


Unless advised to the contrary I'll set about cutting this back this evening. It not by much and its under the hole so it won't affect the strength of the bracket. I am surprised about having to do this. Several other people who have used a mono on a GS haven't mentioned having to do this.

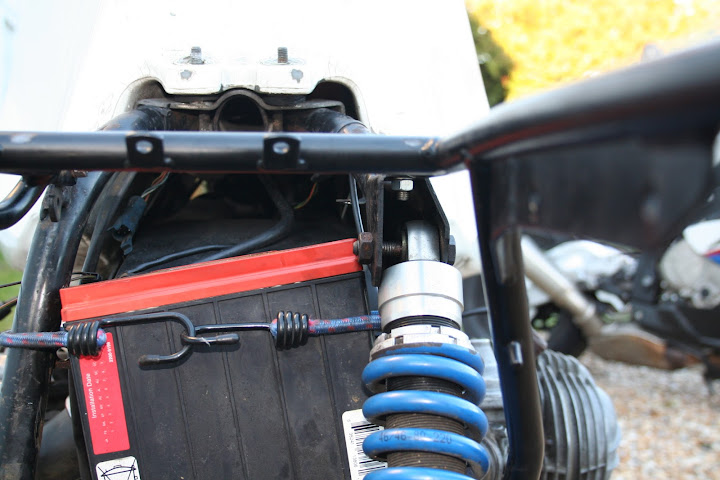
I also need to sort out a battery box - bungies won't cut the mustard :-)

IMG_4399.JPG
 
Hi ians

I was wondering where you got that rear brake lever bracket or if you made it yourself?

cheers
-Pete


Hi Pete,

I made the bracket myself.

It's quite easy if you have access to a welder, if you look at the cable end of the bracket there is a piece welded in the corner to give a sort of 3 sides of a box arangement, this stops that folded end bending and the bevelbox casting stops the long straight section bending. all the bending forces are directed straight up so the bevelbox stops this happening.There is also a metal ring welded to the passenger footpeg hanger to keep the cable in close to the frame.

I thought it looked flimsy when I first made it, so in my attempt to test to destruction before I went on the road all I managed to do was pull the threaded end of the cable out of the butterfly nut threads. So thats the weakest point, not the bracket.

One other thing is if you extend your swingarm the standard cable should be long enough, if you don't it might be worthwhile getting a 1-2" shorter cable made up (although mine is standard length it looks to long).

I had forgotten that I needed to grind a bit off the top shock mount, It was only a little bit and as it's under the bolt hole I don't think it really changes any strength bearing properties where it counts i.e. hard compression. But I must say I am NOT an engineer and I don't recommend anyone uses my methods without satisfing them selves it is safe.

My battery box is one of those fancy stainless steel ones from Motoren-Israel that turns the battery 90 degrees. Maybe a mono G/S one will work but I don't know.

When you extend the swingarm why not use a big spacer between the back end of the swingarm and the bevelbox. I have seen these before quite easy for an engineer to do. Basicaly a square block of steel bored through the same I.D. as the swingarm and four bolt holes each side for the swingarm bolts and bevebox bolts the other side.

Anything else you need let me know.
 
Hi Pete,

I made the bracket myself.

It's quite easy if you have access to a welder, if you look at the cable end of the bracket there is a piece welded in the corner to give a sort of 3 sides of a box arangement, this stops that folded end bending and the bevelbox casting stops the long straight section bending. all the bending forces are directed straight up so the bevelbox stops this happening.There is also a metal ring welded to the passenger footpeg hanger to keep the cable in close to the frame.

Hi Ians - thanks for the info. I might see if I can make one of these over the next few days. Ultimately I'll use the shock mounting point in the bevel and turn the brake lever upside down but your solution seams very effective - you should sell them :-)

cheers -Pete
 
Altering the top shock mounting point

Hi Pete,

I had forgotten that I needed to grind a bit off the top shock mount, It was only a little bit and as it's under the bolt hole

Ahha - so thats what I have done. Took some of the metal out with a junior hacksaw and file

IMG_4407.JPG


IMG_4405.JPG


Hmm its quite surprising how thin this steel actually is!!
 
Exhaust gaskets.

new exhaust gaskets arrived during the week. The two lower ones from the header pipes to the Y piece fitted fine. The one for the y piece to the silencer wouldn't squeeze in at all. I even tried cutting a bit out of the gasket as it seamed to big - but that didn't work either - wasted a £8 gasket!

IMG_4409.JPG


Anyway all fited and everything seams to seal ok. Maybe the out pipe on the Y piece is larger than on the connector. I couldn't measure it to check as I'd already set it to Rob :blast
 
Plastics arrive

Plastics arrived first thing saturday morning - got exciting about fitting and taking for a spin

ar £44 delivered they're cheaper that painting existing plastic - and I like the style of these particular UFO "fenders"

IMG_4411.JPG


and fitted to the bike:

IMG_4412.JPG


IMG_4414.JPG
 
First ride

OK - been dying to see what the forks and brakes were like - so took the bike out on some, ahem, private roads.

Front forks : In sa straight line they seam absolutely brilliant soaking up the bumps and following the service of the road really without the jarring clanks and bangs of the old g/s forks.

Brakes : I was a bit worried about what the DRZ brakes would be like on a heavier bike - but wow - they are at least as good as the 6pot billet caliper on the g/s's standard cast iron disk - two finger braking.

Riding position: feels good - bars seam narrower that my g/s bars but they're not.

Handling: who knows got crappy old moto cross tyre on the front end

Straight line stability: scarily bad - presume due to the tyre again

Turing circle: i was expecting this to be noticeably poorer - but after doing a few u turns in the road the whole bike feels like it turns better than the g/s

IMG_4417.JPG


Next steps:
1) get a new heidenau tyre fitted to match existing tyres - then do a direct straight line/handling comparison with the g/s

2) try the longer monolever and note its effect on straight line and handling
 
Height and headstock angle

The seat height is now 855mm


I think the height that the bike sits at is just right, although I want to calculate what the headstock angle is. It looks pretty close to stock but I need to be sure.

Set up like this; using the GS paralever top mount point, the angle of the universal joint onto the gear box is more extreme than it really should be.

IMG_4413.JPG


When I get the monolever arm back with the 100mm extension, I'll work out where the rear shock point needs to go to retain the same height- this will reduce the angle of the mono shaft to the gearbox and therefore reduce the strain on the universal joint..
 
machining starts

So Dave starts machining down the face which mates with the wheel

IMG_4420.JPG


This picture shows 12mm taken out.

IMG_4419.JPG


IMG_4418.JPG


We calculate another 8mm so 20mm in total should be the best fit

Picture of Dave measuring up the monolever

IMG_4421.JPG


The bolt in this picture represents where the shaft sits in the monolever tube - no where near the centre

IMG_4422.JPG
 
Progress this weekend - not much

I was away over the weekened so not much progress other than removed knobbly front tyre and fitted a matching K60.

Overall effect on the handling was to improve greatly over the knobbly - as expected, but the bike still isn't a stable as I'd hope for high speed cruising. Shaking the handlebars at 60/70mph still leaves the bike feeling a little unstable.

Hopefully my monolever will be finished this week so I will see what the effect of the lengthened wheel base is.

Not done anything with the engine yet at all. It was a bonus the fact that it was running in the first place. It takes a while to start, runs pretty sweetly at tickover and low down but doesn't pull properly above an estimated 4000 rpm so it probably maxs out at around 60/70mph. I don't want to waste too much time on the engine as I am going to strip it down when I pull the bike apart for painting but it will be good to getting it running reasonably well to assess the effect of the monolever changes on the handling.

I'll do some basic checking it over this week before the monolever arrives so I can have a proper run to assess whether the suspension changes have given me what I want.
 
The weave could be due to the low back end but I would suspect steering head bearings or even the front wheel not running true.
 
project update: the rear wheel

The rear wheel machining is finished:

This is the last picture I posted:

IMG_4419.JPG


The machining took 19mm off the internal boss and now fits snugly on the bevel drive

IMG_4429.JPG


Dave then made a tool to skim the inside of the brake surface

skim%20rear%20brake%20lining.jpg


And this is it finished

IMG_4431.JPG
 
Project update: extending the monolever 100mm

Dave decided to do this by creating a mild steel extension piece that mimicked the fittings at both ends which could then be bolted into place.

Once in place the side gets cut out for clearance

IMG_4430.JPG


I wish we could have gone the conventional route to the 100mm extension but I couldn't persuade Dave to go this was. I guess thats the problem if one isn't paying for it!!

IMG_4432.JPG


Once cut away it looks like this

monolever%20mod%201.jpg


And then plated up

IMG_4435.JPG


IMG_4436.JPG


IMG_4438.JPG


OK so not the prettiest of modifications but hey ho

so soon on to the fitting ....


Back
Top Bottom